Showing posts with label vegetarian. Show all posts

Thursday, April 24, 2014

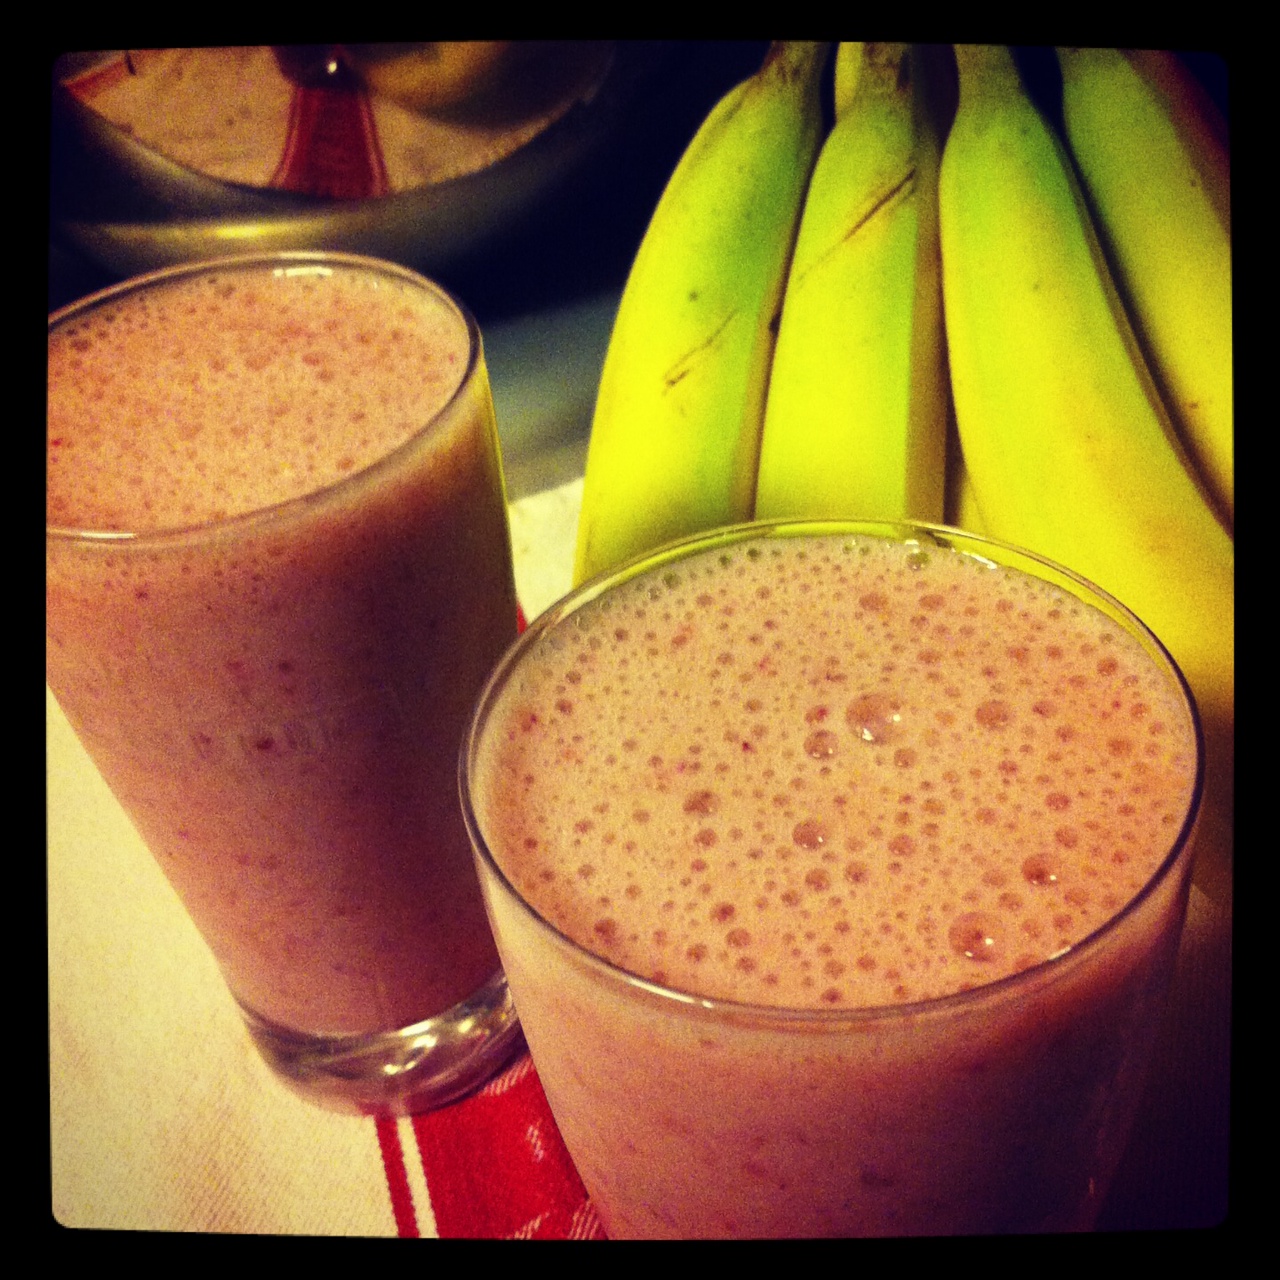
Pearly Sunny Smoothie

Have you missed my smoothie kick that I was on early in the year?  I didn't fall off the wagon due to eating a bunch of donuts for breakfast, nope...I broke my blender.  One of the pitfalls of being short and having high cabinets is that I drop stuff, A LOT.  Shouldn't I just put my blender that can easily separate into all of it's pieces if it's not level into a bottom cabinet?  No, because that would make sense.  Putting it on a high shelf in my laundry room was clearly the best option.  And when one smoothie mongering morning I went to take it down, the top wobbled off and some how I managed to drop the whole blessed assembly.  Now it won't even make a buzzing sound, I cracked the container, and some how managed to bend the entire rotary unit.  *sigh*  Sadly, it took me entirely too long to figure out that I can make smoothies about just as easy in my food processor.  I say about since it doesn't have as much liquid capacity, but apparently my counter tops are willing to hold a bevy of it when it spills out behind my back.

So this morning I finally used up the Bartlett pears from a few weeks back, and put the navel oranges to good use  in my morning version of an Orange Julius.  Those things were my jam as a kid since the entire food court of my local mall consisted of Orange Julius and the Pretzel Hut.  No soft pretzels in my kitchen this morning, but this smoothie definitely checked the box for delicious and healthy!


Pearly Sunny Smoothie


Ingredients:
3 pears, cored and cubed
3 navel oranges, juiced
1 cup almond milk (or milk of your choice, I use Almond Breeze)
1 Tbsp local honey
8 ice cubes

Blend up your pears and orange juice until smooth, then add in your milk, honey and ice and blend until no ice chunks remain.

Yields two full pints/32 ounces.


Wednesday, April 23, 2014

Sesame Vegetable Noodle Bowls

Despite my recent plague, I still took myself to the grocery store and for reasons I'm still not quite clear on, I apparently developed an all-Asian menu for dinners this week.  Hey, I can't eat most of it out at restaurants (curse you gluten-hating immune system!), so why not make it at home.  Lots of naps and pitiful coughs apparently lead to good things in the kitchen, because these noodle bowls I made last night may be one of my most favorite concoctions as of late.  Loaded with good green veggies, it's like ramen but healthy and it leaves you feeling somehow full yet light.  I used rice noodles, but you could easily use udon or any other of your favorite Asian-style noodles.  This would also be fantastic with shrimp, chicken or tofu, if you're looking to add an extra hit of protein.  Or throw all of it together into a pot with 2 cups of vegetable or chicken stock and 2 cups of water, and have yourself a noodly soup of goodness.


Sesame Vegetable Noodle Bowls


Ingredients:
1 package rice noodles, soaked in hot water until soft
1 tsp chili oil
1 leek, quartered lengthwise and sliced
4 oz Shitake mushrooms (or any mushrooms of your choice), sliced
1/2 bundle of kale, leaves removed from stem and rough chopped
1 cup cabbage, chopped
1 carrot, peeled and grated thin
2 green onions, greens chopped
1 Tbsp soy sauce (I use Kikkoman's wheat/gluten free version)
2 Tbsp sesame seeds

For sauce:
2 Tbsp sesame oil
2 Tbsp rice vinegar
2 Tbsp lime juice
4 tsp soy sauce
2 tsp Sriracha
1 knob ginger, peeled and grated

Prepare sauce first by whisking all ingredients together and set aside, and soak rice noodles in hot water or put in on the stove over medium heat (not enough to boil) until noodles are just soft.

In a large skillet, heat chili oil over high heat.  Add sliced leeks and cook for about 2 minutes.  Then add mushrooms and cook until they begin to brown.  Toss in kale, cabbage and carrot and cook for about 1-2 more minutes or until kale is wilted.  Add in green onions and soy sauce, and cook for an additional minute.  Remove from heat and toss with sesame seeds.

Drain noodles and toss with veggies in skillet.  Pour over sauce and toss until fully combined.  Serve each portion with additional Sriracha and sesame seeds, if desired...and in this house, we do desire!


Radishes In Herb Butter

Other than raw in a salad or in this delicious Radish Dip, I've never actually cooked with radishes.  So for Easter Sunday, I figured why not turn it into a quick and simple side dish.  I'd bought a bundle of parsley earlier in the week, and frankly I couldn't remember what I planned to use it for, so it became destined to join the radishes, and thus this recipe was born.  The bitterness of the radish and parsley is the perfect accompaniment to anything with very rich flavors (like that Gratin of Leeks).


Radishes In Herb Butter


Ingredients:
1 Tbsp butter
1 bundle radishes, both ends trimmed and sliced thin
1 bundle parsley, chopped
Salt & pepper to taste

In a skillet, melt butter over medium high heat.  Add in radishes and saute for about 3-5 minutes or until the middles are translucent.  Toss in chopped parsley and season with salt & pepper and cook for an additional minute.  Remove from heat and serve.


Tuesday, April 15, 2014

Spring's Bounty Soup

I came across this recipe for "Spring Celebration Soup" in one of my cookbooks, and while I figured it would be fitting to give this one a try since Spring is officially here, I looked at the ingredients and thought, "This is going to taste like the color green."  So I decided to make it!  Because if you don't have a kitchen fail every once in awhile your husband might forget the gloriousness of take-away!  I switched up some of the veg to cater to what was in our Crop Shares this week, and then I decided to really go off the rails and use the carrot greens in place of the parsley required for this soup.  I really thought about calling this the Waste Not Want Not Soup since there are very few kitchen scraps that come out of this one, and hey if you have the carrot greens, why not use them!  As an aside, Crop Share member Deanna Freedlander has a fantastic recipe for Carrot Top Pesto that she puts over spaghetti squash.  Since squash season is on it's way out, just use regular pasta or even turn your yellow squash into "squoodles" (if you have a sprial cutter or a juillene tool that will cut thin noodle-like strips, just saute those in a little bit of olive oil for a few minutes and ta-da veggie pasta!).

Once I'd finished the soup, I took one look at it and thought, "what have I done?!"  But once I tasted it, is was surprisingly good!  It didn't taste like the color green, it was refreshing and even filling.  So...I had another bowl.  Thus if you're looking for something bright and fresh, that is so chock full of veggie goodness it would make a vegan blush, then this is the soup for you.  And if your spinach is starting to look a bit sad by today, this is a great way to use it up since it's getting pureed in and looking wilty won't matter.


Spring's Bounty Soup


Ingredients:
1 Tbsp olive oil
2 cloves garlic, minced
1 bundle green onions, chopped (and hang onto the stem ends and start to re-sprout them as we did with the romaine here!)
4 carrots from bundle, skinned and diced
Carrot greens, minced
1 bundle asparagus, chopped
5 cups low sodium vegetable or chicken stock
3 Tbsp lemon juice
1/2 bundle of spinach, stem ends trimmed at root (see our trick for perfectly clean and grit-free spinach)
1 cup milk (I used unsweetened rice milk for dairy-free)
Salt & pepper to taste


In a stock pot, heat olive oil over medium high heat and add in garlic to saute until just fragrant, about 1 minute.  Add in green onions and carrots and saute for 5 minutes, then add carrot greens and asparagus and cook for an additional 3 minutes.  Pour in stock and lemon juice, and bring to a boil.  Reduce heat slightly and simmer, uncovered, for about 5-7 minutes.  Add in spinach and simmer for 2-3 minutes more, just long enough to wilt down the spinach.

If you've got an immersion blender, this is where it becomes your best friend.  Break that baby out and start to puree the dickens out of this soup -- just make sure to pull it off the heat, unless you're really a fan of hot soup burns.  If you don't have an immersion blender, you'll want to use a measuring cup to puree up about 2 cups of the soup at a time, and you'll need a holding pot or bowl for the already pureed portions, as you'll be returning everything to the main pot.

Once pureed, return to heat and bring back to a simmer.  Stir in your cup of milk, and season with salt and pepper to taste.  Simmer for an additional 3-5 minutes, and then remove from heat and let stand for the same amount of time, to let the flavors set up.  Taste and adjust seasoning if needed.

Serve with crusty bread (the baguettes at Nalls on Fridays would be PERFECT).  Or if your immune system hates gluten like mine does, make sad puppy eyes at the baguettes and then pick up some gluten-free bagel chips or crackers.  Glutino makes some killer rosemary crackers.


Adapted from Simply In Season by Mary Beth Lind & Cathleen Hockman-Wert


**Speaking of all things Spring, don't forget next weekend (4/25-4/26) is the LAST weekend of the Early Spring Crop Share round.  But don't despair, the Spring Round will kick off on May 9th, so be sure to grab a registration form when you're picking up this weekend.  They've got more details on the Crop Share portion of the website...**


Thursday, February 6, 2014

Strawberry, Spinach & Almond Salad with a Poppy Seed Dressing

And you thought you were getting rid of me that easy?  Muahahahaha, surprise!  I'll (Tara) still be manning things over here in Nalls' Kitchen, because really, how can I pull myself away?  So gird your loins for continued random musings of Crop Share cooking adventures.  And guest posts are still welcome, encouraged and greatly enjoyed!  You'll still be able to send recipes and guest posts to tara@nallsproduce.com or send them to cropshare@nallsproduce.com and Valerie will forward them my way.

Now...let's get cookin'!

So yesterday, the Mister and I discovered something glorious...Winesday.  We'd heard about Whole Foods wine tastings, but never seriously looked into it until this week.  When I learned that $5 per person got you 5 wines to taste (they say it works out to about a glass and a half by the end - but there were some generous pour-ers last night!), food pairings at each station, and a glass to keep.  Plus, if you bring your glass back, you get a $1 off future Winesdays.  Drinking in the grocery on the cheap, and at a place like Whole Paycheck nonetheless?  To that I say...Namaste!  Side note: If you've yet to read, Surviving Whole Foods, it's a must, especially if you've also taken your life into your own hands in the parking garage at the one in Old Town.  

So what was the very first food pairing we encountered?  A spinach salad with strawberries!  And what are we getting this week in the Crop Share?  STRAWBERRIES!!!!!!!! AHHHHHHHHHH!!!!!  So skip the Whole Paycheck prices and whip up this delectable salad, complete with your own homemade poppy seed dressing.  Toss in some chicken, shrimp or tofu to make it a meal.  And of course, if anyone wants to come drink with me in the grocery, you will henceforth be able to find me celebrating Winesdays at the Whole Foods in Old Town between 5-7 PM.  Completely for recipe research of course!

Strawberry, Spinach & Almond Salad


For salad:
1/2 lb fresh spinach
1/2 pint strawberries, halved
2 Tbsp slivered almonds, toasted and unsalted (to toast your own, brown in a skillet over medium heat, the natural oils in the almonds will be sufficient)

For Poppy Seed Dressing:
1/3 cup sugar
1/4 cup apple cider vinegar
1 1/2 tsp sweet onion, minced
1/4 tsp paprika
1/4 tsp Worcestershire sauce (for gluten-free stick with original Lea & Perinns as it's safe, huzzah!)
1/2 cup vegetable or olive oil
1 Tbsp poppy seeds

In a blender, add your first 5 dressing ingredients and blend for about 30 seconds until smooth.  Then with the blender running, slowly pour in oil in a steady stream to make an emulsion.  Once fully blended, stir in poppy seeds and set aside.  You can either serve it at room temp or if you're wanting a warm dressing, put it in a microwave safe container and nuke it for 30 seconds to maybe at most a minute.  You want it warm, not hot.

For salad, use our handy dandy tips for no gritty spinach, and then trim stems.  Toss with strawberries and toasted almonds, and then right before serving gently toss with the Poppy Seed Dressing.

Yields 2 servings.


Sunday, November 10, 2013

2 Minute Mason Jar Apple Crisp

The Mister and I have a bit of a history when it comes to apple crisp.  In fact, the very first time I met his family, his mom made delicious apple crisp for us.  We had all enjoyed a lovely dinner of a Youngstown favorite -- chili dogs from Jib-Jabs (I will personally fight anyone who says that any other place has better chili dogs) -- and then the Mister and I were given leave to go be super nerds and watch the boxed set of Firefly.  As we're snuggled up on the couch, completely absorbed in this space western, the Mister's mom was in the kitchen whipping up some apple crisp for everyone.  As she was baking away, she sent his younger brother to inquire about popcorn and dessert.  Well, somehow, and naturally something like this can only happen to me, the stitching on my shirt became tangled with a button on the Mister's shirt.  So, in walks my future brother-in-law, we sit up and suddenly I realize...I'm stuck.  Which meant here I am grasping at my top, the Mister is grasping at his shirt, and it all looks very shady and quite scandalous.  So, I had now scarred this 18 year old boy who was clearly going to head straight to his mom and tell her he walked in on us fumbling with my top.  I could tell I was going to make a great impression on this family!  Thankfully, everyone was amazed that such nerds actually found someone to date, and somehow his amazing Mom could already sense I was a comedy of errors waiting to happen.  So no one actually thought I was dropping my top in their tv room an hour after meeting all of them.  And thankfully, neither of us were scarred for life when it came to ever eating apple crisp ever again.  So when I saw this recipe for a 2 minute apple crisp in a mug I knew two things...1.) it needed to be made in a mason jar (because everything needs to come in mason jars) and 2.) apple crisp of this speed will surely save future generations of girls like me from haphazard wardrobe malfunctions, as you'd not even be down the hall before the dessert was ready.  Oh 2 Minute Mason Jar Apple Crisp, where were you in the summer of 2010?  Needless to say, I'm sharing this recipe (and surely a good chuckle) with my mother-in-law!


2 Minute Mason Jar Apple Crisp


Ingredients:
1 apple (I used this week's Cameo apples)
2 Tbsp brown sugar
1 Tbsp flour (I used Bob's Red Mill Shortbread Cookie Mix for gluten-free and because I prefer the taste of that mix to their all purpose flour blend which can taste a tad metallic)
2 Tbsp oats (again, I used Bob's Red Mill Gluten-Free Certified Oats)
2 Tbsp butter, melted (or Earth Balance margarine for dairy-free)
Cinnamon

Core and thinly slice apple, and toss together in a bowl with the brown sugar and flour until evenly coated.  Add in about 3-4 dashes of cinnamon.

In another bowl combine oats with melted butter, and 2 dashes of cinnamon.

Place apple mixture into a mason jar and then top with the oat mixture.  Then place the jar into the microwave and cook for 2 minutes.  Take care when removing jar as it will be super hot!

You can top with vanilla bean ice cream to make it a la mode (So Delicious makes a killer coconut milk based vanilla bean ice cream) or toss in a few chocolate chips and stir up to let them melt into the crisp (we use Ghiradelli semi-sweet chips as they are dairy & gluten free).


**Update: My brother-in-law just contacted me to let me know he's bringing his girlfriend home to meet the family for the first time.  Naturally, he is having her read this.  Good luck girl, you'll do great...just don't wear anything that easily snags.**


Tuesday, November 5, 2013

Oh Honey, Let's Be Rad...ish!

If you haven't figured this out yet, I'm incapable of talking about radishes without making a pun.  It will keep happening, so just smile and nod.

Anywho, last evening I finally got around to using up my radishes from two weeks ago (thank you cooler season produce for lasting so much longer and suiting my procrastination tendencies), and was able to finally make this Radish Dip that Crop Share member Missie Welch had shared with us.  She was oh so right with how delicious it is.  We baked up some Beet Chips to go with it, but this would make a fantastic veggie dip.  So for holiday parties, if you're tasked with bringing the veggie tray, whip up a quick batch of this dip and tell the french onion dip to take the night off and keep off your hips!  It has an almost hummus like consistency so it's a great, healthy alternative for a chip dip, too.

We used the juice of 1 lemon and a full 8 oz of cream cheese (we use Tofutti Better Than Cream Cheese to keep it dairy, free but you can use any reduced fat variety to keep the calories down).  Plus at one point I went to add a dash of pepper and opened the pour and not the sprinkle side, so I spent a good 5 minutes scooping what was about 1/4 cup of ground black pepper out of my blender.  *sigh*


Radish Dip via Missie Welch


Thursday, October 31, 2013

Stewed Collard Greens, Kenyan Style: Sukuma Wiki

A few weeks ago I mentioned in the Crop Share spoiler e-mail that I'd be posting my results of a big Kenyan feast I was cooking up, as that was how I planned to use up the last of that delicious sweet corn.  I did make the feast, but I'm just now getting around to the blogging part.  Ah well, I run on Irish time!

Wait, so what's this Youngstown born, Irish American gal doing making a Kenyan feast and getting all misty eyed over the dishes?  Isn't Kenyan cuisine thin on the ground in NE Ohio and in Ireland?  It is, but I was blessed to be able to fall in love with these flavors in Nairobi, Kenya.  To make a very long, and very awesome story short...there was a man from Nairobi named Mo Amin, who was one of the most influential photojournalists of the 70s, 80s and early 90s (remember the NBC Nightly News segment in 1984 on the Ethiopian famine that spawned USA For Africa, We Are The World, Live Aid and Band Aid -- that was Mo's footage).  There was another man named John from Youngstown, OH, who was one of the pioneers in upper limb prosthetic technology.  John also had a curious, adventurous, ginger-haired little girl named Tara.  The three of them met due to an ammunitions depot explosion and a stray missile in Ethiopia.  Thanks to John's expertise, Mo was able to go back to work doing what he did best, and thanks to Mo, John and his family had their lives changed forever, especially little Tara.  Finally in 1995, they got to visit Mo in Nairobi and thus 13 year old Tara's love affair with the flavors of Kenya was born.

There is way more awesomeness to the story, and even more tears because in '96 I lost my friend and mentor when the Ethiopian Airways flight he was on was hijacked and crashed off the Seychelles.  Maybe it's solely due to Mo, but despite only spending about a month in Kenya, it has remained a place I will get legitimately homesick for.  But there is something magical about that country, and while Mo was hands down the most incredible person I've ever met, I know he's not the sole reason why there are times my heart just aches to be back there.  And until I finally sat down to do some serious research on some of my most beloved dishes from my time there, my stomach has been aching for nearly 20 years for those foods!  But oh thanks to the magic of some collards, white corn meal, corn, beans, and then a delicious curried beef stew, I got to transport myself and the Mister to Kenya for an evening.  And yes, I cried with the very first bite.  I'm a total foodie sap.

So since collards have made their way into this week's Crop Share, I give you two of my favorite dishes...sukuma wiki and ugali.  There's a reason why "sukuma wiki" is Swahili for "stretch the week" because you will have a mountain of greens...dare I say a Mount Kilimanjaro of greens!

Stewed Collard Greens, Kenyan Style: Sukuma Wiki


Ingredients:
3 Tbsp olive oil
1 sweet onion, chopped
1 bundle collard greens, rough chopped
2 cups diced tomatoes
1-2 cups water, chicken or vegetable stock
Salt & pepper to taste


Heat oil over medium high heat in a large saute pan.  Add in onions and saute until translucent.  Toss in greens, and you'll likely  have to do this in stages to allow them to wilt down and make room for the rest.  Once greens have wilted down to make enough room, stir in tomatoes and cook for an additional 2-3 minutes.  Add in water or stock, and simmer on low for about an hour.  Season with salt & pepper to taste before serving.

To really keep it traditional, serve with ugali (big ball of awesome in the center of the photo below).


The ugali, which is just cooked white corn meal, is the vehicle you use to sop up and scoop up all the loveliness on your plate.  Just bring 4 cups of water and 2 teaspoons of salt to a boil, then stir in 2 cups of finely ground white corn meal (if you have trouble finding it, check the Hispanic food section of your grocery or head to a Hispanic market, as white while corn meal/masa for arepas is exactly what you'll need).  Reduce heat right away lest you want to be pelted with bubbling corn meal.  Then stir off and on for about 10 minutes until the ugali pulls from the sides of the pan and begins to form a ball in the pan.  You'll think its done much earlier, but trust me, you need 10 minutes, as you want to get a bit of a crisp on the outside. Not a burn, just a light crisp.  Remove from heat and allow to slightly cool.  Then wet your hands with water, pull out a hunk of the ugali and roll into a ball the size of your palm to place on each dish.  It actually does reheat well, so if you're only cooking for 1 or 2, you'll be able to stash the rest away and eat it as you go through the week.


Thursday, October 10, 2013

Baked Spaghetti Squash with Garlic & Butter

Let's just say spaghetti squash and I have an unfortunate history.  You see, my senior year in college I was taking this ghastly Flight class taught by a former NASA physicist (I was a political science kid, and as we can all plainly see from current events, those who focus on politics decidedly do NOT excel in maths and sciences), and on my lab days my roommate knew to have a cocktail ready for me when I walked into the apartment.  Yes, the class was really that bad, especially when you never actually took a physics class in your life.  So on this one occasion she greeted me with a rather interesting "cocktail" of Crystal Lite and vodka, and not just any vodka, but that Vladimir vodka that comes in the giant plastic jugs and is probably just straight kerosene or distilled windshield washer fluid. *shudder*  Then to top it all off, she'd made dinner, and it was spaghetti squash with marinara.  Oooo, I'd never had spaghetti squash before but as a vegetarian at the time I was excited for this new veggie to enter my life.  Well, I'm not rightly sure what she did to the squash, because I saw a baking sheet and yet I also saw a pot of water on the stove that looked like it had recently boiled up something.  But what was hiding under the marinara was a gelatinous glob of goo, so methinks it got boiled like pasta.  Eek!  Two sips of the cocktail and maybe 3 bites of the squash travesty and it was coming back up to greet me.  So needless to say, dinner was over and I avoided spaghetti squash for years.

But fear not, when done right, it is amazing!  One of the most common and tastiest preparations is to slice the squash in half lengthwise, and then pour olive oil or melted butter on each half and season with a generous amount of brown sugar and cinnamon, before baking till golden brown.  But if you're looking for something a little less sweet and a little more savory, or even something that can serve as the base for an entree, then doing a simple garlic and butter preparation is the way to go.  This would be great tossed with some sauteed chicken to turn it into a full meal, or simply use it as an alternative to a pasta side dish.

Baked Spaghetti Squash with Garlic & Butter


Ingredients:

1 spaghetti squash
2 Tbsp butter (or Earth Balance margarine for dairy-free)
2 cloves garlic, minced
1/4 cup parsley or basil, minced
Kosher salt and ground black pepper, to taste
Dash of red pepper flakes
1/4 cup Parmesan cheese, shredded (or Go Veggie! vegan parm for dairy-free)

Preheat oven to 375 degrees.

Pierce the squash a few times to allow for ventilation, and then place whole on a baking sheet and bake for 1 hour, or until a paring knife can easily be inserted.  Set aside and allow to cool for at least 10 minutes.

Once squash is cooled, cut in half lengthwise and scoop out the seed portion.  Then using a fork, scrape out the flesh so you have stringy "noodles".  If it's hard to scrape, place back into the oven and bake for an additional 10 minutes or more until the squash will easily shred with a fork.  Set shredded squash aside and discard skin.

In a skillet, heat butter over medium high heat.  Add in garlic and saute for 1-2 minutes.  Toss in shredded squash, parsley and seasonings, and toss to evenly coat.  After about a minute, add in your parm and toss to fully incorporate.  Cook for an additional minute and then remove from heat to serve.


Tuesday, October 1, 2013

Mushroom Stroganoff for World Vegetarian Day!

Happy World Vegetarian Day!  Whether you eat meat or not, I think we can all agree that more fruits and veggies are a good thing...a yummy good thing.  I was a vegetarian for most of my life, but let's be honest, I'm too much of a foodie to restrict myself (I'm looking at you delicious, delicious bacon jam!), especially when so many items are already off the table due to the Mister's and my food allergies.  But for the most part we practice Meatless Mondays in our home, and we would really be up a creek if it weren't for all those crafty vegan cooks, like Doron Petersan of Sticky Fingers Sweets & Eats,  who come up with new and interesting ways to make desserts we can safely eat.  So on this World Vegetarian Day, I give you a way to use up the mushrooms and most of that lone onion from this week's Crop Share...my version of Skinnytaste's Mushroom Stroganoff!


Mushroom Stroganoff


Ingredients:

1 Tbsp butter (I used Earth Balance Margarine for dairy-free)
1/2 sweet onion, chopped
2 Tbsp corn starch
2 cups reduced sodium vegetable broth
1 Tbsp plus 2 tsp soy sauce (I use Kikkoman's gluten-free soy, but you can also use 1 Tbsp only of Worcestershire sauce.  My Mama always used soy sauce in her stroganoff, so that's why I went that route)
1 tsp tomato paste
1 tsp Dijon mustard
1 pint mushrooms, gently washed, stems trimmed and sliced
1/4 tsp thyme
Ground black pepper to taste
2 Tbsp dry white wine
1/4 cup sour cream or plain Greek yogurt (I used Tofutti's Sour Supreme for dairy-free)
8 oz uncooked noodles (I use Schar's tagliatelle as it's gluten and egg-free, and you won't even know!)


Begin to bring your pasta water to a boil so that you can cook your noodles while you prepare the sauce.  If you want to mix your noodles into the stroganoff, then undercook them to allow them to finish in the sauce.  I prefer a larger noodle to sauce ratio, so I fully cooked the noodles and then spooned the amount of sauce I wanted on my portion.

In a skillet, melt your butter over medium high heat until it's bubbly.  Add in you onion and saute for about 3-4 minutes, until onions are translucent.  Stir in your corn starch and fully coat all the onions, allowing to cook for an addition 30 seconds.  Slowly add your vegetable broth, scraping up any browned bits from the bottom of the pan.  Add in soy sauce and tomato paste, making sure to fully mix in the tomato paste.  Bring up to a simmer and add your mushrooms, thyme and ground black pepper.  Simmer for about 4 minutes or until sauce has thickened up.  Stir in your white wine (and here would be where I had an oops, I thought 2 CUPS of wine -- wishful thinking -- so thankfully I only had a 1/2 cup at my disposal and caught myself before I added more, so if you'd like a more "winey" sauce, then add a half cup of white wine and then an addition 2 tsp of soy sauce) and bring sauce to a low simmer.

Once noodles are cooked either drain and mix in to the sauce, or set aside and toss with a splash of olive oil to keep them from sticking.

Before serving, stir sour cream into the sauce and leave on heat for an additional minute to bring it all up to the same temperature.


**You'll be easily able to convert this into a beef stroganoff by starting with 1 lb of beef round or chuck cut into 2 " cubes (my Mama always asked the butcher to run them through the meat tenderizer to make the pieces melt in your mouth even more) and brown that up in butter or olive oil before removing and adding in the onions and mushrooms to brown up.  Then add the beef back in, stir in your corn starch and add your liquid to loosen all the lovely browned bits from the bottom of the pan.  Proceed from there and simmer everything for about 30 minutes before stirring in the sour cream.**


Thursday, July 18, 2013

Eggplant & Pepper Curry (Plus Tips on Freezing Basil)


Who doesn't love a good curry?  Okay well I'm sure there are folks who don't enjoy curry, but I question whether or not they despise all that is good and wonderful in the world.  Be it a traditional Indian or Thai curry, German currywurst, or a thick, pub style curry in the UK, if it has curry in it, I want to eat it.  So the other night having a fridge full of basil, eggplant and bell peppers I decided it was curry time.  You'll be getting a whole bundle of basil this week, so this quick and easy curry will be a great way to use up a good portion of it, and then freeze the rest to preserve it.  Just snip the leaves from the stem, rinse and allow leaves to dry on the counter for about 30 minutes.  Then loosely layer leaves in a freezer bag and place in freezer for future use.  When you want to use them, just remove the bag and allow to gradually thaw.

But enough of that...now onto the curry!

Eggplant & Pepper Curry


Ingredients:
2 Tbsp olive oil
1 sweet onion, chopped
3 baby neon eggplants, cubed
3 bell peppers (1 green, 1 white and 1 purple), seeded and chopped
2 Tbsp Dizzy Pig Bombay Curry-ish seasoning (now in store!)
1 cup plain Greek yogurt (or Tofutti Sour Supreme for dairy-free/vegan)
2 cups water
3 Tbsp basil, chopped
Jasmine rice for serving

In a saute pan, heat olive oil and cook onions over medium high heat until they begin to caramelize.  Add in eggplant and bell peppers and cook for 3-5 minutes or until eggplant begins to brown.  Stir in Curry-ish seasoning and cook for an additional 1-2 minutes.  Mix in Greek yogurt and then add in water.  You may not need the full two cups or you may wish to add more, whatever your sauce thickness preference is.  Simmer for an additional 3-4 minutes, and stir in chopped basil.  Serve over jasmine rice.


Thursday, June 20, 2013

Grilled Scallions With Romesco Sauce

I once caught an episode of Tony Bourdain's No Reservations where he was roaming around Barcelona and other parts of Catalonia, and during one outdoor gathering, the Catalans were grilling up calcots, a type of scallion that is native to the area.  I'm not rightly sure what it was that was so transfixing, I mean they were just grilled scallions paired with a romesco sauce, but I was in hardcore food lust and I knew I just had to have those.  So while likely very few of us will be traveling to Barcelona any time soon, we can attempt to recreate the magic by grilling up the scallions from this weeks' share and dipping them in a decadent romesco sauce.  And thanks to the foodies at Food Republic, this recipe looks like just the ticket!  Pair these with a hearty red wine and for those avoiding dairy, you can easily sub in vegan parmesan with the romesco.  Clink the link in the title below to view the recipe...

Grilled Scallions With Romesco Sauce


Thursday, June 6, 2013

Radish Dip: Guest Post From Crop Share Member Misse Welch

This week's Crop Share is going to be RAD!  Why?  Because you're getting a bundle of RADishes!  If you're a radish skeptic, fear not, because do I have a recipe for you.  Or more like Crop Share member Misse Welch has a recipe for you.  During the Early Spring round, Misse sent us this recipe as an entry into our Nalls Next Top Food Blogger Contest, and we've been drooling over it ever since and waiting for another go-round of radishes so we could share this great recipe with you all.  So from Misse's kitchen to yours, we give you delicious way to prepare radishes.  Because we all know, cream cheese makes every thing amazing!


Radish Dip

Ingredients:
5 oz cream cheese
1 cup radishes, quartered
1-1 1/2 Tbsp fresh lemon juice
1 bunch chives, chopped
1/2 cup fresh parsley, chopped
2 cloves garlic
Sea salt
Black pepper
Paprika

I threw the radishes, chives, garlic and parsley in my food processor until finely chopped, and then added the lemon juice and cream cheese (cubed to make it easier).  Once it was combines to the consistency of a dip, I added sea salt and pepper to taste and put it in a serving dish.  I sprinkled it with paprika and it was ready to eat, more like devour!  It can be eaten with veggies, potato chips, or I even used it as a sandwich spread!

Adapted from Farmgirl Fare (http://www.farmgirlfare.com/2009/08/advice-for-new-vegetable-gardeners-what.html)

Thursday, May 30, 2013

Sauteed Swiss Chard

My first encounter with Swiss chard was during the Fall Crop Share round, and it has quickly become one of my favorite leafy greens.  Much like kale or spinach, Swiss chard is fantastic sauteed up with some olive oil and garlic, and this recipe below from Epicurious is my all-time favorite for sauteed Swiss chard.  I like to add a dash or two of red pepper flakes, and of course some grated Parmesan!  While this works great as a side dish, you can easily make it a meal by tossing it with some grilled chicken.


Sauteed Swiss Chard


Ingredients:

1 large bundle of Swiss chard
1 Tbsp olive oil
1 Tbsp unsalted butter
1 medium onion, halved and thinly sliced
2 cloves garlic, minced

Thursday, May 16, 2013

Strawberry Banana Smoothie

This week we're getting a taste of some first-of-the-season strawberries from South Carolina.  If you can somehow restrain yourself from eating them all within the first 5 minutes of arriving home with your Crop Share, then why not kick-start a weekend morning with a refreshing and healthy strawberry banana smoothie!  The banana makes it creamy without having to rely on ice cream or frozen yogurt, and by using natural sweeteners like honey or maple syrup, you can skip the spoonful of sugar.  Plus, it's a great way to ingest your daily dose of local honey to help keep allergies at bay.

Strawberry Banana Smoothie


Ingredients:
1 large ripe banana (for thicker and creamier, add another half a banana)
1 heaping cup of fresh strawberries
1 cup milk of your choice (I used lite vanilla soy)
1 tsp honey or maple syrup (use the local honey we have in store for an added allergy fighting boost)
1/2 tsp vanilla extract
3 ice cubes

Place all ingredients into a blender, press the magic button, do the smoothie dance (admit it, you know you shake it in the kitchen), pour blended goodness into glasses and serve immediately.

Thursday, April 25, 2013

Two Blueberry Recipes Even Violet Beauregarde Could Still Love!

Oompa loompa doopity do, I've got two blueberry recipes for you!  Fresh blueberries are fantastic, but I think we can all agree that we would not care to become one like poor, boisterous, gum-smacking Violet from Willy Wonka & The Chocolate Factory.  


But I'm fairly certain that these two recipes could win over even Miss Violet.  After all, being juiced has to work up a serious appetite.

Blueberry-Swirl Pound Cake


Ingredients:
1/2 cup unsalted butter, room temperature, plus more for pan
1 1/3 cups blueberries
1 1/4 cups, plus 2 Tbsp sugar
1 1/2 cups all-purpose flour
1/2 tsp coarse salt
1/4 tsp baking powder
2 large eggs, lightly beaten
1/2 tsp pure vanilla extract
1/2 cup sour cream, room temperature

Preheat your oven to 350.  Lightly grease a 5x9 loaf pan and line with parchment paper, with about 2 inch overhang on all sides.  Also lightly butter the parchment.

In a food processor or blender, puree blueberries with 2 Tbsp sugar.  In a medium sized bowl, mix together your flour, salt and baking powder.  Then in a larger bowl, cream butter and 1 1/4 cups sugar using an electric mixer.  Add in eggs and vanilla, and continue to beat until fully combined.  Gradually add in flour mixture, and between additions of flour, also begin to add in your sour cream, alternating between both and ending with one last bit of the flour mixture.

Pour half of the batter into the pan and dot with 1/2 cup of the blueberry puree.  Add remaining batter and dot with the rest of the puree.  With a thin-bladed knife or skewer, swirl the batter and puree together.  Bake at 350 for about 1 hour and 15 minutes or until golden brown.  Let cool on a wire rack for 30 minutes, then lift out of pan by parchment.  Allow to cool completely before slicing.


Gluten-Free Blueberry Pancakes


Ingredients:
1 2/3 cups gluten-free all purpose flour (I used Bob's Red Mill)
4 tsp sugar
1 tsp baking powder
1/4 tsp Kosher salt
2 large eggs (or 2 egg equivalent of Ener-G Egg Replacer for egg-free/vegan)
1 cup light vanilla soy milk (or vanilla almond milk)
1/4 cup coconut oil
1 tsp vanilla extract (I make my own by steeping vanilla beans in brandy for several months)
1/2 cup blueberries

In one bowl, combine your dry ingredients and then in a separate bowl, whisk together your wet ingredients, and then slowly mix into the dry mixture until well combined.  Mix in blueberries.  Add coconut oil to your skillet and once melted, begin to spoon your batter into the heated skillet.  Once the edged begin to brown, flip your pancakes and cook until both sides are golden.

We served ours topped with Earth Balance margarine and agave nectar, since I'd made this recipe on a complete whim and didn't have any maple syrup around.  This really is a no-fail gluten free (and vegan if you make the egg substitute) pancake recipe.  I'd never made pancakes before in my life, and on our one snow day this past year, I decided it was time to not just make pancakes for the first time, but now they have to also be gluten, egg & dairy free.  This recipe was cobbled together from several that I looked up, and the results were fantastic.  The only problem was there just weren't enough!


Thursday, April 18, 2013

Yellow Squash with Tomatoes & Parmesan

Where most people tire of yellow squash, I can't seem to get enough of it.  And once squash season is going full tilt, I will find new and interesting ways to fit it in to pretty much every meal of the day.  One of my go-to dishes over the past few years has been to slice yellow squash in half, place it into a baking sheet, drizzle with olive oil, sprinkle with salt, pepper and cardamom, and then bake at 350 for about 15-20 minutes.

But when I saw this recipe for Yellow Squash with Tomatoes & Parmesan, over at Kayln's Kitchen, I knew I'd found a new love!  Such a quick and simple weeknight side dish to throw together.  Or, if you're a squash fiend like me, an entire meal to try and hoard all to yourself.  With the Vidalia onion also in this week's share, you'll already have 2 of 7 ingredients going home with you!


Hop on over to Kayln's Kitchen to view the recipe for Yellow Squash with Tomatoes & Parmesan!


Chocolate & Strawberries: A Match Made in Food Heaven

It seems that most people I've encountered the past few days have all had "a week."  You know, when you have a case of the Mondays that just seems to last all...week...long.  So the first of the season strawberries from South Carolina in this week's Crop Share will go a long way to brighten any crummy week you may have had.  But in case strawberries just aren't enough...add chocolate and whiskey!

I found this recipe several months ago as an adaptation to HervĂ© This' infamous chocolate mousse.  Think of This as sort of the original mad scientist of the culinary world, in fact, he began his career as a chemist.  So this dairy-free chocolate mousse is one product of that wonderful scientific brain of his, proving that it is absolutely possible to make chocolate mousse with only 2 or 3 ingredients.  And since the strawberries this week are more delicate, and thus best eaten sooner rather than later, it's the perfect excuse to literally whip up this mousse to reclaim whatever sanity you may have lost this week!

Three-ish Ingredient Whiskey Chocolate Mousse with Strawberries


Ingredients:
9-10 oz bittersweet chocolate (I used Ghirardelli bittersweet chocolate chips as they are dairy-free)
Just less than 1 cup water
4 Tbsp sugar
1 Tbsp whiskey, or other liquor of your choice (optional)
Sliced, fresh strawberries

Melt your chocolate, sugar, water and whiskey together in a double boiler.  Fill a large bowl with ice cubes and then place a smaller bowl on top.  Once your chocolate is melted, empty it into the bowl on top of the ice.  Then use an electric hand-held mixer to beat the mixture until it thickens.  As the chocolate cools, it will begin to thicken.  This always takes me about 7-10 minutes, but some people swear it comes together for them in 3-5.  Once the chocolate begins to thicken it will harden very quickly, so take care not to over-beat.  If your chocolate gets too grainy, you can melt it down and begin again.  Serve immediately topped with sliced, fresh strawberries.

Adapted from Drizzle & Dip

Nalls Next Blog Superstar Is...

Drumroll please...

Miss Elisa and her "seriously succulent" Roasted Brussels Sprouts with Avocado & Toasted Pecans!


With the combo of avocado, pecans and balsamic vinegar, Elisa's dish delivers on her promise of succulent.  But I dare say this dish is downright decadent!

Plus, Elisa is the local food blogger behind Citrus -n- Spice, so you should run, not walk, your typing fingers over to her blog to see some of the other delicious recipes she's posted.

So without further adieu, from Elisa's kitchen to yours...

Roasted Brussels Sprouts with Avocado & Toasted Pecans

1/3 Cup pecans
1.5 lbs Brussels sprouts, ends trimmed
Extra virgin olive oil
Sea salt
Pepper
Crushed red pepper
1 Medium Avocado, cut into small pieces
1/2 tsp Thyme
2 Tbsp Balsamic vinegar

Preheat the oven to 400. Place the pecans on a cookie sheet and bake for 5 minutes. Remove from heat and let cool. Chop into small pieces and set aside.

In a large pot, bring salted water to a boil. Blanch the brussels sprouts for about 3 minutes (less if they are small). Drain and let cool. Cut the sprouts in half and place on a foil covered cookie sheet or roasting pan. Drizzle with a little bit of olive oil (3 Tbsp.) and sprinkle with salt and pepper. 
Roast in oven on the top rack for 20 minutes.

In a serving bowl, combine brussels sprouts, avocado, pecans, crushed red pepper and thyme. Stir gently and drizzle with balsamic vinegar.


Congratulations again Elisa, you've made our produce-loving hearts flutter!


Thursday, April 11, 2013

Let's Be Rad(ish)!

Think radishes only exist to be shaved thin and perched atop fancy crostini appetizers, then it's time to Rethink Radishes.  The foodies over at Cooking Light put together a series of 20 recipes to stretch our imaginations when it comes to this oft underused vegetable.  So be sure to check out the full list (here), but here was my favorite from the bunch: Radishes In Browned Butter & Lemon.

Radishes In Browned Butter & Lemon


Ingredients:
3 cups radishes, halved lengthwise, with root and 1" stem left on
1 Tbsp butter (or dairy-free margarine for vegan preparation)
1/2 tsp grated lemon rind
2 tsp fresh lemon juice
1/4 tsp salt
1 cup torn radish leaves
1/4 tsp black pepper

Click through to view the rest of the recipe...


And just so you all know...