Showing posts with label zucchini. Show all posts

Monday, June 15, 2015

Keep Baking


You've got lots more zucchini from your box this week.  There was quite a bit of it, and it'll be a staple all summer long.  The muffins were really good, but how about some cornbread?

Most zucchini bread recipes fall under the heading of "quick breads."  They're named so because they don't use yeast as the leavening agent, and therefore don't need time to rise.  Instead, the recipe uses baking soda and/or baking powder with salt to make the bread rise in the oven.  The cornbread recipe above, as most cornbread recipes, fall into this category.  Most banana breads are quick breads, too.

The recipe below is from The Everything Cookbook by Betty Wason.  The book has long been out of print, but if you can get a hold of a copy, by all means do so.  It's my most frequently used reference in the kitchen, and it'll have pretty much every single classic recipe you'll ever think of.  This recipe is adapted from recipes in that book.
Photo via Epicurious

Zucchini Quick Bread

  • 1 3/4 cups all purpose or bread flour
  • 1 teaspoon baking soda
  • 1/2 teaspoon baking powder
  • 1 teaspoon salt
  • 8 tablespoons (1 stick, 1/2 cup) butter
  • 3 eggs
  • 2 cups grated zucchini
  • Dash grated nutmeg
  1. Preheat the oven to 350˚F, and liberally grease and flour a loaf pan.
  2. Whisk together dry ingredients (flour, baking powder, baking soda, salt, nutmeg).
  3. Melt the butter in a pan over medium-low heat, and continue to brown butter slightly.  Cool until just a little warmer than room temperature.
  4. In a separate bowl whisk the eggs.  Stir in the butter and the grated zucchini.
  5. Stir the dry ingredients into the zucchini egg mixture a little at a time, mixing between additions until incorporated.  Pour in the loaf pan and bake until a toothpick inserted into the center comes out clean, 50-60 minutes or slightly more.

Friday, June 12, 2015

Guest Post - Bethany's Zucchini Muffins

Zucchini is one of the most delicious and flexible items we get in the crop share. You can make them into noodles, roast them with herbs, or make muffins like crop share member Bethany Duffy. As always, if you bake up a mean batch of these muffins (or let your kids do it for you) please share your pictures with us! Hashtag them #cookingwithnalls on Instagram and tag us in the photo @nalls_produce. Don’t forget to follow us there and on Pinterest--we will have some exciting giveaways popping up later this month.  We can’t wait to see what you’re cooking!


It seems like we’re constantly being told that the best way to get kids to enjoy a variety of foods is to invite them into the kitchen. I’m sure that this is true, but it’s definitely not the easiest guideline to implement--for me, at least, cooking dinner can take more than twice as long with a 4 year old “helping,” and that’s not always time I can spare on a busy weeknight! My solution: let kids help with meals on weekends or days off, and always let kids help with baking. 


These spiced zucchini muffins are a great place to start. There’s no chopping, no hot liquids, no operating heavy machinery. Just one big bowl, a box grater, a little stirring, and a delicious treat at the end. Besides, with the good fats from olive oil, an extra bit of whole grains from white whole wheat flour, and tons of beautiful shredded summer squash, they’re almost healthy! Smear a little cream cheese (plain or lightly sweetened) on top, and you can even get away with calling it a cupcake. Who said you need to hide vegetables to get kids to eat them? 
. 


Spiced Zucchini Olive Oil Muffins
Makes 12-14 muffins

1 cup olive oil
3 large eggs
1 ¼ cup sugar **I have also had success making these with light agave syrup, for those who would rather not use white sugar. Use about ¾ cup agave, and reduce your baking temperature to 325 to prevent over-browning. You will probably need 3-5 extra minutes of baking time.**
1 ½ tsp pure vanilla extract
2 cups grated zucchini (about 2 medium)
1 ½ cups all-purpose flour
1 ½ cups white whole wheat flour
1 ½ tsp ground cinnamon
½ tsp ground nutmeg
¼ tsp ground ginger
1 tsp baking soda
¾ tsp baking powder
1 tsp kosher salt
Optional: mix in ½ cup toasted walnuts or ¾ cup dried cranberries or cherries at the end

Preheat oven to 350. Line a muffin tin with paper liners, or spray a silicon muffin pan with cooking spray and set aside. In a large bowl, whisk eggs. Stir in olive oil, sugar, vanilla, and zucchini. Layer dry ingredients on top and stir until just combined. Stir in nuts or dried fruit if desired. Scoop batter into muffin cups until they’re ¾ full. Bake 20-25 minutes, until a toothpick insterted into a muffin comes out clean.


Monday, April 27, 2015

King of the Road

Ever heard this song?  I love it, an oldie but a goodie.  One of my favorites, and it reminds me of a great little idea to try out for dinner tonight.  "Hobo packs" are a cooking technique that Boy Scouts have been using for generations.
Photo via The Unorthodox Epicure
The idea is simplicity itself.  Take a piece of heavy aluminum foil (if you don't have heavy foil, double layer the regular stuff), add in whatever is for dinner, and seal the edges tightly.  Put it over a campfire, or a grill, or even a burner on the stove set to low, and in a little while you're ready to eat.

Hobo packs can be adapted to pretty much anything you're cooking:  Meat, fish, chicken, vegetables... anything.  In my decades of Scout experience, I've come up with a couple of rules of thumb.  Let me share the results of my many experiments.
  1. You need some fat in the pack.  This can be butter or oil.  If you're including a meat whose fat will render (e.g., ground beef, pork, or lamb), use less and put the oil mainly on the meat.  That'll ensure it cooks nicely until it gets hot enough for the fat starts to render.
  2. Include at least some of an aromatic vegetable.  Onions are the most commonly used ingredient, but celery, carrots, or any other aromatic will work.  For chicken, fish, or veggies, I've found fennel is my favorite.
  3. Season it.  That means salt and pepper.  And don't skimp.  If you've got some fresh herbs, add them too.  Think about the classic, time-honored pairings:  mint with lamb (where I went camping, spearmint grew everywhere in the woods and we used it), dill with chicken, etc.
  4. If you're making more than just a side item, include your starch and protein in the packet as well.
Tonight we're having zucchini and carrots with fennel, olive oil, dill and chives.  Since we're not camping, we'll use plates instead of eating right out of the foil.  But I won't fault you if you do it the rustic way!


Friday, January 30, 2015

Crudités, Anyone?

Another item that can move grease off of the game day buffet is utterly simple:  crudités, or, simply, cut up veggies with dip.  Pick up some carrots and anything else that looks appetizing at the store this week, and either put out your favorite salad dressing with it, set out some hummus, or use this utterly simple dip.  My mom has been making it since the beginning of time, I believe.

Thanks, mom, for the recipe.
Photo via Saveur

Vegetable Dip With Dill

Ingredients:
  • 3/4 cup mayonnaise (light mayo works just fine)
  • 1/2 cup sour cream (again, fat free is just fine)
  • 1 tablespoon dried onion or 
  • 1 teaspoon onion powder
  • 1 tablespoon dried dill weed (double for fresh)
Directions:
Stir it all together.  finis.  It's better, though, if it can sit in the fridge for a day or two prior to serving to allow flavors to integrate.

Saturday, July 5, 2014

No, It's Not Just a Movie


Listen, I love that little mouse, too.  But Remy's movie isn't just a movie for kids.  It's a movie for us foodies, too.  And, ratatouille is an actual dish.  Granted, like any good chef, Remy put his own spin on it.  What you'll see in a traditional ratatouille recipe looks more like a vegetable stew with a tomato sauce.  And it's fantastic.
Map via Google Maps
Ratatouille is a dish native to Provence, particularly around Nice.  In reality though, forms of this dish can be found all the way around the Ligurian Sea to Tuscany and even south to Rome.  In Italy, essentially the same dish is called ciambotta.
Photo via Epicurious

Yes, there are definitely variations in both ingredients and in how it's served.  Generally they will both contain a combination of eggplant, peppers, zucchini, and tomatoes.  Toward the east (France), the dish is flavored with marjoram and thyme.  As you go west, there is more basil and parsley instead.  In France, the dish is a casserole or the filling in an omelet and can be served either hot or cold as a side.  In Tuscany, the dish is thicker, and generally a stew, often with potatoes and olives and sometimes even meat.  Making either ratatouille or ciambotta is fairly simple, and the ingredients are now in season!
Photo via SmittenKitchen

For those of you who, like me, have a child who is a fan of the movie, you can't get away with making the dish if it doesn't look like Remy's interpretation.  Don't worry, I've got you covered.  There are two great examples (here and here) that will make you quite the hero.

So, do you have any of those peppers left from your box?

Friday, June 27, 2014

A River of Zucchini, And An Ocean of Squash


There's lots of squash in your not-too-distant future.  During summer and early fall, we'll see at least some in almost every crop share box.  And, that's a good thing.


What's the most common thing we do with it?  Cut it up, steam, sauté it or grill it, and serve.  Ta da!  Dinner.  I do it too.  As a matter of fact, it's what's on the menu for tonight.  Over the next few months, I'll be doing that a lot.  So will you, probably.  But around late-July, most of us will begin yearning for something else.  It's bound to happen.  I'm a big fan of the old TV show M*A*S*H, and one of my favorite episodes illustrates this beautifully:  After weeks of liver or fish, there's mutiny.


I don't know about you, but I sure don't want to see my family coming into the kitchen with pitchforks and torches like that.  Time to get creative.  One really cool thing to do with zucchini and squash is to pretend they're noodles.  Get yourself a really, really good peeler, and peel them all the way down until you see the seeds.  Now, you have "pasta."

Start easy.  Take your favorite lasagna recipe and sub the noodles with either the shaved squash or planks made with a mandoline.  (You're not going to touch that mandoline without a safety glove, are you?)  Not only did you just use some of that squash, you made your lasagna considerably healthier – and gluten free.  Now how hard was that, really?
Photo via oprah.com

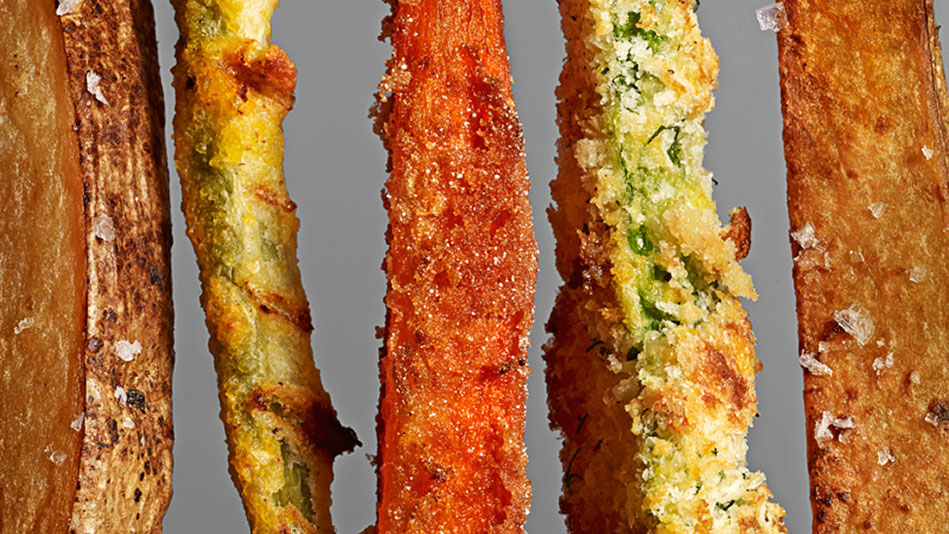
After a couple of lasagnas with leftovers, we're back to our mutiny condition.  Time to get a little more creative.  Last week, I made zucchini french fries (baked ones).  They turned out to be a big hit, especially with the little guy.  Shave your squash, or plank them.  You can pretend they're noodles again, but this time don't hide them in the tomato sauce.  Use them as a salad.  Or just take your favorite primavera recipe, and replace half the noodles with thinly shaved squash (raw).
Photo via foodandwine.com

See?  Lots of options!

Wednesday, June 4, 2014

Stuffed Full of Zucchini

Here come the squash!  Yellow squash and zucchini are staples in our crop share boxes throughout summer and fall.  As one of the most commonly available veggies, I'm always looking for new recipes to use in order to keep my family's interest.  Don't get me wrong, simply sautéed is awesome too.  If you can get the tiny baby ones, those are phenomenal for sautéing.  Just slice the squash in quarter-inch disks, melt some butter/margarine in some olive oil, and put them in.  Salt, pepper, and let them sit undisturbed until the bottom side is beautifully brown.  Flip and let the other side brown, and remove briefly to a paper towel to get rid of any excess oil.  These can be dressed up thousands of different ways.  My personal favorite:  Add just a little minced garlic to the butter and oil, sauté the disks as above, and just before they finish squeeze a lemon over the pan.  Add a little fresh dill and fresh oregano (how's your herb planting coming, by the way?) after you drain them on the paper towel, and finally sprinkle with some Parmesan or feta.  mmmm...

That's not the real thing we're here to talk about, though.  We're here to talk about stuffed squash.  This is an entirely different level.  In general, you slice the zucchini lengthwise, then take the tip of a spoon and scrape out the seed area in the center.  Save what you scoop out, as lots of recipes add this in with the fillings.  Some sort of filling of herbs, breadcrumbs, cheese, other veggies, or even ground meat or seafood is pulled together and spooned back into the hollowed-out zucchini canoes.  Bake it, and you have stuffed zucchini!  This recipe, though, is my dead-on favorite for stuffed zucchini.  The combination of sun-dried tomato and canned artichoke hearts works so well.  This recipe is really good too.  Everything's better with bacon, right?

Another delicacy is stuffed zucchini flowers.  Yes, you can eat the flowers!  These dishes come from Italian, French and Mexican cuisines.  Essentially, some sort of stuffing, frequently cheese based, is put in between the petals of a closed flower.  The flower is then dipped in a batter (tempura batter is good) and then they're fried.  Italian variations frequently use ricotta as the stuffing, with some sort of addition (black pepper, herbs...).  French variations do too.  I'll admit that I haven't really tried any Mexican recipes for squash blossoms, but this one for crab-stuffed blossoms looks promising.  And, for the adventurous souls among us, there's Aztec squash blossom pudding.  Hmmm...

On an unrelated note, I was wandering around Nall's on Friday and there is an incredible collection of hanging baskets full of flowers and plants.  The one below (with coleus) I thought was really gorgeous.  Stop by and take a look!

Wednesday, April 23, 2014

Southwest Stuffed Peppers

I actually whipped up these stuffed peppers last week as my even lighter and more veggie-tacular version of the Cream Cheese Chicken Enchilada Stuffed Peppers, but failed miserably at actually getting this to the blog.  But we got onions and there's onions in this recipe, so hey it's still relevant!  Especially as we head into summer with all the squash and corn, this will be a great way to use it all up.


Southwest Stuffed Peppers


Ingredients:
2 tsp olive oil
2 cloves garlic, minced
1 onion, sliced
5 green peppers, 1 sliced, 4 hollowed and lids removed to prepare for stuffing
2 cups corn (or 1 can)
1 yellow squash or zucchini, sliced (if you have a zoodler or a julienne peeler, use that!)
1 1/2 Tbsp cumin
1 can black beans, rinsed and drained
1 chicken breast, cooked and shredded (great for leftover chicken or rotisserie chicken)
1 cup chicken or vegetable broth
8 Tbsp salsa (be fancy and make your own Homemade Salsa)
1 Tbsp lime juice
1/2 cup, plus extra, shredded cheese of your choice (we use Daiya cheddar for dairy-free)
1/4 cup cilantro, chopped
Salt & pepper, to taste
Hot sauce, to taste -- optional


Preheat oven to 350 degrees.

You'll want to prep all of your veggies first, that way this recipe goes at light-speed.  It makes a TON of filling, so you can easily freeze any extra that won't fit in your peppers and use later for enchilada stuffing or bring it up to a boil with some stock and diced canned tomatoes for a filling soup.

Prep them veggies!

In a large skillet, and I mean large, heat olive oil over medium high heat.  Add in garlic and saute for about 1 minute or until fragrant.  Add in onion and pepper and saute for about 3 minutes.  Add corn, yellow squash and cumin and saute for an additional 3 minutes.  Next, pour in beans, shredded chicken, broth, salsa and lime juice.  Bring to a boil, then reduce heat and simmer until no liquid remains.

Stir in cheese, cilantro, and any hot sauce if you'd like a kick.  Then season with salt & pepper, to taste.  Remove from heat.

Take your 4 hollow peppers and stuff each with generous portions of the filling and top each with a sprinkle of cheese.  Place upright into a baking dish and bake at 350 for about 20-30 minutes, until skin on peppers starts to shrivel at top and look wrinkly and the cheese on top is nice & bubbly.


Thursday, March 13, 2014

Salmon With Vegetables In Herb Butter Sauce

In Dublin's fair city, Molly Malone may have wheeled about her cart of cockles and mussels (alive, alive, oh!), but she might as well have been wheeling about fillets of salmon for as much as the Irish consume of this meaty, delightful fish.  That's one of the benefits of being an island, all the seafood, all the time!  And while most of us think of fish & chips when it comes to Irish seafood, that's like portraying all American cuisine as just McDonald's.  Those folks know their fishies, and how to best prepare them, and one of my all time favorite recipes comes from Margaret M. Johnson's cookbook The New Irish Table.  In a bit of a twist on a surf & turf, she tops some wine and butter poached salmon with veggies from the land and the sea. I'll spare you having to hunt down dried sea vegetables, and just stick with lovely land based ones.  But this is one dish that is sure to be a winner, winner, St. Patrick's Day dinner!


Salmon With Vegetables In Herb Butter Sauce


Ingredients
2 Tbsp dry white wine
1/2 cup fish stock or bottled clam juice
Juice of 1/2 lemon
1 bay leaf
2 carrots, chopped
1/2 red onion, chopped
1 small zucchini, chopped
4 cherry tomatoes, halved
1 cup spinach, coarse chopped
4 salmon fillets, about 5-6 ounces a piece
1/2 cup (1 stick) unsalted butter
1 Tbsp parsley, minced
1 Tbsp chives, minced
1/2 tsp fennel seeds
Kosher salt and ground black pepper, to taste


In a large saute pan, heat the white wine over medium heat until reduced by half.  Add in the fish stock/clam juice, lemon juice, bay leaf, and all the vegetables from the carrots thru the spinach.  Place the salmon on top of the vegetables, cover the pan and cook for 4 to 5 minutes or until the vegetables are tender and the salmon is cooked thru.  Transfer the salmon to a plate to keep warm, and into the pan add your butter and stir till well blended.  Then stir in your herbs, salt & pepper, and cook for an additional 30 seconds.

Serve each piece of salmon with a generous spoonful of the vegetables and butter sauce.


Wednesday, February 12, 2014

Mega Snownadotopus vs. Snowbominable Zombie Prianhaconda: Snow Day Comfort Cooking!

Well a few years ago we had Snowmageddon (aka Snowpocalypse or SnOMG!), and tonight it looks like we're in for some more powdery fun!  YAY!  In good SyFy Originals fashion, I just couldn't resist giving an over-the-top name to the next 48 hours, and I feel my blog title has done that in pure overblown style.  Now, I get it, many of you are not originally from lands where this type of snow is a weekly winter (and fall, and spring) occurrence, and the words, "lake effect," "parking ban," and "shoveling the roof" have never been a part of your vocabulary.  So before panic sets in, here are this Northeast Ohio gals tips for winter storm survival:

1. PUMP YOUR BRAKES!  Seriously people, even if you have anti-lock breaks, please do not come flying up behind me at a stop light and think if you slam on your breaks you will stop.  Go slow, use caution on turns, pulling out and merging, and when you need to use your breaks, gradually pump them to slooooooowly decrease your speed.  Also, don't make drastic U-Turns into oncoming traffic and expect that I can slam on my breaks and stop (I'm looking at you black BMW on Beulah Street!).  That being said, unless the conditions are ungodly, going 5 mph on the Beltway is also in itself dangerous, and you will likely be the cause of an accident.  Oh and if you're in a big pickup or black government issue Suburban, let me remind you that ice is a great equalizer of all vehicles and just because you drive a big honkin' tank, it doesn't mean you can go or exceed the posted speed limit.  Slow your roll big vehicles, slow your roll.

2. Invest right now, right now, in a snow scraper and a shovel!  I've witnessed too many people trying to clean their cars or shovel out around their cars with baking sheets to know that proper snow removal implements are apparently a real need in this area.  Good people have invented wonderful devices to handle snow, so that you can leave the baking sheets for all the Snow Day baking you'll be doing.  Mmm, cookies & cocoa!  Also, once it really starts coming down, if we do get the higher totals they're calling for, trust me, you DO NOT want to try and shovel 10" of snow out of your driveway all at once, so shovel in intervals.  As the son my parents never had, I've had to shovel near knee-deep, heavy, wet snow, that was so heavy the snow blower said, "no, no thank you."  I wound up with what was likely a stress fracture in my left wrist for several months.  Not fun.  But snowball fights while you shovel your driveway in intervals are!  Plus, it's an excuse for more cocoa or hot toddies when you come back in!

3. Fairfax County Schools have already called it for tomorrow, so if you have kids, you get outside tomorrow and you play in that snow!  Snow forts, sledding, snowmen, snow angels, snowball fights, belly flops into snow (this is only fun if the under layers of snow are not frozen, if they are, trust me, it reaaaallly hurts), and even trek your way to the nearest playground and play on the equipment in the snow.  If you don't have kids...you get outside a be a kid!  But just as a friendly reminder to all...don't eat the yellow snow, and yeah, really don't eat any snow at all.  I've seen recipes on Pinterest for making ice cream from snow and I'm like um, probably not a sound idea folks.  Think of it like a sandbox, a very cold, wet sandbox, so don't eat the contents!

4.  There will still be Doritos, milk, bread and water on Friday.  It amazes me the first things to disappear from grocery shelves here, and apparently Doritos are a part of every snow emergency kit.  Unless you plan to go through a loaf of bread, a gallon of milk, 8 gallons of water (I have witnessed this purchase this week, and yes she was in full storm panic mode), and 3 bags of Doritos in the next 24 hrs, maybe just buy some comfort foodstuffs.  A nice bottle of wine, a large roast, some potatoes, bagels from the bakery, you know, cozy foods you want to cuddle up with.  You're not going to be wearing a power suit and heels tomorrow, you're going to be letting the gut out in some slouchy, comfy pants (what I call, "party pants"), so eat accordingly!


See, this is fun!  Most of you will have the day off tomorrow, and just get home safely tonight and Mother Nature has just gifted you a Pajama Day!  HOORAY!  So like I said in #4, rather than stocking up like the world is ending (really lady at the Giant, 8 gallons of water??), get ready for some stick to your ribs comfort cooking.  And with that in mind, tonight I whipped up a faux cheesetacular batch of Chicken, Broccoli, and Zucchini Mac & Cheese!  There's nary a lick of dairy in this mac, but I dare you to not succumb to the ooey gooeyness.  I'll give you the dairy-free version, but you can always go with a dairy-full version and just use the real milk versions of the ingredients.  Well, at least in theory it should work, I never actually made mac & cheese from scratch before I met my dairy-free Mister.

So get home safe everyone, and if you don't have to venture off to work in the AM, then stay in those pj's all morning until you change into your snow gear to go play, and then immediately come home to change into another set of pj's before you curl up with some comfort food and a good film.  Happy Snow Day!

Dairy-Free Mac & Cheese with Chicken, Zucchini & Broccoli


Ingredients:

12 oz pasta (shells, rotini, or macaroni)
1/2 Tbsp olive oil
1 large zucchini, stem end trimmed and then cut into bite-sized pieces
2 broccoli crowns, chopped
Ground black pepper & garlic powder
1 breast, thigh and leg from a rotisserie chicken, shredded
4 cups unsweetened rice milk (or use skim milk for real dairy)
1 cup Daiya jack "cheese" shreds
4 cups Daiya mozzarella "cheese" shreds (or use the real version of each cheese)
2 tsp ground black pepper
2-3 dashes nutmeg


Start your pasta water to boil and get your pasta cooking according to package directions.

In a skillet, heat olive oil over medium high heat.  Add in veggies, season with a few sprinkles of ground black pepper and garlic powder, and saute until just slightly browned, 4-5 minutes.  Remove from heat and set aside.

Dismember your rotisserie chicken, and shred breast, thigh and leg meat with two forks (use the remaining breast and thigh for these Zucchini Boats Stuffed with Pesto Chicken...and know your husband has likely already eaten one chicken leg within 5 minutes of getting home from the grocery).  Set aside.

In a saucepan, heat rice milk over medium high heat.  When it begins to simmer, whisk in your cheese and continue to whisk until fully melted and well-combined.  Reduce heat to low and season with black pepper and nutmeg, whisking to fully blend.  Fold in shredded chicken and veggies and allow to cool for a few minutes while pasta finishes cooking.  When pasta is done and drained, pour cheese and veggies over top and gently fold in to cover all of the pasta.  Allow to cool and set up for a minute or two before serving.  Proceed to bow in awe before the lusciousness of the faux cheesiness!


Zucchini Boats Stuffed with Pesto Chicken

I'm currently OBSESSED with pesto.  Earlier in the week I had to make our new favorite, Cilantro Pistachio Pesto, and it just wasn't enough, I needed more.  Luckily, I've begun to cook in my dreams again, and the other morning I awoke after having whipped up some delectable roasted zucchini boats stuffed with basil & almond pesto, tomatoes and shredded chicken.  They say if you can dream it, you can do it, so I made a massive batch of basil & almond pesto (for the base pesto recipe, see our Broccoli Pesto recipe, and either omit the broccoli, or use up the last of this week's broccoli for a double dose of crop share veggies), turned two zucchini into battleships of deliciousness, snagged an extra tomato and rotisserie chicken, and prepared to make my dream come true.  I only used up two of the three zucchini this week, so it allowed for two halves for the Mister & I, and man do I wish I would have just attacked that 3rd zucchini.  But I'm lovingly saving that one to pair with the broccoli, and the rest of the rotisserie chicken in a creamy, dairy & gluten free mac & cheese.  That magic is happening tonight, so stay tuned!  Oh and if you make the full pesto recipe linked above, it makes A LOT.  You only need a cup for this recipe, so save the rest to toss with pasta, pour over some baked chicken or fish, use as a chip or veggie dip, or hollow out a couple tomatoes and cook up a cup of quinoa, and get ready to roast up some stuffed tomatoes with pesto quinoa.  Which if you want a vegetarian or vegan version of these zucchini boats, just leave out the chicken and sub in quinoa, chickpeas, or another protein-packed animal-friendly foodstuff.


Zucchini Boats Stuffed with Pesto Chicken


Ingredients:
2 large zucchini, stem end trimmed, halved and seed section scooped out to make enough room to stuff
1/2 tomato, seeded and diced
1 breast and 1 thigh from a rotisserie chicken
1 cup pesto (for homemade, see our Broccoli Pesto recipe.  I left out the broccoli, but added in 1/2 cup of the zucchini innards, for extra veggie power)
Pinch of kosher salt
Olive oil for drizzling

Preheat oven to 375 degrees.

Lightly rub olive oil onto zucchini boats and place on a baking sheet or in a large enough baking dish.

In a medium sized bowl, shred the cooked chicken breast & thigh meat, and then stir in 1 cup of prepared pesto and the diced tomato.  Add a pinch of kosher salt, and stir to fully combine.  Evenly distribute filling among zucchini boats, and then lightly drizzle tops with a bit of olive oil.

Bake in the oven at 375 for 30 minutes or until zucchini is just soft, but not mushy, and top of stuffing is golden.


Thursday, February 6, 2014

Zucchi-me!

Strawberries and zucchini in the same week!  It's like the best of summer just arrived in February!  Woo hoo!  Now, I know there are some who despise zucchini, or at least get all zucchini-ed out after months and months of this glorious squash, but not me, nope, I could eat it all day every day.  So here are some savory, and even a sweet, take on cooking with this delectable and versatile green veggie (links to recipes hyperlinked in titles).


Zucchini & Quinoa Stuffed Tomatoes


Zucchini Ribbons in Oil & Garlic


Veggie & Chicken Sausage Stuffed Potatoes


Chocolate Chip Zucchini Brownies


Wednesday, September 18, 2013

Chocolate Chip Zucchini Brownies

Okay so we gave you A LOT of zucchini this week.  So if you're still left with zucchini and no inspiration, or maybe you just really don't like zucchini, then the best way to use it up is to hide it inside dessert.  Eww, you say?  Trust me, just like with zucchini bread, the zucchini is in there but you'll never know, plus it makes your baked good super, duper...well, you know, that m-word.  We all have a word in the English language that we despise, mind is that m-word often used to describe soft and luxurious baked goods.  I refuse even to type it, and I generally do not allow that word spoken around me.  But suffice it to say, if you add grated zucchini to a baked good, it will give you that oft desired texture that is better just enjoyed rather than named.

Anywho, m-word rant aside, I stumbled across this recipe for Chocolate Chip Zucchini Brownies from Texanerin Baking, and decided to tweak it to make it safe for consumption in this household.  Plus, I had just enough Homemade Applesauce left over to use in the recipe.  Score!  Now don't I feel all domestic!  So I've provided my gluten, dairy & egg free version below (I'd say this recipe was vegan if there wasn't honey in my homemade applesauce), with alterations for a gluten, dairy and egg full version.  Make it my way and this is practically a health-food!  Because anything with a cup and a half of chocolate chips in it is clearly good for you!  ;)

Chocolate Chip Zucchini Brownies


Ingredients:
2 egg equivalent of Ener-G Egg Replacer (or 2 eggs)

1 1/2 Tbsp vanilla

1/4 cup plus 4 Tbsp Homemade Applesauce

1 cup sugar (if not making the gluten-free version, you can stick to 3/4 cup, as the base flavor of the gluten-free flour pretty much tastes like aluminum so I try to mask it as much as possible)

1 cup Bob's Red Mill All-Purpose Baking Flour (or 1 cup regular All-Purpose Flour)

1/2 cup cocoa powder

1 1/2 tsp baking soda (or if you're like me, you forget you've run out of baking soda and have to substitute 6 tsp of baking powder -- if you do this, just use 1/8 tsp of salt rather than the full 1/4 tsp)

1/4 tsp Kosher salt

4 small zucchini peeled and finely grated (makes just shy of 2 cups)

1 cup Ghirardelli Semi-Sweet Chocolate Chips, plus 1/2 cup more for sprinkling (if not avoiding dairy, you can use any chocolate chips you desire)


Preheat oven to 350 degrees F.

Grease a 9 x 13 or 8 x 8 baking pan.

In a medium sized bowl, mix together egg replacer, vanilla, applesauce and sugar until well blended.  Allow to sit for several minutes to allow the sugar to mostly dissolve.

In a separate, larger bowl, mix your dry ingredients up through the salt, making sure to break up any clumps.  Stir in wet ingredients and mix until fully combined.  Fold in your zucchini and chocolate chips, and then pour into your prepared baking dish.  Sprinkle remaining 1/2 cup of chocolate chips over top.

Bake at 350 for 30-35 minutes or until a toothpick inserted in the middle comes out clean...well, as clean as it can be with all those chocolate chips.  You just don't want to see batter being pulled up, if so leave it in for a few extra minutes.

Allow to cool completely before slicing (yeah right, I don't even follow my own directions) and enjoy part of your daily serving of fruit & vegetables!


Friday, September 13, 2013

Zucchini Ribbons in Oil & Garlic via Natasha Scott

Crop Share member Natasha Scott (not a Scott for long as I hear it's the 30 day countdown till her wedding, yay mawage!) can always be counted on coming up with super healthy takes on traditional recipes.  Her own blog Tash's Noshes has lots of great recipes, and they often contain Crop Share veggies and fruits.  Recently she got a spiral cutter and thus zucchini pasta was born.  This recipe hasn't made it to her blog yet, so I picked her brain for the yummy recipe to share with you all.  While a spiral cutter makes this a cinch, you can also use a potato peeler to achieve some of the same effect.  In the recipe below she just did a simple light oil and garlic preparation, but this would be fantastic with some pieces of grilled or sauteed chicken, or even try tossing with some marinara to see who all you can fool that they're eating pasta made from veggies!

Zucchini Ribbons in Oil & Garlic


Ingredients:
4 zucchini, sliced with a spiral slicer or a potato peeler
1-2 tsp olive oil
2 tsp garlic, minced
coarse ground salt & cracked black pepper to taste

Heat olive oil in pan over medium high heat, add in zucchini and garlic, and saute for 3-5 minutes, until zucchini is cooked through but still retains some crunch.  Season with salt and pepper to taste and serve immediately as a side dish or as it own pasta dish.

Thursday, August 29, 2013

Sweet Day In The Morning, It's Sweet Potato Season!

So, unfortunately, my brain hates freedom tonight and no amount of Advil or Tylenol is touching it.  I am actually blogging in sunglasses at the moment.  Classy.  Thus, for now at least, this week's posts will be rather short and sweet.  In the Spoiler e-mail we linked you to our favorite, simple preparation for Sauteed Swiss Chard, which doesn't exactly scream Labor Day picnic food, but thankfully with this week's bounty of fruit you'll be able to throw together a wonderful fruit salad, fruit crisp, or even go all-American with some apple pie (or tart it up a bit!).  But I've got two preparations for those sweet potatoes for you.  One (an oldie but a goodie from our Crop Share vault) that will be a healthy, yet filling game day recipe now that football season is upon us (I might as well draw ire where I can...Go Colts!) and then another to take you from the gridiron to the grill and have you set for this weekend's picnic circuit.  Happy Labor Day weekend everyone!  Now where's a nice, dark and quiet room for me to hide?

Veggie & Chicken Sausage Stuffed Sweet Potatoes


Grilled Sweet Potatoes with Scallions via Martha Stewart


Monday, July 29, 2013

Herbed Curry Chicken Kebabs

So we've gone a bit overboard loading you up with veggies in the past two weeks of Crop Share.  What can I say, we just can't help ourselves.  But if you're like me, that means you've likely got a fridge full of peppers and squash from this week and last and you're wondering how on earth you're going to use it all up.  Well, when you've got a bounty of veggies and no grand ideas, then it's time to harpoon those suckers.  Okay, not with a real harpoon -- with kebab skewers!  So yesterday I whipped up this tasty dish and in the end still had way more veggies than chicken, so this will easily leave you with enough to make at least 4-5 vegetable-only kebabs.  Get ready to fire up the grill, or in my case, the grill pan!

Herbed Curry Chicken Kebabs


Ingredients:
1 onion, sliced
4 squash, cubed (yellow, zucchini or pattypan)
1 green bell pepper
3 sweet banana peppers, sliced
4 plum tomatoes, halved and quartered
3 boneless, skinless chicken breasts, cubed

For marinade:
1 cup olive oil
1 cup white balsamic vinegar
1 tsp dried tarragon
1 tsp dried parsley
1 tsp dried rosemary
1 tsp pineapple sage
2 tsp Dizzy Pig Bombay Curry-Ish (now in store!)

Combine all marinade ingredients in a small bowl and set aside.

Assemble kebabs on wooden skewers alternating between vegetables and chicken.  You'll have lots of leftover vegetables, so go ahead and make some vegetarian kebabs out of them.  They'll make great ready-made side dishes for the rest of the week.  Layer skewers in a baking dish and pour marinade over top.  Cover and refrigerate for at least 1 hour, more is always better.

Pre-heat your stove top grill pan over medium high heat.  Lay out kebabs and grill for 20 minutes or until chicken is fully cooked, turning the kebabs regularly to sear all sides.

Serve with jasmine rice.


Friday, July 12, 2013

Grilled Vegetable Skewers via Proud Italian Cook

Pardon my lack of original content this week, I'm out of town for a wedding and my lonely share is waiting for me back at Nalls.  :(  So for all you Crop Share newbies, don't worry, cooking does actually happen in Nalls' Kitchen!

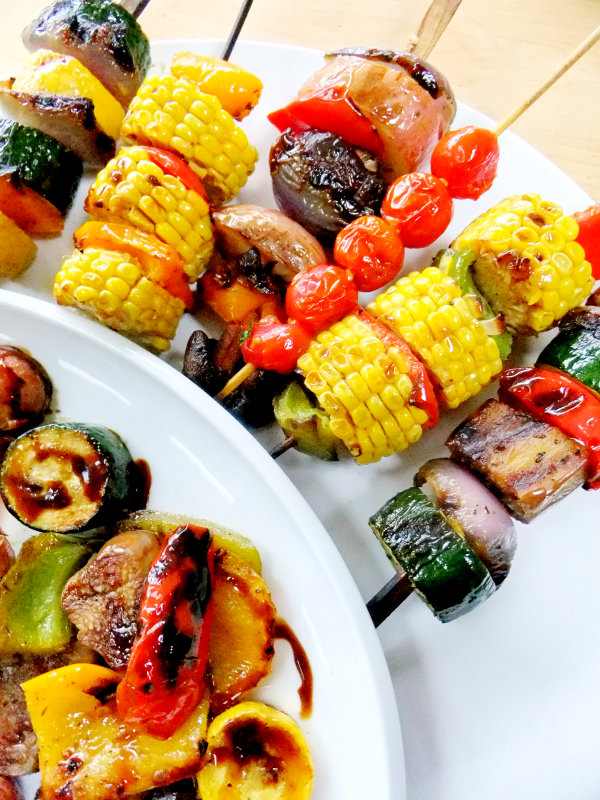
In the meantime we can all drool together with some gems I discovered thanks to Pinterest, like this Grilled Vegetable Skewers from Proud Italian Cook.  A great way to use up the corn, bell peppers, broccoli and even slice up the tomatoes into wedges to skewer.  I hear grilled cantaloupe is fantastic!  Though probably hold off on grilling the spinach, something tells me that's a bad idea.

So follow the link below to view this recipe that has me ready to fire up the grill at 9am!

Grilled Vegetable Skewers


Thursday, May 30, 2013

Veggie & Chicken Sausage Stuffed Potatoes

During my time in Ireland I became obsessed with stuffed potatoes.  No, not just the broccoli & cheese or "loaded" baked potatoes we have here, these were stuffed potatoes on a whole other level.  The Irish call them jacket potatoes, and think huge puffy winter jacket kind of jacket, because they are stuffed to the gills and then some with all sorts of yumminess.  Basically what we'd normally reserve for an elaborate salad bar, they will shove into a fresh baked potato.  So when I stumbled upon this recipe in the fall, it was love at first sight.  A stuffed potato that would make the biggest jacket potato blush!  Being chock full of veggies, this will be a great recipe to come back to through all seasons, and the perfect way to use the zucchini we're giving you this week.  I've even made it with baked sweet potatoes, so if you still have some leftover from last week, stuff them up!

Veggie & Chicken Sausage Stuffed Potatoes


Ingredients:

4 baking potatoes or sweet potatoes
2 Tbsp olive oil, plus 1 tsp, divided use
4 links of apple chicken sausage, sliced into 1/4 rounds
1/2 sweet onion, sliced thin
1 cup crimini or baby bella mushrooms, sliced
2 cloves garlic, minced
1 red bell pepper, sliced thin
1 zucchini, sliced thin
1 yellow squash, sliced thin
1 14oz can diced tomatoes, some juice drained off but not all
1/2 tsp dried dill or 1 Tbsp fresh chopped dill
1/2 tsp Kosher salt
1/4 tsp black pepper

Preheat oven to 400 degrees.  Rub potatoes with olive oil, stab a few times with a fork to allow for ventilation when baking, and place in middle rack of oven to bake for 50-60 minutes.  While potatoes bake, prepare all the sausage and veggies.

In a large skillet, heat 2 Tbsp olive oil over medium-high heat.  Add chicken sausage and onions, gently tossing and cook until the sausage begins to brown.  Then add the mushrooms and garlic, and allow for mushrooms to begin to brown.  Add in red pepper, zucchini and yellow squash, and cook for about 2 minutes.  Then add in the tomatoes with a little bit of the juice from the can, the dill and your seasoning.  Cook for an additional 2 minutes and then remove from heat while you wait for the potatoes to finish baking.

Once potatoes are done, carefully remove them from the oven (wooo hot potato!!) and allow them to cool slightly.  Then slice lengthwise down the potato and fluff the the inside with a fork to loosen everything from the skin.  Drizzle with a bit of olive oil and season with a dash of salt & pepper.  Then generously top with the sausage and veggies.  Serve with a dollop of sour cream if you so desire.


Recipe adapted from The Cozy Apron (http://thecozyapron.com/reminiscing-a-little-over-vegetable-stuffed-potatoes/)