Showing posts with label ginger. Show all posts

Wednesday, April 23, 2014

Sesame Vegetable Noodle Bowls

Despite my recent plague, I still took myself to the grocery store and for reasons I'm still not quite clear on, I apparently developed an all-Asian menu for dinners this week.  Hey, I can't eat most of it out at restaurants (curse you gluten-hating immune system!), so why not make it at home.  Lots of naps and pitiful coughs apparently lead to good things in the kitchen, because these noodle bowls I made last night may be one of my most favorite concoctions as of late.  Loaded with good green veggies, it's like ramen but healthy and it leaves you feeling somehow full yet light.  I used rice noodles, but you could easily use udon or any other of your favorite Asian-style noodles.  This would also be fantastic with shrimp, chicken or tofu, if you're looking to add an extra hit of protein.  Or throw all of it together into a pot with 2 cups of vegetable or chicken stock and 2 cups of water, and have yourself a noodly soup of goodness.


Sesame Vegetable Noodle Bowls


Ingredients:
1 package rice noodles, soaked in hot water until soft
1 tsp chili oil
1 leek, quartered lengthwise and sliced
4 oz Shitake mushrooms (or any mushrooms of your choice), sliced
1/2 bundle of kale, leaves removed from stem and rough chopped
1 cup cabbage, chopped
1 carrot, peeled and grated thin
2 green onions, greens chopped
1 Tbsp soy sauce (I use Kikkoman's wheat/gluten free version)
2 Tbsp sesame seeds

For sauce:
2 Tbsp sesame oil
2 Tbsp rice vinegar
2 Tbsp lime juice
4 tsp soy sauce
2 tsp Sriracha
1 knob ginger, peeled and grated

Prepare sauce first by whisking all ingredients together and set aside, and soak rice noodles in hot water or put in on the stove over medium heat (not enough to boil) until noodles are just soft.

In a large skillet, heat chili oil over high heat.  Add sliced leeks and cook for about 2 minutes.  Then add mushrooms and cook until they begin to brown.  Toss in kale, cabbage and carrot and cook for about 1-2 more minutes or until kale is wilted.  Add in green onions and soy sauce, and cook for an additional minute.  Remove from heat and toss with sesame seeds.

Drain noodles and toss with veggies in skillet.  Pour over sauce and toss until fully combined.  Serve each portion with additional Sriracha and sesame seeds, if desired...and in this house, we do desire!


Tuesday, March 11, 2014

Ginger Beef with Green Beans & Mushrooms

Last Friday I whipped up the Szechuan Noodles with Cabbage & Broccoli and you know if you've made it before, it makes a TON of sauce, so you always have about a l/2 pint of it in reserve to use for another dish.  I'd always thought it would make an amazing beef marinade, so I gave it a whirl!  Knowing we were getting green beans in the Crop Share, I couldn't resist grabbing a pint of mushrooms, to turn this into a spicy and fragrant version of some homemade Chinese take-away.  So if you're looking at this week's green beans and all you can think of is green bean casserole, then plan to give your favorite Chinese restaurant the night off and whip up your own take-away at home!

Ginger Beef with Green Beans & Mushrooms


1.5 lbs thin sliced beef (I used eye of round)
Half of the Szechuan Noodles sauce (see recipe here)
2" knob of ginger, minced
1 pint mushrooms, washed and sliced
1 lb green beans (about half the bag from the Crop Share), rinsed and ends snapped
1 Tbsp chili oil
Noodles or rice for serving, we used rice noodles for gluten-free


In a large bowl, toss the beef, sauce and minced ginger to fully coat the beef.  Cover and place in fridge to chill and marinate for at least 1 hour.

Once beef has marinated, remove from fridge and allow to come up to room temp while you prep your mushrooms and green beans.

In a large skillet or wok, heat chili oil over high heat.  Once oil is hot, toss in mushrooms and green beans (taking care to watch our for oil splatters) and cook for about 1-2 minutes, continually stirring or tossing with tongs to prevent burning.  Then add in your beef and all of the sauce and ginger,  and cook until you can no longer see pink on the beef and meat is just slightly browned.  It's best to use tongs to help stir and toss at this point.  Remove immediately from heat and serve with rice or noodles.  We stirred our rice noodles into the skillet and allowed to sit for a few minutes to allow the sauce to flavor the noodles.


Wednesday, February 26, 2014

Vietnamese Beef Salad

There were just a few carrots in the Crop Share this week, and by a few I mean a ton.  And while I thought about a carrot soup, it was too cold and snowy yesterday after all of the beautiful Spring weather, so I had to just delude myself a little longer and make something bright and fresh that made me think of the warmer temps to come.  If you'll remember, a few weeks back when we got cabbage I did my own Vietnamese twist on TaKorean "takos".  So last night I just left out the arepas all together, tweaked a few of the ingredients, and made up some delicious Vietnamese Beef Salads.  If you're looking to make a dent in your carrot supply and ignore the continued snow, these salads are where it's at!

Vietnamese Beef Salad


For the pickled slaw:

1 cup water
½ cup apple cider vinegar
½ cup sugar
½ cabbage, cored & thin sliced
1 cup cilantro, minced
4 carrots, peeled and shredded


For the spicy garlic beef: 

1/2 cup soy sauce (I use Kikkoman's gluten-free soy sauce)
2 Tbsp Sriracha (use only 1 Tbsp for a lower heat version)
3 Tbsp local honey
1 Tbsp garlic, minced
1.5 lbs thin sliced ribeye (if you really want the perfect cut for this or for making bulgogi hit up a local H Mart, it's worth the extra trip -- alas, I did not have the time to make the extra trip)
2 Tbsp sesame oil
1" knob of ginger, minced

Make your slaw a day in advance if possible, if not, just allow yourself at least an hour for the flavors to meld and begin to pickle the veggies.  In a small saucepan, heat the water, vinegar and sugar until the sugar is fully dissolved.  Remove from heat and allow to cool.  Prep your cabbage, cilantro and carrots and then toss into a bowl.  Pour the liquid over and toss to fully combine.  Cover bowl and place in fridge for at least 1 hour up to 24 hrs (the longer it sits the better).

In a medium sized bowl, whisk together your soy sauce, Sriracha, honey and garlic, till fully combined.  Then add in your sliced ribeye and toss to coat.  Cover and place in fridge to marinate for at least 1 hour.

In a large skillet, heat your sesame oil over high heat, but take care to not allow it to burn.  Once you start to see little bubbles in the oil, toss in your minced ginger and cook for no longer than 1 minute.  Pour in your beef, marinade and all, and toss with tongs to cook.  Cook beef on high heat until you can no longer see pink on the meat, and no longer otherwise you're going to have chewy bits of beef.  Remove cooked beef from skillet and set aside on a plate.   Continue to simmer down remaining marinade in the skillet until it's turned into a thicker, sticky sauce.  Remove from heat and add beef and any drippings back to pan, tossing to fully coat the beef.

To assemble, place a mound of the slaw on each plate and top with some beef.  Drizzle any of the pan sauce over top if you'd like and serve.  You can also cook up a cup of rice if you feel like you need a starch with this too.


Wednesday, January 29, 2014

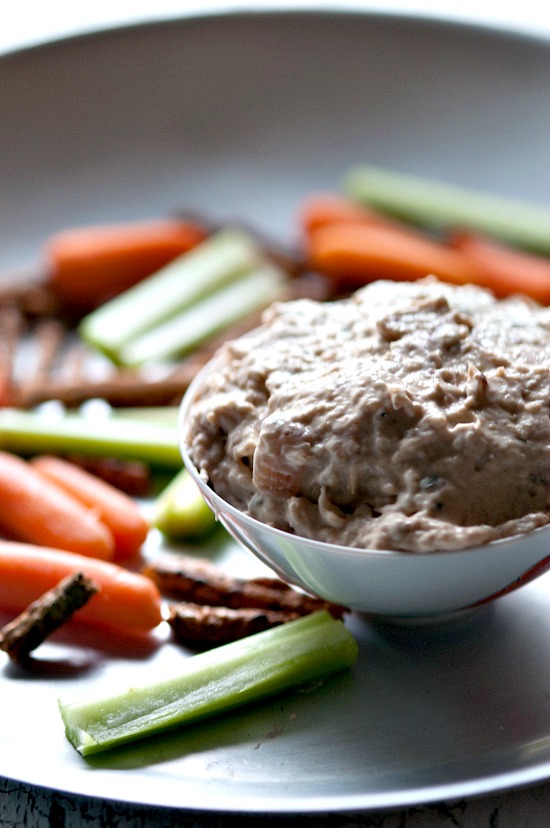
Healthy Caramelized Red Onion Dip via Healthy Green Kitchen

I tend to have a fear of red onions -- long story, but let's blame it on a freshman-year college roommate with horrendous acid reflux and a penchant for subs loaded with raw, red onion.  But when I came across this Caramelized Red Onion Dip from Healthy Green Kitchen, I knew it could make be a believer in "demon onions."  So with Super Bowl Sunday on the horizon, make sure to honor your chips and give them something good and fresh to be dipped in!  If it looks like it's in the same style can as cat food, it's probably wise to leave that on the shelf, and whip up your own easy and healthy onion dip!  Plus, you'll get to put this week's garlic to good use in this dip, too.  Follow the link below to view the recipe...

Caramelized Red Onion Dip


Wednesday, January 1, 2014

Cilantro or Cilant-NO?

Cilantro and I are tight.  I love that fragrant herb and it loves me back.  But I recognize that for some of you, you might hear that we're getting cilantro this week and your first thought is, "Cilant-NO! That stuff tastes like soap!"  A few years ago, I learned that for some folks, cilantro only reads like soap or cleaning products on their taste buds.  This is not a case of having an unrefined palate (Julia Child herself despised cilantro), it's simply our taste buds being our personal food safety testers to keep us from harm.  Since cilantro contains the same or similar type of aldehydes found in soaps, certain chemicals and even in bugs, some people's taste buds pick up on the flavor and alert, "DANGER!  DANGER!  DO NOT EAT!"  Hence, why it reads like soap or cleaning products to many folks, it's their taste bud's way of stopping them from eating the perceived hazard.

So can those of us who love cilantro boast about having more evolved and intelligent palates?  Probably not, as I can shamefully admit to once eating an entire slice of moldy pizza and then reached for another before I bothered to flip on the light and see that my pizza was growing a sweater.  Like I said, shameful.  But the good news for cilantro-phobes is that some people have found if the herb is crushed or really finely chopped, that by breaking it down, it decreases the soapy flavor and only imparts that wonderfully fragrant note that those of us who love cilantro rave about.

Whether you love it or have always reviled it, we've got two great cilantro containing recipes.  For those of you doubters, in both of these you can just mince the heck out of the cilantro, let it rest for a few minutes and then toss it in.  Think almost a pesto consistency in how finely you mince it.  Click the link to view the first recipe, but the second is provided in this post...

Thai Chicken Quinoa Bowls


If you have an aversion to quinoa, you can easily toss this with white or brown rice, and since it has a Thai flavor profile, you might even try tossing it with rice noodles for a bit of a riff on Pad Thai.  Pass the Sriracha!


Healthier Three Layer Taco Dip


Layer 1:
8 oz Neufchatel 1/3 less fat cream cheese (I use Tofutti Better Than Cream Cheese for dairy-free)*
8 oz reduced fat sour cream (I use Tofutti Sour Supreme for dairy-free)*
1 package low-sodium taco seasoning**
1 tsp chipotle pepper (or less to control the heat)**

Beat all ingredients together until well-blended and creamy.  Spread in the bottom or a deep dish or pie plate.  Refrigerate for at least one hour to allow this layer to set up and firm up.

*When using the reduced fat cream cheese and sour cream, beware of the increased water content.  So drain any excess liquid off of the sour cream before using, and then make sure your subsequent layers are well-drained before adding them.

**Since determining the gluten-safe properties of most taco seasonings, I just created my own.  This is a great way to save on sodium, because even the low-sodium seasonings are still too high for my taste.  Alas, I made mine recently at about 2 am and thus didn't measure, but I did a blend of garlic powder, paprika, ground black pepper, chipotle pepper, and a dash of salt.  So add a few dashes and season till you get the taste you want.  You definitely want the smoky heat of the chipotle in this layer, so to keep from going overboard on the heat you can up the smoke factor with more paprika.


Layer 2:
1 head of romaine lettuce, chopped fine and patted dry with a paper towel

Evenly spread over cream cheese mixture.


Layer 3:
4 tomatoes, seeded and diced
1/2 chopped sweet onion
1 chopped and seeded jalapeno pepper
3 Tbsp minced, fresh cilantro
Juice of 1 lime or lemon

Mix all ingredients together in a separate bowl and then, using a slotted spoon to allow for drainage of excess liquid, evenly spread over top of romaine.  You'll likely have left over pico de gallo, so save to use as a plain salsa or for topping homemade tacos, grilled fish or chicken.


Wednesday, November 6, 2013

Mango Mango Chili Shrimp Salads and an Homage to Destiny's Child

So if you've seen our Facebook posts about this Mango Mango stuff and have wondered what on earth is all the fuss about, let me illuminate you.  Mango Mango is this great product made by 3 women in the Virginia Beach area.  We at Nalls Produce carried it for over a year now and it sold fairly decently and then...Shark Tank. Unbeknownst to us, these ladies appeared on a episode of Shark Tank about a month ago, and ever since we cannot keep the mangoliciousness on our shelves.  No joke, we've had people buy 10 jars and we know one woman who keeps a jar at home, a jar a work, and one spare in case of emergencies.  There's even a gentleman out there that has asked for Mango Mango for Christmas.  We love the product, but the gals at Mango Mango say there are over 100 ways to use it, so I felt it was time to explore the full range of fun instead of just slathering it on a carb.  And the grape tomatoes and leaf lettuce in this week's Crop Share had visions of shrimp salads or wraps dancing in my head.  Fans of Destiny's Child (I should just say humans, because really, who doesn't love them and long for a full reunion tour.  That Superbowl half time show was not enough and the lights in the stadium protested as such!) should check out the Mango Mango website because it's sly reference after sly reference to the song "Bootylicious".  So, it begs the question...are you ready for this jelly? Because this Mango Mango Chili Shrimp may be too mangolicious for ya babe!  Buckle your seat belt, it's time for take off!

Mango Mango Chili Shrimp Salads


Ingredients:
1 head Romaine or Red Leaf Lettuce
1 pint grape tomatoes, halved
4 Tbsp Mango Mango Preserves (in store now!)
1 tsp garlic, minced
1 inch knob ginger, diced
1/8 tsp coarse ground salt
1 tsp paprika
1 Tbsp sriracha (more if desired for extra heat, and if it's my plate, oh I do desire)
1.5 lbs cooked shrimp, tails removed
2 Tbsp corn starch
Coconut or olive oil

Chop off ends of lettuce (don't discard, see how we reuse it!) and rinse leaves thoroughly, setting aside to dry.  Rinse and slice tomatoes and set aside.

In a bowl, mix together Mango Mango preserves, garlic, ginger, salt, paprika and sriracha, set aside.  Pat shrimp dry with a paper towel and toss in 2 heaping Tbsp corn starch (corn starch is my miracle batter for frying sans gluten, dairy or egg, it coats things just enough to give the skin a crispy finish).  Heat about 1/4" of oil in a pan over high heat.  Once your oil is hot enough drop in coated shrimp to begin lightly frying.  You'll likely have to do these in batches to prevent over crowding if you don't have a huge skillet.  Once shrimp have curled and the outsides have crisped, remove from pan and rest on a paper towel lined plate.  Repeat until all shrimp are fried.  Drain off excess grease from the pan and wipe down with a paper towel.  Reduce the heat to medium high, and toss shrimp back into the pan and pour your mango chili sauce over top.  Cook until the sauce is thick and some of it begins to crisp up, about 1-2 minutes.

Serve a scoop of shrimp on a bed of lettuce with some sliced grape tomatoes and finish with an extra drizzle of sriracha if you need a final kick.  I ate mine as lettuce wraps and the Mister ate his as a shrimp salad with a bit of jasmine rice on the side.


And because now I just can't resist...


Wednesday, October 23, 2013

Juice It Up!

So this Monday I had the pleasure of partnering with Pat Backe of Senior Fall Prevention and Kingstowne Pilates to host a Juicing With Greens workshop at the Kingstowne Center for Active Adults.  It was a fantastic class with lots of hilarity (a juiced apple spurting across the room) and extreme randomness (ginger root pilfering), but the juices that Pat whipped up for all of us were fantastic.  So since much of the ingredients focused on seasonal items that we're all getting right now, I thought I'd share the two recipes from Monday with you.  If you don't have a juicer, you can still use a blender to make these items, though I'd recommend peeling the items first, and just know that they won't be as smooth and pulp free as if you were using a juicer.  But no matter what equipment you have, just be sure to wash all of your fruits and vegetables well beforehand.


ABC (Apple-Beet-Carrot) Juice

Serves 1

Ingredients:
1 apple (we used Suncrisp)
2 beets
3 large carrots
1" knob of ginger, peeled
Handful of kale, spinach or even toss in the beet greens


Kale-Aid Juice

Serves 1-2

Ingredients:
5 large kale leaves
1-2 cucumbers
1 lemon, peeled
1 apple (we used Suncrisp)
1" knob of ginger, peeled (for more kick add 2 or 3 pieces of ginger)
1-2 large celery ribs

For both recipes, wash your ingredients well, then cup them up as needed to fit through the chute of your juicer or to make blending easier.  Juice the ingredients in the order they're listed and serve immediately with or without ice.


Thursday, October 3, 2013

Spicy Chickpea Quinoa Wraps

The Boston lettuce for the boxes this week is beautiful, and if there's one thing that this variety of lettuce is great for it's lettuce wraps!  Maybe it's the novelty of feeling like you're playing with your food, but I'm a big fan of things wrapped in lettuce.  There's really nothing like Korean BBQ scooped up into a giant leaf of lettuce.  Though perhaps the piece of lettuce makes me feel better about the horrifying quantities of pork belly I can consume.  So I'm not even going to try to recreate that sort of deliciousness, as I will leave that firmly in the hands of the masters.  Instead, here's a healthy, super-quick dish that's chock full of flavor and will make about enough for you to use up the entire head of lettuce.

Spicy Chickpea Quinoa Wraps


Ingredients:
1 head Boston lettuce, rinsed and leaves removed for wraps
1 Tbsp olive oik
1 sweet onion, diced
2 cloves garlic, minced
1 Tbsp fresh ginger, minced
15 oz can chickpeas, rinsed and drained
2 tsp of curry powder (or more if you live in my house and there can never be too much curry)
1/8 tsp cayenne (omit to avoid the heat, or if your curry powder is already on the spicy side)
15 oz can fire roasted tomatoes (you can also toss in some quartered cherry tomatoes too)
1 cup cooked quinoa
Plain Greek yogurt or reduced fat sour cream for serving


Cook quinoa to package directions while you prepare the filling.

In a skillet, heat olive oil over medium high heat.  Add in onion and saute for 2-3 minutes or until onion is translucent.  Add in garlic & ginger and cook for an additional 1-2 minutes.

Stir in chickpeas, curry and cayenne (optional) and stir to fully coat.  Pour in can of tomatoes, including any liquid and stir to fully blend.  Bring mixture to a low simmer, remove from heat and stir in quinoa.  Allow to rest for a minute or two.

Serve a scoop of the curried quinoa mixture in each lettuce wrap, and top with a dollop of plain Greek yogurt or reduced fat sour cream, if desired.


Inspired by the Ridiculously Easy Curried Chickpeas & Quinoa from Fat Free Vegan.


Tuesday, September 24, 2013

Homemade Take-Away: Beef with Broccoli

Having a gluten-allergy means that most take-away is off the table for me.  It's a good thing I love to cook, and I'm sure in the long run my waistline and my heart will thank me, but sometime you just want to pick up the phone and order pizza or Chinese without a care in the world.  Thankfully Moo Goo Gai Pan was always my favorite Chinese take-away dish and is the one dish that is actually safe for me.  But man a good Beef with Broccoli, or beef in any of that wonderful sweet, salty, yet mildly spicy brown sauce is sooooo yummy, and sooooooo off limits for me.

But, the day that local snow peas arrived in the store, Valerie began to celebrate in the office because that meant she was making The Pioneer Woman's Beef with Snow Peas and thanks to gluten-free soy sauce this recipe would be within my reach.  So I too grabbed snow peas the the rest of my supplies, tweaked the recipe a bit (I just can't leave any recipe well enough alone), and that night I treated the Mister and myself to homemade Chinese take-away.  It was BETTER than take-away, and I wanted to eat it ALL!  Oh Ree Drummond, you are a ginger angel of food loveliness (which by the way, leave it to a fellow ginger to come up with a recipe that relies on lots of lovely fresh ginger, oh how you rock woman)!  So this meant when broccoli made its way into last week's share, I knew what had to be done...sub out the snow peas and throw in that broccoli!  Let's just say I ate leftovers for breakfast this morning.  Go ahead and judge, I care not!  

So give your favorite Chinese restaurant delivery guy a break tonight, and make your own Beef with Broccoli at home.  I recommend prepping all your ingredients first, as once you start, this recipe goes super fast.  So I always make the sauce, get the meat in it to marinade, and then get my rice started so that's cooking away when I start to cook the veggies.  The sauce for this recipe is a great base, so feel free to sub in lots of different veggies.  I always throw in mushrooms, but think this would be great with sliced carrots, asparagus, water chestnuts, bamboo shoots, cabbage, and eggplant.  You can even leave out the meat and make a hearty vegetarian version with lots of veggies.

Homemade Take-Away: Beef with Broccoli 


Ingredients:

1 lb sirloin, flank steak or thin sliced top round
1/2 cup low-sodium soy sauce (use gluten-free soy or tamari to keep it wheat-free)
2 Tbsp sherry vinegar
2 Tbsp local honey
2 Tbsp brown sugar
2 Tbsp corn starch
1 Tbsp heaping, minced ginger
1 tsp heaping minced garlic
Dash of crushed red pepper (optional)
1 head of broccoli, chopped
1/2 lb mushrooms, gently washed & sliced
2 Tbsp scallions, chopped
3 Tbsp olive oil
2 tsp sesame seeds
4 cups cooked jasmine rice

In a bowl, mix together soy sauce through red pepper, making sure there are no cornstarch lumps left, and set aside.

Cut beef into thin strips and add to bowl with sauce.  Allow meat to marinade while you get your rice on to cook, as from here, it's going to go pretty fast.

In a large skillet or wok add oil and heat over high heat.  Not medium high heat, but face melting high heat.  So wear an apron or a riot shield if you're worried about oil splatters on your clothes.

Once oil is nice and hot, carefully add broccoli and mushrooms and cook for about a minute to a minute and a half, stirring continually to prevent any burns.  Once mushrooms have started to brown, transfer veggies to a separate plate.

Using tongs, carefully add in beef and if your skillet isn't large enough, you'll want to add it in stages.  Cook meat for 45 seconds.  Toss in scallions and give everything a quick stir.  Pour in rest of sauce and add back in veggies.  Cook for an additional 30 seconds at most, until sauce has started bubbling.  Remove from heat to prevent beef from over cooking and becoming chewy.  Stir in sesame seeds for an added garnish and serve over jasmine rice.  Should make enough for 4 generous portions.


Thursday, August 22, 2013

Szechuan Noodles with Broccoli via Barefoot Contessa

Wednesdays are typically my day off from Nalls Produce and that means I actually get to watch Barefoot Contessa.  Nothing relaxes me quicker than the soothing sound of Ina Garten's voice, even though I always feel like she's silently judging me.  Am I using good olive oil?  Would Ina approve of my faux cheeze?  And this week, as I slipped into a vicarious food coma, I watched as Ina whipped up Szechaun Noodles with Chicken & Broccoli.  Then I thought to myself, "Ooo, next time we get broccoli in the Crop Share, I'm making this!"  And then lo and behold...broccoli is coming home with all of us this week!  The version linked below is the bare bones version, but in the show she added shredded chicken from 4 roasted, bone-in chicken breasts and about a cup of blanched broccoli.  I'm going to use some of this week's cabbage and possibly some of the eggplant, as well, in this dish.  And since we're peanut free in this house, I'll see how it turns out with almond butter in place of the peanut butter called for in the sauce.  So be on the lookout for my follow up post after this weekend, but until then, I give you Barefoot's version...

Szechuan Noodles with Broccoli via Barefoot Contessa


Click through to view this recipe from Barefoot Contessa...


Friday, July 12, 2013

Feeling Loupy!

'Tis the season for melon, and by far my favorite has to be cantaloupe.  So Tasting Table had to have had received some Crop Share vibes about the cantaloupe in this week's boxes, because they've posted not one but TWO amazing, and creative cantaloupe recipes this week.  Normally I can't get past just slicing it up and devouring it, but I think I might just have to exercise some self control and try my hand at these two.  Especially the popsicles with coconut milk and almond milk substituted in for a refreshing dairy-free alternative!  So follow the links below to view the recipes on Tasting Table and get louped!

Creamy Roasted Cantaloupe Pops


Chilled Roasted Cantaloupe Soup with Ginger, Yogurt and Pomegranate Swirl