Showing posts with label Tomatoes. Show all posts

Friday, January 23, 2015

Let's Get Some Spice On!


When I saw the green beans in today's box, for some reason my mind jumped to curries.  I often use a mix of veggies in my curries, but for some reason I almost always include green beans.  We can use the potatoes and the sweet potatoes we've gotten recently, and if you have any carrots left, those would be good too.

Curries originated in southeast Asia, notably the area around Thailand.  From there, they expanded west across India, parts of the Persian Gulf, and into eastern Africa, jumping with the slave trade to various parts of the Caribbean; and they expanded west to places like Fiji and other islands across the Pacific.  At its most basic, it's a dish using lots of spice and almost always includes chilis of some sort.  Some are more like a soup, usually served over rice, others are more like a stir fry with a heavy sauce, again served with rice.

Photo via about.com
The key ingredient in curry is curry powder, which is simply a blend of spices.  That's it.  Take half the spice drawer, put it all together, shake until mixed, and voilĂ , curry powder.  Well, not exactly.  it is a measured quantity of each of certain spices, then shake 'em all together and you have curry powder.  Which spices are going to vary wildly by region, but most of them have cumin and turmeric as a base.  For example, Thai curry powder usually contains turmeric, cumin, coriander, ginger and chilis as its starting point.  As you move west through India, you'll start seeing less coriander and more cardamom, for example.

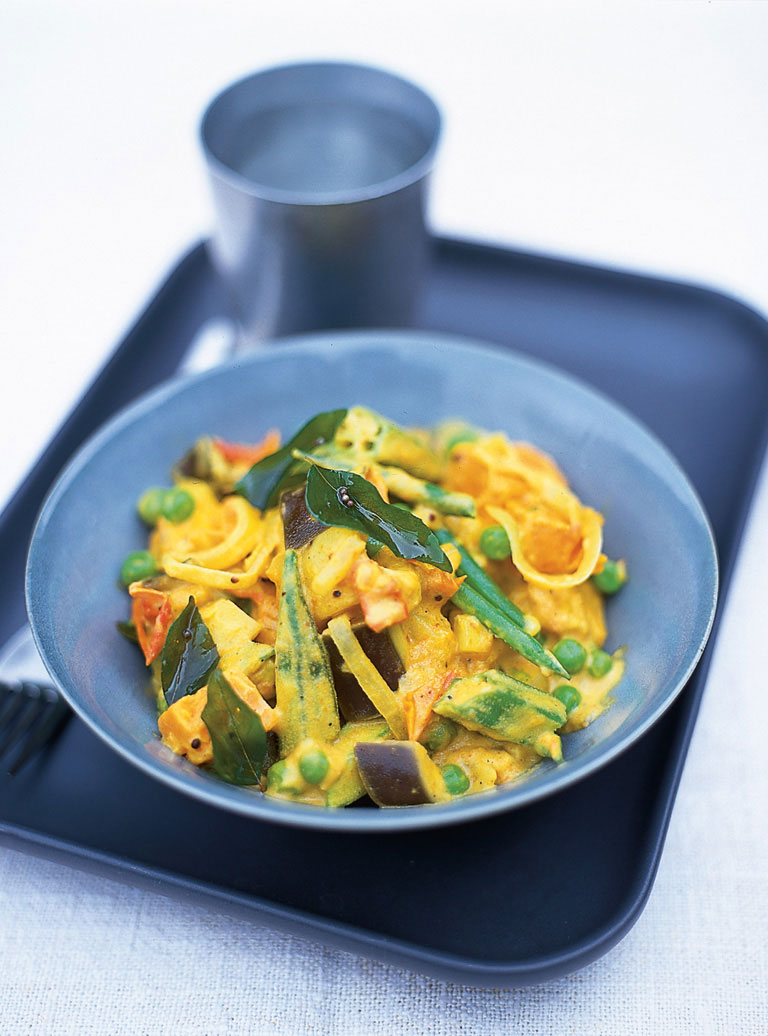
Photo via Jamie Oliver
Curries are usually quite simple to prepare.  Some are yogurt based, some start with a tomato sauce, others use coconut milk.  In essence, you start with the base, add the spices, add whatever half-cooked veggies and browned meat you'd like, and let it cook together until the meat is finished and the veggies are soft.  Some other recipes I've tried and liked are found here, here, and here.

Most of the time, curries can be prepared really quickly with whatever veggies you have on hand.  Great for those weeknights when you need a dinner in 30 minutes or less.

Photo via Food & Wine

Wednesday, October 22, 2014

Member Submissions

I'm always happy to have members send in their favorite recipes.  If you have any that you like, particularly ones involving the current week's crop share, please send them to me at burt@nallsproduce.com.  I'm also happy to get ideas for posts you'd like to see, and any other feedback you might have to make this blog more helpful.

If you're looking for something to do with your beet greens from this week, here's a suggestion from one member.  It's actually quite a hearty soup, and the weather lately definitely calls for soup.

Photo via Whole Foods Market
A member sent us this link on how to roast whole butternut squash.  I've found that if you've got a heavy-duty vegetable peeler, you can use it to peel the squash prior to baking and then follow that recipe.

The final recipe is cheesy, creamy grits with butternut squash.  This one comes courtesy of Paula Deen, so you can be really sure of the cheesy and creamy part.

Photo via Hoffman Media
Easy Cheesy Butternut Squash 'n' Grits
Ingredients

  • 1 butternut squash (about 3 pounds)
  • 3 cups half-and-half
  • 1 cup water
  • 1 cup quick-cooking grits
  • ½ teaspoon salt
  • ¼ teaspoon garlic powder
  • 1 ½ cups shredded sharp white Cheddar cheese
  • 3 tablespoons butter
  • 3 tablespoons olive oil
  • 1 tablespoon chopped fresh sage
  • ¼ teaspoon seasoned pepper
Directions
  1. Preheat oven to 350°.
  2. Using the tip of a sharp knife, pierce squash several times on all sides. Place squash directly on middle oven rack, and bake for 35 to 40 minutes or just until tender. Remove from oven, and let stand until cool enough to handle.
  3. Cut squash in half lengthwise; remove and discard seeds and stringy fiber. Peel squash, and cut flesh into about 1-inch cubes.
  4. In a large saucepan, bring half-and-half and 1 cup water to a boil over medium heat. Slowly stir in grits, salt, and garlic powder. Cover and reduce heat to medium-low; cook, stirring occasionally, for 5 minutes or until grits are thickened. Stir in cheese and butter until melted.
  5. In a large skillet, heat olive oil over medium heat. Add squash cubes, sage, and seasoned pepper; cook, stirring often, for 5 minutes or until squash is lightly browned and tender. Serve over hot grits. Garnish with sage sprig, if desired.

There are plenty of mums here at Nalls, and they're beautiful!

Saturday, July 5, 2014

No, It's Not Just a Movie


Listen, I love that little mouse, too.  But Remy's movie isn't just a movie for kids.  It's a movie for us foodies, too.  And, ratatouille is an actual dish.  Granted, like any good chef, Remy put his own spin on it.  What you'll see in a traditional ratatouille recipe looks more like a vegetable stew with a tomato sauce.  And it's fantastic.
Map via Google Maps
Ratatouille is a dish native to Provence, particularly around Nice.  In reality though, forms of this dish can be found all the way around the Ligurian Sea to Tuscany and even south to Rome.  In Italy, essentially the same dish is called ciambotta.
Photo via Epicurious

Yes, there are definitely variations in both ingredients and in how it's served.  Generally they will both contain a combination of eggplant, peppers, zucchini, and tomatoes.  Toward the east (France), the dish is flavored with marjoram and thyme.  As you go west, there is more basil and parsley instead.  In France, the dish is a casserole or the filling in an omelet and can be served either hot or cold as a side.  In Tuscany, the dish is thicker, and generally a stew, often with potatoes and olives and sometimes even meat.  Making either ratatouille or ciambotta is fairly simple, and the ingredients are now in season!
Photo via SmittenKitchen

For those of you who, like me, have a child who is a fan of the movie, you can't get away with making the dish if it doesn't look like Remy's interpretation.  Don't worry, I've got you covered.  There are two great examples (here and here) that will make you quite the hero.

So, do you have any of those peppers left from your box?

Tuesday, March 11, 2014

Estofado de Pollo: Chicken Stew

If you can somehow keep yourself from just boiling up this week's corn and not just eating piles of corn on the cob, then reserve the kernels from 4 of the ears and get ready to whip up a quick, Mexican style stew, that is perfect served with some tortillas to sop it all up.  You can add another cup or 2 of liquid and a Tbsp of tomato paste if you want to really turn this into a soup style stew, otherwise think of this as more of a pulled pork consistency but with more tomatoes and corn than you can shake a stick at.  I love to lay out some of the tortillas on a platter and spoon the stew over top to serve this family style.  You could even use this as a stuffing for any baked enchiladas or taquitos, or serve it with large leaf lettuce for some healthy lettuce wraps!


Estofado de Pollo: Chicken Stew


Ingredients:
1 Tbsp olive oil
2 Tbsp garlic, minced
3 tomatoes, diced
4 ears corn, cooked and removed from cob
1 chipotle chili in adobo, diced
1 small can salsa verde
2 cups yellow cherry tomatoes, halved
2 cups cherry tomatoes, halved
1 cup reduced sodium chicken stock
2 cups shredded, cooked chicken (great for using up leftover chicken or rotisserie chicken)
1/2 cup shredded cheese of your choice (optional)
Kosher salt & pepper to taste
1 Tbsp cilantro, chopped
1/2 lime
Corn tortillas

In a large stock pot, heat olive oil over medium high heat.  Add in garlic and saute for about 1 minute, until fragrant.  Add in diced tomatoes and corn and stir to blend.  Toss in 1 diced chipotle chili, with about 1 tsp of the adobo sauce, and then your salsa verde and the rest of your tomatoes.  Cook for about 2-3 minutes and then pour in chicken stock.  Bring to a boil and simmer down for about 4-5 minutes.  If you're making this more of a soup type stew, add in 2-3 cups of stock plus 1 Tbsp of tomato paste, and simmer also for 4-5 minutes.

Stir in your shredded chicken, and season with salt & pepper to taste.  You can either stir in any cheese to help thicken the sauce, or use it as a garnish over top.  Garnish top of stew with cilantro and the juice of 1/2 a lime.  Serve with corn tortillas to scoop up the stew.


Wednesday, February 19, 2014

A Fusion Twist On Shrimp & Grits: Cilantro Lime Shrimp with Collards over Cheesy Arepas

I'm still musing over what to do for My Crop Share Challenge this week, and since the brussels sprouts did not want to come out into the blizzard, I'm going to have to re-think my two items.  I got A LOT of collards, so I'm thinking those will certainly be 1 of the 2 items and...wait a tick, hold the phone, some stewed collards with apples.  Yes, yes that's what it's going to be.  I've got a ton of Fuji apples and a ton of collards, why not see if they can play nice together!

But, before we get to those, let me show you what was served up for dinner last night.  I'd seen this recipe for Cilantro Lime Shrimp from Never Enough Thyme and figured I'd wait till we got some of the items needed in an upcoming Crop Share.  But there was that beast amount of collards to contend with, so I figured aww heck just make it and toss in a bundle of collards.  Hmm, shrimp and collards, feels very Low Country.  Hmm, shrimp & grits with collards.  Grits are a cornmeal porridge.  So is polenta, but no, doesn't feel right.  Ugali (see recipe at bottom of this page)?  No.  Oooo, cheesy arepas, it's like cheesy grits pancakes!  And thus Low Country met South-of-the-Border in my kitchen and the results were deeeeeee-licious!


Cilantro Lime Shrimp with Collards over Cheesy Arepas


Ingredients:

1 Tbsp olive oil
1 Tbsp butter
1 sweet onion, minced
1 jalapeno, seeded and diced
1 tsp garlic, minced
1 small bundle collard greens, removed from stem and rough chopped
1/4 tsp red pepper flakes (omit if jalapeno is enough heat for you, or just do 1/8 tsp)
1/2 tsp oregano
1 tomato, diced
2 limes, zest and juice
1/4 tsp Kosher salt
1/2 tsp ground black pepper
1 lb frozen pre-cooked shrimp, thawed in water and detailed
1/2 cup fresh cilantro,  chopped

For arepas -- see recipe for them in Vietnamese Style Tacos and just add a handful or two of your favorite shredded cheese (for dairy free I used Daiya cheddar shreds)


Make arepas first so they have time to set up and cool a bit while you're whipping up the shrimp portion.

Then in a large skillet, heat oil and butter over medium high heat.  Add in onion, jalapeno and garlic and cook for about 3-4 minutes or until onion is translucent.  Add in collards and cook until wilted.  Season with red pepper flakes and oregano and cook for an additional minute.  Add in tomato, lime zest, lime juice, salt and pepper and cook until tomatoes are nice and soft and soupy.  Toss in thawed shrimp and cook for only a few minutes until they are heated thru and have curled up.  Remove from heat and stir in cilantro.

Place 1 arepa on each plate and top with a scoop or two of the shrimp & veggies.


Wednesday, February 12, 2014

Zucchini Boats Stuffed with Pesto Chicken

I'm currently OBSESSED with pesto.  Earlier in the week I had to make our new favorite, Cilantro Pistachio Pesto, and it just wasn't enough, I needed more.  Luckily, I've begun to cook in my dreams again, and the other morning I awoke after having whipped up some delectable roasted zucchini boats stuffed with basil & almond pesto, tomatoes and shredded chicken.  They say if you can dream it, you can do it, so I made a massive batch of basil & almond pesto (for the base pesto recipe, see our Broccoli Pesto recipe, and either omit the broccoli, or use up the last of this week's broccoli for a double dose of crop share veggies), turned two zucchini into battleships of deliciousness, snagged an extra tomato and rotisserie chicken, and prepared to make my dream come true.  I only used up two of the three zucchini this week, so it allowed for two halves for the Mister & I, and man do I wish I would have just attacked that 3rd zucchini.  But I'm lovingly saving that one to pair with the broccoli, and the rest of the rotisserie chicken in a creamy, dairy & gluten free mac & cheese.  That magic is happening tonight, so stay tuned!  Oh and if you make the full pesto recipe linked above, it makes A LOT.  You only need a cup for this recipe, so save the rest to toss with pasta, pour over some baked chicken or fish, use as a chip or veggie dip, or hollow out a couple tomatoes and cook up a cup of quinoa, and get ready to roast up some stuffed tomatoes with pesto quinoa.  Which if you want a vegetarian or vegan version of these zucchini boats, just leave out the chicken and sub in quinoa, chickpeas, or another protein-packed animal-friendly foodstuff.


Zucchini Boats Stuffed with Pesto Chicken


Ingredients:
2 large zucchini, stem end trimmed, halved and seed section scooped out to make enough room to stuff
1/2 tomato, seeded and diced
1 breast and 1 thigh from a rotisserie chicken
1 cup pesto (for homemade, see our Broccoli Pesto recipe.  I left out the broccoli, but added in 1/2 cup of the zucchini innards, for extra veggie power)
Pinch of kosher salt
Olive oil for drizzling

Preheat oven to 375 degrees.

Lightly rub olive oil onto zucchini boats and place on a baking sheet or in a large enough baking dish.

In a medium sized bowl, shred the cooked chicken breast & thigh meat, and then stir in 1 cup of prepared pesto and the diced tomato.  Add a pinch of kosher salt, and stir to fully combine.  Evenly distribute filling among zucchini boats, and then lightly drizzle tops with a bit of olive oil.

Bake in the oven at 375 for 30 minutes or until zucchini is just soft, but not mushy, and top of stuffing is golden.


Wednesday, January 29, 2014

Guac This Way!

Great news, we're getting domestically grown avocados in this week's Crop Share!!!  AHHHHHHHH!!!!!! That can only mean one thing...GUACAMOLE!  Never has something that looks like rancid baby food ever tasted so very good.  You'll find a ton of recipes out there for guacamole, some of which contain about 15 different ingredients and even hardboiled egg.  Let me stop you right there, right bloody there, egg has no place in guacamole and if you need to add a bevy of seasonings, you are dishonoring the flavor glory of the incredible produce that goes into this dish.  Let the ingredients sing for themselves, as the only help they need is a bit of salt and lime juice to balance things out and bring out the brightness of the flavors.  So what does the guacamole sing when it's done properly?

"So I took a big chance, and gave a second glance, with an avocado that was ready to play.  It wasn't me it was foolin', cos it knew what it was doing, when it told me how to gauc this way!  Gauc this way!  Talk this way!  Gauc this way!  Talk this way!  Just give me chip!"

Yes, that was the guacamole version of Aerosmith's "Walk This Way."  Clearly I can talk the talk, and guac the guac. ;)


Fresh Guacamole


Ingredients:

3 medium avocados, flesh scooped, pitted & mashed
1 lime, juiced
1 tsp Kosher salt
1/2 red onion, diced
1 clove garlic, minced
1 tomato, seeded and diced
1-2 Tbsp cilantro, minced
1 jalapeno or serrano chile, seeded and diced *optional


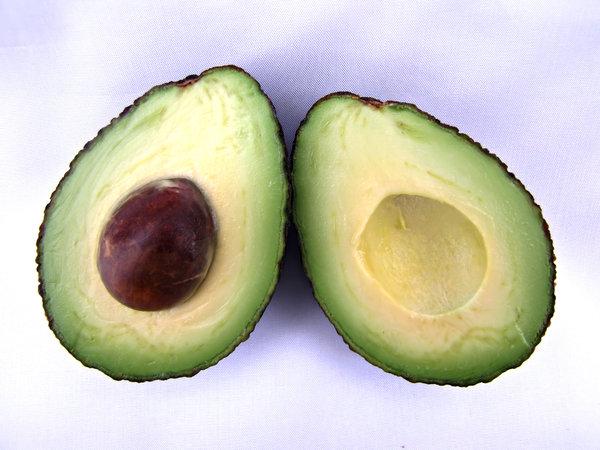
Want to know the best way to get the flesh out of an avocado?  Start by taking your knife straight through it as if you're going to cut it in half, and then just turn the avocado so that you're slicing the whole way around.  Twist each half apart and you'll be left with what you see in the photo above.  Then whack your knife into the pit and pull it out.  Next with your knife, slice three rows down and three rows across through the flesh on each half, and then grab the skin and essentially flip the avocado halves inside out.  The chunks you cut should easily come right out, and it'll save a lot of messing scooping.

In a medium bowl, combine your mashed avocado with all of the ingredients and stir to fully blend.  Adjust salt or lime juice, if necessary.  Serve immediately or really allow the flavors of meld and refrigerate for about 1 hour.  Serve it up the classic way with corn tortilla chips, use it as a topping for burgers and sandwiches, or see our favorite Potato Skins recipe and omit the traditional stuffings and throw in some guacamole or use it along with the bacon and cheese, for a fresh take on a game day classic!

Game on and gauc on!


Wednesday, January 22, 2014

Cooking With Collards: Stewed Collards with Sausage & Quinoa

If you're at a loss with what to do with the collard greens coming your way this week, take heart because if you love kale, you'll love collards.  They're really interchangeable and I've used them to make delicious Collard Chips and Sweet Potato & Collard Soup.  But my all time favorite preparation is Sukuma Wiki, a Kenyan recipe for stewed collards.  You get all the goodness of traditional stewed collards, minus the pork fat of most US recipes.  Penny will thank you and so will your waistline.  So a few weeks ago I took home some collards in order to make another batch of Sukuma Wiki, but I also had some quinoa in my pantry that was looking so lonely and unloved.  Thus a go-to side dish of ours transformed itself into an entree with the addition of quinoa and turkey sausage.  The results were delicious, and while not traditionally Kenyan, it definitely had my tastebuds shouting, "Jambo!" (hello in Swahili).


Stewed Collards with Sausage & Quinoa


Ingredients:

1 cup quinoa, cooked to package directions
3 Tbsp olive oil
1 sweet onion, chopped
1 Tbsp garlic, minced
1.25 lbs hot Italian turkey sausage, casings removed and crumbled
2 cups diced tomatoes
1 bundle of collards, removed from stems and rough chopped
6 cups reduced sodium chicken stock
Salt to taste


Prepare quinoa according to package directions.

In a large skillet, heat olive oil over medium high heat.  Add in onion and garlic and sweat until translucent for about 2-3 minutes.  Add in crumbled sausage and cook until it begins to brown.  Stir in tomatoes and cook for an additional 4 minutes.  Now begin to add your collards, and you'll have to add them in stages to allow them to cook down and make more room for the rest.  Once all collards are in the pan and have started to wilt, begin adding chicken stock.  Bring to a simmer and reduce heat.

Now at this point you could simmer everything for about 10 minutes, season to taste with salt and serve this as a soup (though if you've made the quinoa, now you have lonely quinoa or you could stir some in to function like a pasta or rice), which I'm sure would be delicious.  But to really get all the loveliness and to stew the collards into submission you want to simmer this for a good 50 minutes.

After 50 minutes, stir in your quinoa and allow to cook on low for an additional 10 minutes or until all the liquid is absorbed.  Remove from heat and serve.


Thursday, January 16, 2014

BLT Bonanza (plus a bonus recipe for Brussels Sprout Chips!)

I get the whole bacon craze, I just am not that insane over bacon (though it was a dark chocolate & bacon bar that caused me to fall off the vegetarian wagon).  That being said, if you slap that bacon on a carb and add tomato & lettuce, you better get out of my way because I'm going to go all Shark Week on it!  So a few months ago, I had a mad scientist moment in the kitchen and concocted this sinfully good BLT Pasta.  Yes, there is lettuce in the pasta, because hey, it's a green, it will saute up like spinach.  So, with the cherry tomatoes and Boston lettuce this week, just grab yourself a slab of bacon and your favorite pasta and you're on your way to pastavana (pasta nirvana, but somehow it just sounds like a yoga pose, a yoga pose that I really hope exists and includes eating pasta).

Bacon Lettuce Tomato Pasta


But wait, there's more!  With last week's green leaf lettuce and the tomatoes in store, I whipped up some Triple Decker BLT's.  Now a traditonal BLT needs no recipe because duh it's toasted bread with lettuce, a slice of tomato and crispy bacon.  Easy enough.  But most folks slather mayo on them, and since the Mister has an egg allergy, and I forgot to pickup Veganaise at the store, I decided to pull out some leftover homemade basil & almond pesto and slather that on instead.  I never want to see mayo near my BLT ever again!  Pesto is king!!!  For the pesto, use this Cilantro & Pistachio Pesto recipe as a base and sub in the basil and almonds for the cilantro and pistachio.  OR...I just came across a recipe for Broccoli Pesto that I'm dying to try, so why not weave another Crop Share veggie from this week into your BLT and use some of the broccoli for a pesto!  I know I'll be leaving out the cheese and adding more garlic to my version, because if you don't have dragon breath after eating pesto, then you didn't do it right.  The Boston lettuce will work great for your "L" but I suggest grabbing some larger tomatoes in store for your "T" as the cherry tomatoes will just fall the heck out of your sandwich.  BUT!  As an added bonus I made Brussels Sprouts Chips, as a healthy side to my leaning towers of bacon.  Let me just say, move over Kale Chips, there is a new green chip in town and it is the muscles from Brussels!  So I'll provide the recipe for those after the photo.


Baked Brussels Sprouts Chips

Ingredients:
1 quart fresh Brussels Sprouts, ends trimmed, exterior leaves discarded
1 - 2 Tbsp olive oil
Coarse ground salt & pepper to taste (or instead throw on some Dizzy Pig's Cow Lick Seasoning -- in store -- that's what I did!)

Preheat oven to 350 degrees.  Pull apart leaves of Brussels Sprouts and spread evenly on a baking sheet.  You may need to core them a bit more to get all of the leaves off.  Then drizzle with olive oil and toss in your seasoning of choice.  Bake at 350 for about 10-15 minutes or until the chips have started to brown and caramelize.  Proceed to eat them all before you walk away from the oven.


Wednesday, January 1, 2014

Cilantro or Cilant-NO?

Cilantro and I are tight.  I love that fragrant herb and it loves me back.  But I recognize that for some of you, you might hear that we're getting cilantro this week and your first thought is, "Cilant-NO! That stuff tastes like soap!"  A few years ago, I learned that for some folks, cilantro only reads like soap or cleaning products on their taste buds.  This is not a case of having an unrefined palate (Julia Child herself despised cilantro), it's simply our taste buds being our personal food safety testers to keep us from harm.  Since cilantro contains the same or similar type of aldehydes found in soaps, certain chemicals and even in bugs, some people's taste buds pick up on the flavor and alert, "DANGER!  DANGER!  DO NOT EAT!"  Hence, why it reads like soap or cleaning products to many folks, it's their taste bud's way of stopping them from eating the perceived hazard.

So can those of us who love cilantro boast about having more evolved and intelligent palates?  Probably not, as I can shamefully admit to once eating an entire slice of moldy pizza and then reached for another before I bothered to flip on the light and see that my pizza was growing a sweater.  Like I said, shameful.  But the good news for cilantro-phobes is that some people have found if the herb is crushed or really finely chopped, that by breaking it down, it decreases the soapy flavor and only imparts that wonderfully fragrant note that those of us who love cilantro rave about.

Whether you love it or have always reviled it, we've got two great cilantro containing recipes.  For those of you doubters, in both of these you can just mince the heck out of the cilantro, let it rest for a few minutes and then toss it in.  Think almost a pesto consistency in how finely you mince it.  Click the link to view the first recipe, but the second is provided in this post...

Thai Chicken Quinoa Bowls


If you have an aversion to quinoa, you can easily toss this with white or brown rice, and since it has a Thai flavor profile, you might even try tossing it with rice noodles for a bit of a riff on Pad Thai.  Pass the Sriracha!


Healthier Three Layer Taco Dip


Layer 1:
8 oz Neufchatel 1/3 less fat cream cheese (I use Tofutti Better Than Cream Cheese for dairy-free)*
8 oz reduced fat sour cream (I use Tofutti Sour Supreme for dairy-free)*
1 package low-sodium taco seasoning**
1 tsp chipotle pepper (or less to control the heat)**

Beat all ingredients together until well-blended and creamy.  Spread in the bottom or a deep dish or pie plate.  Refrigerate for at least one hour to allow this layer to set up and firm up.

*When using the reduced fat cream cheese and sour cream, beware of the increased water content.  So drain any excess liquid off of the sour cream before using, and then make sure your subsequent layers are well-drained before adding them.

**Since determining the gluten-safe properties of most taco seasonings, I just created my own.  This is a great way to save on sodium, because even the low-sodium seasonings are still too high for my taste.  Alas, I made mine recently at about 2 am and thus didn't measure, but I did a blend of garlic powder, paprika, ground black pepper, chipotle pepper, and a dash of salt.  So add a few dashes and season till you get the taste you want.  You definitely want the smoky heat of the chipotle in this layer, so to keep from going overboard on the heat you can up the smoke factor with more paprika.


Layer 2:
1 head of romaine lettuce, chopped fine and patted dry with a paper towel

Evenly spread over cream cheese mixture.


Layer 3:
4 tomatoes, seeded and diced
1/2 chopped sweet onion
1 chopped and seeded jalapeno pepper
3 Tbsp minced, fresh cilantro
Juice of 1 lime or lemon

Mix all ingredients together in a separate bowl and then, using a slotted spoon to allow for drainage of excess liquid, evenly spread over top of romaine.  You'll likely have left over pico de gallo, so save to use as a plain salsa or for topping homemade tacos, grilled fish or chicken.


Wednesday, November 13, 2013

Quinoa Tabbouleh

When your best friend is Lebanese and her mom owns her own restaurant, that can only mean one thing...you wind up with hummus running through your veins.  I cannot tell you the number of times I made the mistake of eating something before going to their house.  Big, big mistake!  Because you're almost always greeted with a giant plate of delights, and whether you came on an empty stomach or not, you will leave nearly unable to stand up straight from being so full.  So I've been trained to consume NFL linebacker portions of hummus, pita, tabbouleh, kibbe, fattoush, mujadara and shawarma.  Not to mention obscene quantities of garlic sauce that I will continue to sweat out for about 48 hrs (oh yes, I keep it classy!).  So when I had to give up gluten, there went pita, kibbe, fattoush, and tabbouleh, 4 of my favorite things on earth, right out the window.  Waaaaaaa!!!!  But, like the angle she is, Mrs. Rajeh started making gluten-free kibbe and tabbouleh at her restaurant, using quinoa as the base for both.  Happy days were here again!  So the last time my friend Nawal stayed with us, she arrived with a big container of me-safe tabbouleh from her mom's restaurant, which I promptly ate in one sitting.  Whether you enjoy this recipe gluten free with quinoa, or go the traditional route with bulgur/cracked wheat, it will undoubtedly have you singing....The Tabbouleh Song.  DC based comedian, Remy, put this together a few years ago and ever since I've been shake, shaking my booty every time I eat tabbouleh.  Because, as Remy says, you've got to push, push, push the tush, when you eat an Arab salad that's not fattoush!  Enjoy this taste of Samia's Phoenician Grill (well as close as it gets since, as a true cook, Mrs. Rajeh never measures or writes anything down).

Quinoa Tabbouleh


Ingredients:
1/2 cup quinoa (or bulgur for traditional, non-gluten free version), cooked to package directions
1 bundle fresh parsley, finely chopped
2 Tbsp (heaping) fresh mint, finely chopped
3 green onions, ends trimmed and finely diced
2 tomatoes, seeded and diced
1 tsp garlic, minced
Juice of 2 lemons
1/4 olive oil
Kosher or sea salt

Cook quinoa according to package directions, then set aside to cool completely.

In a bowl, mix together parsley, mint, onions, tomatoes and garlic.  Fold in cooled quinoa and stir to fully combine.

In a separate bowl whisk together lemon juice and olive oil.  Pour dressing over the tabbouleh and season with a pinch of two of coarse ground salt.

Cover and refrigerate for at least 30 minutes to allow flavors to meld together, and then taste and adjust any seasoning as needed.


Serve with Homemade Chicken Shawarma or Kale, Sweet Potato & Lamb Polenta Pizza, basically anything with super bold flavor that needs a good refreshing palate cleanser to go with it.


Thursday, October 31, 2013

Stewed Collard Greens, Kenyan Style: Sukuma Wiki

A few weeks ago I mentioned in the Crop Share spoiler e-mail that I'd be posting my results of a big Kenyan feast I was cooking up, as that was how I planned to use up the last of that delicious sweet corn.  I did make the feast, but I'm just now getting around to the blogging part.  Ah well, I run on Irish time!

Wait, so what's this Youngstown born, Irish American gal doing making a Kenyan feast and getting all misty eyed over the dishes?  Isn't Kenyan cuisine thin on the ground in NE Ohio and in Ireland?  It is, but I was blessed to be able to fall in love with these flavors in Nairobi, Kenya.  To make a very long, and very awesome story short...there was a man from Nairobi named Mo Amin, who was one of the most influential photojournalists of the 70s, 80s and early 90s (remember the NBC Nightly News segment in 1984 on the Ethiopian famine that spawned USA For Africa, We Are The World, Live Aid and Band Aid -- that was Mo's footage).  There was another man named John from Youngstown, OH, who was one of the pioneers in upper limb prosthetic technology.  John also had a curious, adventurous, ginger-haired little girl named Tara.  The three of them met due to an ammunitions depot explosion and a stray missile in Ethiopia.  Thanks to John's expertise, Mo was able to go back to work doing what he did best, and thanks to Mo, John and his family had their lives changed forever, especially little Tara.  Finally in 1995, they got to visit Mo in Nairobi and thus 13 year old Tara's love affair with the flavors of Kenya was born.

There is way more awesomeness to the story, and even more tears because in '96 I lost my friend and mentor when the Ethiopian Airways flight he was on was hijacked and crashed off the Seychelles.  Maybe it's solely due to Mo, but despite only spending about a month in Kenya, it has remained a place I will get legitimately homesick for.  But there is something magical about that country, and while Mo was hands down the most incredible person I've ever met, I know he's not the sole reason why there are times my heart just aches to be back there.  And until I finally sat down to do some serious research on some of my most beloved dishes from my time there, my stomach has been aching for nearly 20 years for those foods!  But oh thanks to the magic of some collards, white corn meal, corn, beans, and then a delicious curried beef stew, I got to transport myself and the Mister to Kenya for an evening.  And yes, I cried with the very first bite.  I'm a total foodie sap.

So since collards have made their way into this week's Crop Share, I give you two of my favorite dishes...sukuma wiki and ugali.  There's a reason why "sukuma wiki" is Swahili for "stretch the week" because you will have a mountain of greens...dare I say a Mount Kilimanjaro of greens!

Stewed Collard Greens, Kenyan Style: Sukuma Wiki


Ingredients:
3 Tbsp olive oil
1 sweet onion, chopped
1 bundle collard greens, rough chopped
2 cups diced tomatoes
1-2 cups water, chicken or vegetable stock
Salt & pepper to taste


Heat oil over medium high heat in a large saute pan.  Add in onions and saute until translucent.  Toss in greens, and you'll likely  have to do this in stages to allow them to wilt down and make room for the rest.  Once greens have wilted down to make enough room, stir in tomatoes and cook for an additional 2-3 minutes.  Add in water or stock, and simmer on low for about an hour.  Season with salt & pepper to taste before serving.

To really keep it traditional, serve with ugali (big ball of awesome in the center of the photo below).


The ugali, which is just cooked white corn meal, is the vehicle you use to sop up and scoop up all the loveliness on your plate.  Just bring 4 cups of water and 2 teaspoons of salt to a boil, then stir in 2 cups of finely ground white corn meal (if you have trouble finding it, check the Hispanic food section of your grocery or head to a Hispanic market, as white while corn meal/masa for arepas is exactly what you'll need).  Reduce heat right away lest you want to be pelted with bubbling corn meal.  Then stir off and on for about 10 minutes until the ugali pulls from the sides of the pan and begins to form a ball in the pan.  You'll think its done much earlier, but trust me, you need 10 minutes, as you want to get a bit of a crisp on the outside. Not a burn, just a light crisp.  Remove from heat and allow to slightly cool.  Then wet your hands with water, pull out a hunk of the ugali and roll into a ball the size of your palm to place on each dish.  It actually does reheat well, so if you're only cooking for 1 or 2, you'll be able to stash the rest away and eat it as you go through the week.


Thursday, September 12, 2013

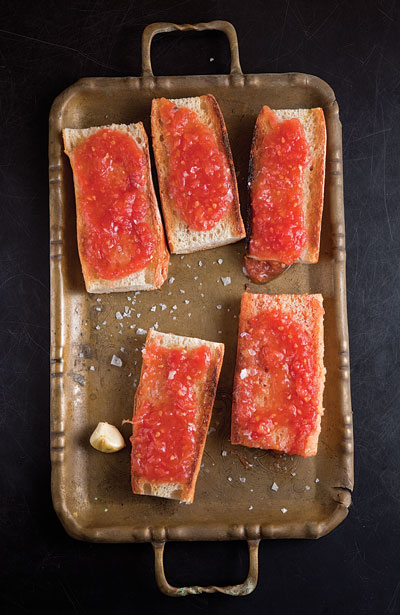
Pan Con Tomate via Saveur

If you've read your spoiler e-mail, you'll know you're getting an extra special surprise in your box tomorrow...a baguette from Panorama Bakery!  No?  Oui!  For those of you who attended our Block Party last Saturday, there's no way you missed Emmanuel from Panorama and the massive bakery display of carb loveliness.  So if you took any of those delights home, you already know how amazing their bread is.  Wait a minute, Tara, aren't you gluten-free, how do you know it's amazing?  Okay so in a moment of weakness, when Emmanuel first brought us samples, my French DNA got the best of me and I tried a nibble of the brioche.  Was it the best bit of bread I ever had in my life?  YES!  Did I pay for it for a few days after?  Ugh, yes.  Was it worth it?  YES!

So back in my gluten-full days, one of my favorite things to do with baguettes or any crusty French bread was to make a traditional Catalan dish of Pan Con Tomate.  Yep, bread with tomatoes.  And since you're getting tomatoes in this week's share too, you've already got half your ingredients!  These make a great appetizer, or pour yourself a glass of wine and slice up some cured meats for a dinner of assorted nibbles.  This recipe below from Saveur calls for you to grate the tomato and then spoon the puree over the bread, but the best way and the traditional Catalan way is to simply rub the slices of tomato onto the toasted bread to infuse it with just enough tomato goodness.  Then just reserve the broken down tomatoes for use in sauce for another meal!


Pan Con Tomate


Click through to view the recipe on Saveur...


Thursday, August 15, 2013

Celebrating 101 Years of Julia Child with Tomates a la Provencale

August 15th may be one of my most favorite days on the calendar, because 101 years ago, on this very day, a little girl was born who was destined to change the face of food as we knew it.  Not just food in America, but perceptions of food across the globe.  That little girl who was never actually all that little, was none other than Julia Child.


Whether you're a Julia nerd like me, we all share in a piece of what she was all about by participating in the Crop Share program, and as Julia herself said, "You learn to cook so that you don't have to be a slave to recipes.  You get what's in season and you know what to do with it."  And that's why we're all here, eating, cooking and learning about all this wonderful seasonal produce so that we're not slaves to recipes or supermarket shelves, we can create our own magic with the bounty that the earth gives up each season.  So as we all raise our rolling pins and save the chicken liver in honor of what would have been Miss Julia's 101st birthday, here is her classic recipe for Tomates a la Provencale and then my quick gluten and dairy-free riff on it.  Bon Appetit!


Julia Child's Tomates a la Provencale


Ingredients:
6 firm, ripe, red tomatoes about 3 inches in diameter
Salt and pepper
1 to 2 cloves mashed garlic
3 Tbsp minced shallots or green onions
4 Tbsp minced fresh basil and parsley, or parsley only
1/8 tsp thyme
1/4 tsp salt
Big pinch of pepper
1/4 cup olive oil
1/2 cup fine, white, dry bread crumbs
A shallow, oiled roasting pan just large enough to hold the tomatoes easily in one layer

Preheat oven to 400 degrees.

Remove the stems, and cut the tomatoes in half crosswise.  Gently press out the juice and seeds.  Sprinkle the halves lightly with salt and pepper.

Blend all remaining ingredients in a mixing bowl.  Correct seasoning.  Fill each tomato half with a spoon full or two of the mixture.  Sprinkle a few drops of olive oil.  Arrange the tomatoes in the roasting pan; do not crowd them.

Place in upper third of oven and bake for 10 to 15 minutes, or until the tomatoes are tender but hold their shape, and the bread crumb filling has browned lightly.


Quinoa Stuffed Tomatoes


Ingredients:
2-4 large, red tomatoes, tops sliced off and diced, insides scooped out and seeded
8 oz Tofutti Better Than Cream Cheese (or real dairy cream cheese)
2 tsp garlic, minced
1 Tbsp fresh tarragon, minced
1 Tbsp fresh basil, minced
1 cup quinoa, cooked to package directions
Salt & pepper
Olive oil


Preheat oven to 400 degrees.

In a mixing bowl, combine cream cheese through quinoa.  Mix well to incorporate.  Stir in diced tops of tomatoes, and then season mixture to taste with salt and pepper and hit it with a quick splash of olive oil.  Stuff each tomato till full with the quinoa mixture and place into a baking dish.  Drizzle tops with a smidge of olive oil and then bake in oven at 400 degrees for 10 to 15 minutes or until tops are slightly browned and skin on the tomatoes has blistered a bit.

Thursday, August 8, 2013

All Jalapeno Business!

We're turning up the heat this week with lots of local jalapenos!  Don't fear the heat, as there are plenty of easy ways to prepare them that will mask the burn and highlight their lovely smoky flavor.  But be warned, you will want to wear kitchen gloves or put some baggies on your hands when seeding and chopping the jalapenos, because not only will you undoubtedly rub your eyes sometime later that day and then rue the jalapeno's existence, but you will also find that your fingertips themselves will burn.  Leave feeling the burn to the gym, not the kitchen!

So here's two great recipes for this week's bounty of jalapenos.  First up, the best ever layered taco dip I've had in my life, courtesy of my good friend Alicia.  There was a memorable New Years Eve when we co-hosted a party in which this taco dip was made, along with enough food to feed about 30 people.  There were 5 of us at this party.  We have a slight problem with going over board.  But you will want to make a ton of this layered taco dip and then go hide yourself in a closet with a bag of chips.  Just the spiced cream cheese base of this is to die for!  

Then the next recipe comes from everyone's favorite down-home gal, The Pioneer Woman.  She once made these killer BBQ Jalapeno Poppers, and while you can certainly go the BBQ route (how amazing would they be with some of that Almost Heaven Apple Butter BBQ we have in store?!?), Miss Valerie in our office LOVES to replace the BBQ in this recipe with peach jam.  Say what?!  Sweet with heat, sign us up!  We pretty much have peach jam coming out our ears in the store, including a new Sunshine Peach Jam.  But ooo, how deliciously exotic would it be with some Mango Jam or some of the Mango Mango Preserves?  Go ahead, get a little crazy this week!

Miss Alicia's Taco Dip


Layer 1:
8 oz cream cheese
8 oz sour cream
1 package low-sodium taco seasoning
1 tsp chipotle pepper (or less to control the heat)

Beat all ingredients together until well-blended and creamy.  Spread in the bottom or a deep dish or pie plate.

Layer 2:
1/2 head of iceburg lettuce, chopped fine

Evenly spread over cream cheese mixture.


Layer 3:
Grated cheddar cheese to taste

Evenly sprinkled over lettuce.


Layer 4:
3 tomatoes, seeded and diced
1/2 chopped sweet onion
1 chopped and seeded jalapeno pepper
3 Tbsp minced, fresh cilantro
1 tsp lime juice

Mix all ingredients together in a separate bowl and then evenly spread over top of cheese.  You'll likely have left over pico de gallo, so save to use as a plain salsa or for topping homemade tacos, grilled fish or chicken.


Pioneer Woman's BBQ Jalapeno Poppers


Friday, July 12, 2013

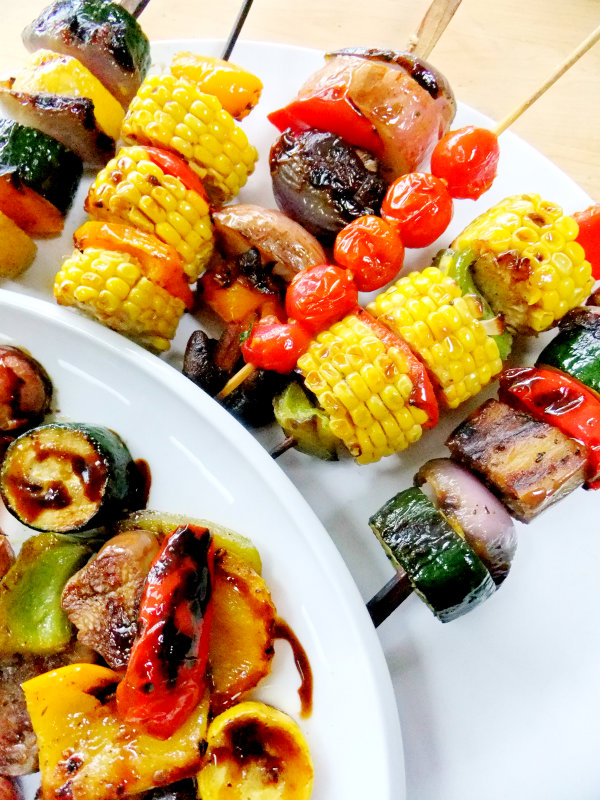
Grilled Vegetable Skewers via Proud Italian Cook

Pardon my lack of original content this week, I'm out of town for a wedding and my lonely share is waiting for me back at Nalls.  :(  So for all you Crop Share newbies, don't worry, cooking does actually happen in Nalls' Kitchen!

In the meantime we can all drool together with some gems I discovered thanks to Pinterest, like this Grilled Vegetable Skewers from Proud Italian Cook.  A great way to use up the corn, bell peppers, broccoli and even slice up the tomatoes into wedges to skewer.  I hear grilled cantaloupe is fantastic!  Though probably hold off on grilling the spinach, something tells me that's a bad idea.

So follow the link below to view this recipe that has me ready to fire up the grill at 9am!

Grilled Vegetable Skewers


Thursday, June 27, 2013

Thai Chicken Quinoa Bowls

So the Mister and I are kind of a hot mess of food allergies.  Our home is peanut, cashew, dairy, egg and gluten free.  And while I adore Thai food, it's pretty much the kiss of death for the hubs.  Thus I was pretty darn excited when I stumbled across these Thai Chicken Quinoa Bowls from How Sweet It Is and realized all I needed were a few key tweaks to make it safe for both of us.  Including subbing in almond butter in place of peanut butter -- you'd never know.  While this dish is the perfect vehicle for this week's cilantro, you could just as easy throw in some of the diced, green bell pepper or even blanch some of the broccoli to toss in.  I say the more crunchy veg in these quinoa bowls, the better!


Thai Chicken Quinoa Bowls


Ingredients:

1 cup uncooked quinoa, cooked to package instructions
2 chicken breasts cooked & shredded, or use leftover rotisserie chicken
1/3 cup chopped carrots
1/3 cup chopped green onions
1 1/2 tomatoes, seeded and diced
1/4 cup fresh cilantro, chopped

Sauce:
4 Tbsp chili garlic sauce
2 Tbsp rice vinegar
2 Tbsp coconut milk
1 Tbsp brown sugar
2 tsp almond butter
1 lime, juiced
1/4 tsp ground ginger

Toss shredded chicken with cooked quinoa.  Add in chopped vegetables and cilantro and stir to mix well.

In a separate bowl, whisk together all sauce ingredients until fully combined and pour over quinoa mixture.  Fold sauce in evenly and taste.  Season with salt & pepper if needed.


Adapted from How Sweet It Is: (http://www.howsweeteats.com/2013/02/thai-chicken-quinoa-bowl/)

Friday, June 21, 2013

Fresh Tomato Salad & Panzanella Longings

For years, panzanella has been my signature summer salad.  It's a classic Italian dish that was a way to use up stale bread as the croutons.  If I must say, my homemade croutons were AH-MAZING.  But then life has a funny way of throwing you curveballs, and mine arrived in the form of a gluten allergy.  So while I gladly trade all those delightful carbs for the ability to feel human every day, panzanella is one dish I do miss, as I've yet to find a gluten-free bread that will really fit the French bread bill needed to make the croutons.  But that hasn't stopped me from regularly turning tomatoes into a wonderful, fresh, and fragrant summer salad.  Served as a side or topped with grilled chicken, these bright flavors are the essence of summer, and for those of you growing fresh herbs, it's a great way to use up any basil that's growing like crazy.  And so no one else has to miss out on the tastebud joy that is panzanella, I'll include the extra steps and ingredients for that at the end.

Fresh Tomato Salad (with Panzanella adaptation below)


Ingredients:
1.5 - 2 lbs tomatoes, seeded and diced (I'll often mix red and yellow tomatoes)
1/2 sweet onion, minced
2 tsp garlic, minced
1/2 cup extra virgin olive oil
2 Tbsp fresh lemon juice
2 Tbsp fresh basil leaves, chopped
1 Tbsp fresh tarragon leaves, chopped
1 tsp Kosher salt
black pepper to taste
2 cups arugula

In a large bowl, mix together tomato, onion and garlic.  Pour olive oil and lemon juice over top and toss to fully coat.  Add in chopped basil and tarragon, and season with salt and pepper, tossing to evenly blend all ingredients.  Taste and adjust seasoning as needed.  Toss with arugula and serve.

Panzanella Croutons

Ingredients:
1/4 cup butter (use Earth Balance margarine or coconut oil for dairy free)
1 Tbsp garlic, minced
6 cups cubed French Bread
Kosher salt & pepper, to taste (I've also added some herbs de provence, as well)
6 Tbsp grated Parmesan (can substitute vegan parmesan for dairy free)

Preheat oven to 375 degrees.

Melt butter in a skillet over medium high heat.  Add garlic and cook for 1 minute.  Add breadcrumbs and toss to evenly coat.  Season with salt and pepper and pour bread out onto a baking sheet.  Sprinkle with the grated Parmesan, tossing to coat, and bake for 8 or 9 minutes, stirring occasionally to prevent burning.  Allow to cool before tossing with the rest of the salad.


Thursday, June 20, 2013

Baked Spicy Brown Sugar Salmon with Roasted Vegetables

Salmon is a go-to protein around here, as the Mister isn't a huge poultry fan and I don't eat very much red meat or pork.  So I'm always on the hunt for new and exciting preparations for this tasty piece of fish, and one of my current favorites is this baked salmon with a spicy brown sugar rub.  We made it for some friends for Easter dinner this year, and it had everyone ooo'ing and ahh'ing.  And there's really nothing better to serve with this dish than a simple medley of roasted vegetables.  We all know yellow squash is divine when roasted up, but certainly don't miss out on roasting this week's yellow squash along with the tomatoes, as the flavor just explodes.  For those of us without access to a proper grill, it's the closest we can get to some lovely charred tomatoes.


Baked Spicy Brown Sugar Salmon with Roasted Vegetables


Ingredients:

4 salmon fillets
olive oil
1/4 cup brown sugar
1/2 tsp paprika
1/2 tsp garlic powder
1/4 tsp Kosher salt
1/2 tsp pepper
1/2 crushed red pepper flakes
3 yellow squash, halved and sliced into half-rounds
2 tomatoes, halved and sliced into wedges
1 bunch asparagus, ends trimmed
2 broccoli crowns, chopped
1/2 lemon, juiced
salt, pepper & garlic powder, to taste

Preheat oven to 425 degrees.  In a small bowl, mix together brown sugar, paprika, garlic powder, salt, pepper and red pepper flakes.  Drizzle salmon fillets with olive oil and then evenly distribute brown sugar rub onto fillets, gently massaging the rub onto all sides of salmon.  Place in a baking dish and bake for 20-25 minutes.  If you want a bit of a crispy crust, reduce cook time by a few minutes and place under the broiler on high and allow sugar to begin to bubble and caramelize.

Spread veggies out on a baking sheet, drizzle with olive oil, sprinkle with lemon juice and season to taste with salt, pepper & garlic powder.  Or for an added zing, reserve some of the salmon rub to sprinkle over veggies.  Bake also at 425 for 20-25 minutes, turning half-way through, until veggies begin to brown.


Thursday, June 6, 2013

Chicken Shawarma at Home

Having a best friend who's mom owns an amazing Lebanese restaurant (if you're ever in Youngstown, OH you need to beat a path to Samia's Phoenician Grill and prepare for food bliss), tends to make one slightly obsessed with Middle Eastern food, and also rather picky.  I'm pretty sure my body is about 75% hummus.  So being out here in the DC area and missing Samia's amazing chicken shawarma wraps, a gal has to improvise and try to recreate the magic at home.  It took some trial and error, but finally I stumbled upon a great base recipe from The Shiksa In The Kitchen and soon the Mister and I were on Cloud 9...if Cloud 9 is a delicious shawarma cloud.  While pickles and grilled or sauteed onions are a traditional must, we also love to add some slices of fresh tomato.  So slice up and seed one of the tomatoes you get and slap those babies on some homemade chicken shawarma.  All the fun of take-away without ever having to leave your home!

Chicken Shawarma at Home


Ingredients:

For chicken:
2 lbs boneless, skinless chicken breast
1/4 cup extra virgin olive oil
3/4 tsp salt
1/4 tsp black pepper
2 tsp cumin
2 tsp paprika
1 tsp allspice
3/4 tsp turmeric
1/4 tsp garlic powder
1/4 tsp cinnamon
Pinch cayenne
Salt & black pepper

For garnish:
1 sweet onion, halved and sliced thin
1 tomato, sliced and seeded
Dill pickle spears (to make your own, see our Nalls' Kitchen recipe here)
Pita for wraps (If anyone knows of gluten-free pita, please tell me!!  We had to use GF tortillas, whomp whomp.)


For garlic sauce:
1 head garlic, roasted
1 cup sour cream (We use our dairy-free Tofutti sour cream, but plain Greek yogurt would also work great!)
1/2 lemon, juiced


Slice chicken into strips and place in a marinating dish or large plastic, well-sealing bag.  In a bowl, whisk together 1/4 cup of olive oil and all the spices for the chicken marinade.  Pour over chicken and toss to completely coat each piece.  Cover the dish/seal the bag and place in the fridge for at least 1 hour or even better, overnight.

Preheat oven to 400.  Slice off the top of a head of garlic to expose the tops of the cloves.  Place on a baking sheet or into a muffin pan, and generously drizzle olive oil over the top.  Bake in oven for 30-35 minutes, or until cloves are soft and golden.  Set aside to cool.

Heat 1 Tbsp of olive oil in a skillet (or on a stovetop grill pan) over medium high heat.  Add in marinated chicken and saute until chicken is browned and cooked through.  Remove from pan and dice into small shawarma-like pieces and pop back into the pan for another minute just to flash sear and flavor the newly exposed parts.  Remove from pan and set aside on a plate lined with a paper towel to absorb some of the excess oil.

In the same pan (add an additional Tbsp of olive oil if needed) add in sliced onion and saute for 2 minutes.  Remove from heat and allow the onions to continue to soak up some of the residual seasoning from the chicken.

For the garlic sauce, remove roasted cloves by squeezing into a bowl and mash with 1 cup of sour cream, taking care not to get any garlic skins into the bowl.  Add the juice of 1/2 a lemon and stir to incorporate.

Now...shawarma....assemble!!!

Grab whatever carb-o-licious vehicle you're going to place all this goodness on,  add a portion of chicken, some onions, a few slices of tomato, a pickle spear or two and top it all off with a dollop of garlic sauce.  Get generous with that garlic sauce, because it's not enough until you're sweating it out.  Make sure your loved ones do the same so everyone's garlic aroma will cancel each other out.  ;)


Recipe adapted from The Shiksa In The Kitchen: (http://theshiksa.com/2012/08/15/chicken-shawarma/)