Showing posts with label garlic. Show all posts

Saturday, January 31, 2015

Last Minute Idea For the Big Game

One last little thought for game day snacks.  This idea uses lots of things from your box, too.  Let's see... grape tomatoes and red onion... maybe pick up a focaccia loaf... some olive oil...
Photo via Epicurious
Bruschetta!!

Variations on this antipasto dish exist all over Italy.  Some add olives, some add cured meat, all toast the bread either with or without toppings.  The simplest version involves mixing tomatoes, finely shredded basil, garlic, salt, pepper and olive oil, and piling that on top of thin slices of toasted bread.  Variations on the theme:

    Photo via Food & Wine

1. Keep it simple.  Or use focaccia.
2. Use a blend of herbs.
3. Add some prosciutto.


Now, I think, we're ready for the game!

Wednesday, January 28, 2015

The Superbowl Is a Cooking Holiday


I've read somewhere that the typical American consumes more calories on Superbowl Sunday than on Thanksgiving Day.  Seeing what's typically on the table at game time, I believe it.  While, in my book, Game Day has to involve wings and such, there can also be some veggie-based components present.  So if we have some wings, and then some veggies... it all balances out in the end, right?

Don't let your game day spread look like this!
I'll just let myself believe that.

Valerie does a pretty great job every year in putting together a box that supports game day snacks.  I'm positive this year won't be an exception.  In all the years in which I've been a crop share member, there has always been at least an avocado or two in the box.  So, let's talk about guac.  This is the easiest of the game day items.

Photo via Pioneer Woman
According to Wikipedia (which is never wrong, right?), guacamole had its beginning with the Aztecs.  Modern day guac in its most basic form is just mashed avocado with sea salt and lime juice.  Variations on the theme can also include diced tomato, minced onion, minced garlic or garlic powder, cayenne, chili peppers of some sort (Jalapeño, Serrano, or Habañero most typically), or finely chopped cilantro.  Pick the items of your choice, but remember that the avocado is the item to feature.  Other accouterments are just to accent, so don't overdo it.

Photo via Cristina Ferrare
Save one of the avocado pits, and include it with your guac in a sealed bowl until you're ready to serve it.  The pit will significantly slow the avocado from browning.

You can also have some more creative variations, too.  Try adding a bit of tequila, grilled corn, or some tart pomegranate or green apple to cut the creaminess of the avocado.  Everything is better with bacon, right?  Here is another idea that straddles the line between salsa verde and guacamole, but is utterly amazing.

Photo via Food & Wine

Tuesday, July 15, 2014

On Being a Tomato Groupie

Last time we talked about pizza,  and the time before about family secret recipes, and it got me thinking about what other honors could be given to a tomato.  Red sauce is a coveted secret in the kitchen of every Italian grandmother, right?  And not being Italian, I had to get mine off the TV.  That's okay, it still kicks butt!

Being a "Groupie"
I'm a big fan of Anthony Bourdain.  For those of you who aren't, he's an author-turned-television chef.  If you've never read Kitchen Confidential, get it.  Read it.  You can even find it at the public library.  Fantastic look behind the scenes of fine dining establishments, in quite the irreverent vein.  There's an awesome passage where he describes tasting his first oyster at the age of 9, comparing it to... well, I won't give it away.  But I bring this up because I've learned a lot from both watching his television show and reading his cookbook.  Yes, actually reading his cookbook.  You'll both learn, and laugh your butt off, through the whole thing.  The couple of pages he has on making stock are alone worth the cost of the book.

Why am I bringing it up?  Because watching his show is how I learned to make red sauce.  Granted, I've tweaked it along the way.  It's the go-to recipe that I can make by heart using a grand total of about 4 brain cells.  Here's what I do:
Photo via Travel Channel

Ingredients

  • 4 cups diced Roma tomatoes, either fresh (blanched and peeled) or home-canned
  • 1/3 cup decent olive oil
  • 1 large sprig fresh basil
  • 2 large sprigs fresh oregano
  • 1 teaspoon minced garlic (more or less to taste)
  • 1 1/2 tablespoons butter or margarine
  • healthy dash red pepper
  • salt & pepper to taste (but don't use much)
Directions

  1. Steep the herbs in the olive oil over gentle heat for 10-15 minutes, then strain and discard the herbs.
  2. Add the garlic,  and tomatoes to the oil, mash with a wooden spoon, and cook over medium heat for 10-15 minutes until the consistency is a thick sauce.  Add the butter and stir until melted.  Ta da!
  3. If you're using it with pasta (okay, yes that's a blinding flash of the obvious), let the noodles cook their last minute or two in the sauce along with 1/2 cup of pasta water.  You want to aerate the noodles while they cook in the sauce.

Photo via Epicurious

So, let's take a look at some other types of tomato-based sauces.  Marinara is a classic.  One of my family's favorite recipes is this one for chicken in an herby French sauce made from cherry tomatoes. This Provencal chicken stew has a beautiful tomato sauce as well.  Yes, even the humble Sloppy Joe should have a beautiful, rich tomato sauce.  Of course, the most glorious use for tomatoes (after, of course, deep dish pizza) is my Nirvana:  cioppino.  (Let me know if you ever go to San Francisco, I know the greatest place!)
Photo via The Old Clam House

Wednesday, April 23, 2014

Southwest Stuffed Peppers

I actually whipped up these stuffed peppers last week as my even lighter and more veggie-tacular version of the Cream Cheese Chicken Enchilada Stuffed Peppers, but failed miserably at actually getting this to the blog.  But we got onions and there's onions in this recipe, so hey it's still relevant!  Especially as we head into summer with all the squash and corn, this will be a great way to use it all up.


Southwest Stuffed Peppers


Ingredients:
2 tsp olive oil
2 cloves garlic, minced
1 onion, sliced
5 green peppers, 1 sliced, 4 hollowed and lids removed to prepare for stuffing
2 cups corn (or 1 can)
1 yellow squash or zucchini, sliced (if you have a zoodler or a julienne peeler, use that!)
1 1/2 Tbsp cumin
1 can black beans, rinsed and drained
1 chicken breast, cooked and shredded (great for leftover chicken or rotisserie chicken)
1 cup chicken or vegetable broth
8 Tbsp salsa (be fancy and make your own Homemade Salsa)
1 Tbsp lime juice
1/2 cup, plus extra, shredded cheese of your choice (we use Daiya cheddar for dairy-free)
1/4 cup cilantro, chopped
Salt & pepper, to taste
Hot sauce, to taste -- optional


Preheat oven to 350 degrees.

You'll want to prep all of your veggies first, that way this recipe goes at light-speed.  It makes a TON of filling, so you can easily freeze any extra that won't fit in your peppers and use later for enchilada stuffing or bring it up to a boil with some stock and diced canned tomatoes for a filling soup.

Prep them veggies!

In a large skillet, and I mean large, heat olive oil over medium high heat.  Add in garlic and saute for about 1 minute or until fragrant.  Add in onion and pepper and saute for about 3 minutes.  Add corn, yellow squash and cumin and saute for an additional 3 minutes.  Next, pour in beans, shredded chicken, broth, salsa and lime juice.  Bring to a boil, then reduce heat and simmer until no liquid remains.

Stir in cheese, cilantro, and any hot sauce if you'd like a kick.  Then season with salt & pepper, to taste.  Remove from heat.

Take your 4 hollow peppers and stuff each with generous portions of the filling and top each with a sprinkle of cheese.  Place upright into a baking dish and bake at 350 for about 20-30 minutes, until skin on peppers starts to shrivel at top and look wrinkly and the cheese on top is nice & bubbly.


Tuesday, April 15, 2014

Spring's Bounty Soup

I came across this recipe for "Spring Celebration Soup" in one of my cookbooks, and while I figured it would be fitting to give this one a try since Spring is officially here, I looked at the ingredients and thought, "This is going to taste like the color green."  So I decided to make it!  Because if you don't have a kitchen fail every once in awhile your husband might forget the gloriousness of take-away!  I switched up some of the veg to cater to what was in our Crop Shares this week, and then I decided to really go off the rails and use the carrot greens in place of the parsley required for this soup.  I really thought about calling this the Waste Not Want Not Soup since there are very few kitchen scraps that come out of this one, and hey if you have the carrot greens, why not use them!  As an aside, Crop Share member Deanna Freedlander has a fantastic recipe for Carrot Top Pesto that she puts over spaghetti squash.  Since squash season is on it's way out, just use regular pasta or even turn your yellow squash into "squoodles" (if you have a sprial cutter or a juillene tool that will cut thin noodle-like strips, just saute those in a little bit of olive oil for a few minutes and ta-da veggie pasta!).

Once I'd finished the soup, I took one look at it and thought, "what have I done?!"  But once I tasted it, is was surprisingly good!  It didn't taste like the color green, it was refreshing and even filling.  So...I had another bowl.  Thus if you're looking for something bright and fresh, that is so chock full of veggie goodness it would make a vegan blush, then this is the soup for you.  And if your spinach is starting to look a bit sad by today, this is a great way to use it up since it's getting pureed in and looking wilty won't matter.


Spring's Bounty Soup


Ingredients:
1 Tbsp olive oil
2 cloves garlic, minced
1 bundle green onions, chopped (and hang onto the stem ends and start to re-sprout them as we did with the romaine here!)
4 carrots from bundle, skinned and diced
Carrot greens, minced
1 bundle asparagus, chopped
5 cups low sodium vegetable or chicken stock
3 Tbsp lemon juice
1/2 bundle of spinach, stem ends trimmed at root (see our trick for perfectly clean and grit-free spinach)
1 cup milk (I used unsweetened rice milk for dairy-free)
Salt & pepper to taste


In a stock pot, heat olive oil over medium high heat and add in garlic to saute until just fragrant, about 1 minute.  Add in green onions and carrots and saute for 5 minutes, then add carrot greens and asparagus and cook for an additional 3 minutes.  Pour in stock and lemon juice, and bring to a boil.  Reduce heat slightly and simmer, uncovered, for about 5-7 minutes.  Add in spinach and simmer for 2-3 minutes more, just long enough to wilt down the spinach.

If you've got an immersion blender, this is where it becomes your best friend.  Break that baby out and start to puree the dickens out of this soup -- just make sure to pull it off the heat, unless you're really a fan of hot soup burns.  If you don't have an immersion blender, you'll want to use a measuring cup to puree up about 2 cups of the soup at a time, and you'll need a holding pot or bowl for the already pureed portions, as you'll be returning everything to the main pot.

Once pureed, return to heat and bring back to a simmer.  Stir in your cup of milk, and season with salt and pepper to taste.  Simmer for an additional 3-5 minutes, and then remove from heat and let stand for the same amount of time, to let the flavors set up.  Taste and adjust seasoning if needed.

Serve with crusty bread (the baguettes at Nalls on Fridays would be PERFECT).  Or if your immune system hates gluten like mine does, make sad puppy eyes at the baguettes and then pick up some gluten-free bagel chips or crackers.  Glutino makes some killer rosemary crackers.


Adapted from Simply In Season by Mary Beth Lind & Cathleen Hockman-Wert


**Speaking of all things Spring, don't forget next weekend (4/25-4/26) is the LAST weekend of the Early Spring Crop Share round.  But don't despair, the Spring Round will kick off on May 9th, so be sure to grab a registration form when you're picking up this weekend.  They've got more details on the Crop Share portion of the website...**


Sunday, March 23, 2014

Curried Chickpeas, Potatoes & Collards

As local comedian Remy once rapped, "Hit me, hit me, with a little chickpea!"  While he was talking about hummus, I can pretty much agree, all chickpeas should come my way in any shape or form.  They do look like cute little elf butts, which actually is disturbing if I ponder it too long.  Anywho!  I found myself in yet another raid on my pantry to try and concoct something from the random ingredients I had on hand.  I refused to make a grocery run just so I could make lunch for myself, and there was that lonely can of chickpeas in the pantry that had been let down so many times lately when I didn't reach for it.  Not today, today chickpeas you will be chosen!  I grabbed some Dizzy Pig Curry-ish seasoning (snag some in the store at Nalls!), a small can of tomato paste, and wishes and hopes for a yummy dish.  Then it dawned on me...use...the...collards!  Collards are hands down my favorite greens.  That's right kale, you've been replaced!  Soon I had a simmering curry on my stove, chock full of chickpeas, collards and potatoes, and oh it did not disappoint.  Can of chickpeas, your sacrifice was acceptable!


Curried Chickpeas, Potatoes & Collards


Ingredients:
2 Tbsp olive oil
2 cloves garlic, minced
1 baking potato, cubed
1 bundle collards, removed from stem and torn
15 oz can chickpeas
3 Tbsp Dizzy Pig's Curry-ish seasoning or other curry blend
6 oz can tomato paste
3 cups water

In a large saute pan, heat olive oil over medium high heat.  Add garlic and cook until fragrant, about 1 minute.  Add in potatoes and cook for about 4 minutes until you start to get just a little golden brown on some of the potatoes.  Toss in collards in batches and allow to wilt down, and be careful as they love to snap, crackle and pop in the oil, so you may want to grab a lid for the skillet just for safety (SHIELD WALL!!!).

Once collards are fully wilted, stir in chickpeas and cook for about 2 minutes.  Then add in your curry powder and tomato paste, stirring to fully coat everything and allow it to brown just slightly on the bottom of the pan.

Stir in water, making sure to scrape any browned bits off of the bottom of the pan.  Bring to a slight boil, cover,  lower heat and allow to continue simmering for at least 30 minutes.  Add more water if sauce seems to thick or allow to simmer longer if sauce seems to watery.  Remove from heat and serve as is or serve over top of quinoa, with naan, or over rice.


Lemony Shrimp & Broccoli Over Roasted Cabbage

One good thing about being gluten free is it really forces you to rethink bases for dishes.  You can't throw everything into a pita or onto just any ol' pasta. While I've found some incredible GF pasta's, and there's always the good ol' standbyes of rice or quinoa, I like to get creative with veggies to take the place of traditional starches.  Thanks to my friend Natasha (check her out over at Tash's Noshes - and we'll see more from her in a little bit), I'm OBSESSED with "zoodles."  Zucchini sliced thin into noodles and cooked up with just a titch of olive oil and then dressed as you would any pasta.  But the other veggie that has become my jam for a base is...cabbage.  I'm pretty well convinced that I could eat anything if it was put on top of roast cabbage ribbons.  So when I got to the end of the week and I still hadn't used up the cabbage from our St. Patrick's Day boxes (I know, I should be arrested by the Irish police for not making cabbage-something last weekend), I knew I needed to act fast.  I'd thawed out some shrimp and we had that lovely broccoli, so I vowed to somehow make all these things play nice together.  And play nice they did!

Lemony Shrimp & Broccoli Over Roasted Cabbage


Ingredients:
2 Tbsp olive oil
1 clove garlic, minced
1/2 broccoli crown, chopped
Handful cherry tomatoes, halved
2 lbs shrimp, fully cooked and thawed
Juice of 1 1/2 lemons
Zest of 1 lemon
Dash of red pepper flakes
Salt & pepper to taste
See Simple Roasted Cabbage for cabbage portion of recipe


Start preheating your oven and prep your cabbage, according to the above recipe, so that it can cook while you whip up the rest of the dish.

In a skillet over medium high heat, heat your olive oil and then add your garlic.  Cook for about 1 minute or until fragrant.  Add in your broccoli and cherry tomatoes and cook until tomatoes are soft and skin begins to peel, about 5 minutes.  Add in shrimp and toss to fully incorporate, then add your lemon zest and juice and stir to blend all the flavors.  Cook for an additional minute or two, just long enough to heat shrimp fully through.  Season with red pepper flakes, salt & pepper.

Serve over top of the roasted cabbage.


Tuesday, March 11, 2014

Ginger Beef with Green Beans & Mushrooms

Last Friday I whipped up the Szechuan Noodles with Cabbage & Broccoli and you know if you've made it before, it makes a TON of sauce, so you always have about a l/2 pint of it in reserve to use for another dish.  I'd always thought it would make an amazing beef marinade, so I gave it a whirl!  Knowing we were getting green beans in the Crop Share, I couldn't resist grabbing a pint of mushrooms, to turn this into a spicy and fragrant version of some homemade Chinese take-away.  So if you're looking at this week's green beans and all you can think of is green bean casserole, then plan to give your favorite Chinese restaurant the night off and whip up your own take-away at home!

Ginger Beef with Green Beans & Mushrooms


1.5 lbs thin sliced beef (I used eye of round)
Half of the Szechuan Noodles sauce (see recipe here)
2" knob of ginger, minced
1 pint mushrooms, washed and sliced
1 lb green beans (about half the bag from the Crop Share), rinsed and ends snapped
1 Tbsp chili oil
Noodles or rice for serving, we used rice noodles for gluten-free


In a large bowl, toss the beef, sauce and minced ginger to fully coat the beef.  Cover and place in fridge to chill and marinate for at least 1 hour.

Once beef has marinated, remove from fridge and allow to come up to room temp while you prep your mushrooms and green beans.

In a large skillet or wok, heat chili oil over high heat.  Once oil is hot, toss in mushrooms and green beans (taking care to watch our for oil splatters) and cook for about 1-2 minutes, continually stirring or tossing with tongs to prevent burning.  Then add in your beef and all of the sauce and ginger,  and cook until you can no longer see pink on the beef and meat is just slightly browned.  It's best to use tongs to help stir and toss at this point.  Remove immediately from heat and serve with rice or noodles.  We stirred our rice noodles into the skillet and allowed to sit for a few minutes to allow the sauce to flavor the noodles.


Estofado de Pollo: Chicken Stew

If you can somehow keep yourself from just boiling up this week's corn and not just eating piles of corn on the cob, then reserve the kernels from 4 of the ears and get ready to whip up a quick, Mexican style stew, that is perfect served with some tortillas to sop it all up.  You can add another cup or 2 of liquid and a Tbsp of tomato paste if you want to really turn this into a soup style stew, otherwise think of this as more of a pulled pork consistency but with more tomatoes and corn than you can shake a stick at.  I love to lay out some of the tortillas on a platter and spoon the stew over top to serve this family style.  You could even use this as a stuffing for any baked enchiladas or taquitos, or serve it with large leaf lettuce for some healthy lettuce wraps!


Estofado de Pollo: Chicken Stew


Ingredients:
1 Tbsp olive oil
2 Tbsp garlic, minced
3 tomatoes, diced
4 ears corn, cooked and removed from cob
1 chipotle chili in adobo, diced
1 small can salsa verde
2 cups yellow cherry tomatoes, halved
2 cups cherry tomatoes, halved
1 cup reduced sodium chicken stock
2 cups shredded, cooked chicken (great for using up leftover chicken or rotisserie chicken)
1/2 cup shredded cheese of your choice (optional)
Kosher salt & pepper to taste
1 Tbsp cilantro, chopped
1/2 lime
Corn tortillas

In a large stock pot, heat olive oil over medium high heat.  Add in garlic and saute for about 1 minute, until fragrant.  Add in diced tomatoes and corn and stir to blend.  Toss in 1 diced chipotle chili, with about 1 tsp of the adobo sauce, and then your salsa verde and the rest of your tomatoes.  Cook for about 2-3 minutes and then pour in chicken stock.  Bring to a boil and simmer down for about 4-5 minutes.  If you're making this more of a soup type stew, add in 2-3 cups of stock plus 1 Tbsp of tomato paste, and simmer also for 4-5 minutes.

Stir in your shredded chicken, and season with salt & pepper to taste.  You can either stir in any cheese to help thicken the sauce, or use it as a garnish over top.  Garnish top of stew with cilantro and the juice of 1/2 a lime.  Serve with corn tortillas to scoop up the stew.


Wednesday, February 26, 2014

Vietnamese Beef Salad

There were just a few carrots in the Crop Share this week, and by a few I mean a ton.  And while I thought about a carrot soup, it was too cold and snowy yesterday after all of the beautiful Spring weather, so I had to just delude myself a little longer and make something bright and fresh that made me think of the warmer temps to come.  If you'll remember, a few weeks back when we got cabbage I did my own Vietnamese twist on TaKorean "takos".  So last night I just left out the arepas all together, tweaked a few of the ingredients, and made up some delicious Vietnamese Beef Salads.  If you're looking to make a dent in your carrot supply and ignore the continued snow, these salads are where it's at!

Vietnamese Beef Salad


For the pickled slaw:

1 cup water
½ cup apple cider vinegar
½ cup sugar
½ cabbage, cored & thin sliced
1 cup cilantro, minced
4 carrots, peeled and shredded


For the spicy garlic beef: 

1/2 cup soy sauce (I use Kikkoman's gluten-free soy sauce)
2 Tbsp Sriracha (use only 1 Tbsp for a lower heat version)
3 Tbsp local honey
1 Tbsp garlic, minced
1.5 lbs thin sliced ribeye (if you really want the perfect cut for this or for making bulgogi hit up a local H Mart, it's worth the extra trip -- alas, I did not have the time to make the extra trip)
2 Tbsp sesame oil
1" knob of ginger, minced

Make your slaw a day in advance if possible, if not, just allow yourself at least an hour for the flavors to meld and begin to pickle the veggies.  In a small saucepan, heat the water, vinegar and sugar until the sugar is fully dissolved.  Remove from heat and allow to cool.  Prep your cabbage, cilantro and carrots and then toss into a bowl.  Pour the liquid over and toss to fully combine.  Cover bowl and place in fridge for at least 1 hour up to 24 hrs (the longer it sits the better).

In a medium sized bowl, whisk together your soy sauce, Sriracha, honey and garlic, till fully combined.  Then add in your sliced ribeye and toss to coat.  Cover and place in fridge to marinate for at least 1 hour.

In a large skillet, heat your sesame oil over high heat, but take care to not allow it to burn.  Once you start to see little bubbles in the oil, toss in your minced ginger and cook for no longer than 1 minute.  Pour in your beef, marinade and all, and toss with tongs to cook.  Cook beef on high heat until you can no longer see pink on the meat, and no longer otherwise you're going to have chewy bits of beef.  Remove cooked beef from skillet and set aside on a plate.   Continue to simmer down remaining marinade in the skillet until it's turned into a thicker, sticky sauce.  Remove from heat and add beef and any drippings back to pan, tossing to fully coat the beef.

To assemble, place a mound of the slaw on each plate and top with some beef.  Drizzle any of the pan sauce over top if you'd like and serve.  You can also cook up a cup of rice if you feel like you need a starch with this too.


Sunday, February 23, 2014

My Crop Share Challenge: Stewed Collards with Apples

So a little late on last week's Crop Share Challenge, but ah well.  The two random items from last week's share I chose to pair together were collard greens and fuji apples.  In theory, this should work, but will the bitterness of the greens over power the apples?  Will it turn out too sweet for a side dish?  Will my insistence on adding garlic to every blessed dish be a very bad idea here?  Let's find out!

Stewed Collards with Apples


Ingredients:
1 Tbsp olive oil
1 clove garlic, minced
1 small bundle collards, removed from stem and shredded into more manageable bits
2 Fuji apples, peeled, cored and diced into 1/2" cubes
1/8 tsp red pepper flakes
Pinch of Kosher salt
2 cups water

In a medium sized skillet heat olive oil over medium-high heat.  Add in garlic and apples and saute until the apples just barely start to golden, about 2-3 minutes.  Add in collards and wilt completely down.  Season with red pepper flakes and salt, and cook for an additional minute.  Add in water and allow to come up to a boil.  Reduce heat to medium and simmer for 30 minutes.


After about 25 minutes, all of the liquid should be gone.  I thought about pulling it from the heat, but apparently the food sadist in me felt that 5 more minutes was what this dish needed.  So I let it brown up for the additional 5 minutes, stirring occasionally to brown everything evenly and prevent burning.  Once you hit minute 30, pull from heat and serve.

Results...

Oh goodness me the results have rendered my newest collards obsession.  Yes, even better than the Collard Greens Pesto from the other night.  I ate the entire thing myself, which if I'm going to spoil my dinner, might as well be with something like this.  But it would make a fantastic side to a roast pork tenderloin, or oooo roasted duck breast.  Or snag some chicken sausage and sear those up to serve with this for that whole apples & sausage thing.  Am I the only one that thinks any form of sausage should be served with apples or some sort of fruity sweet thing?  This is what happens when your parents let you dip your sausage links into grape jelly as a kid.  Mama & Da, you rock!  So yes, for those of you that are like ewww I hate collards, they're so bitter.  Chuck some apples at those greens and trust me you will fall in love.

Move over kale...collard greens are the new green kid in town!


Stay tuned for this week's Crop Share Challenge because I've decided to pair the beets with the blood oranges!  Both look like a homicide on your cutting board, so why not?!


Bayou-ish Jambalaya with Blackened Cauliflower

The awesome folks at Dizzy Pig are getting ready to release a new seasoning called Bayou-ish, so they sent out some samples to vendors to test out.  Well, one of the Nalls' samples trickled its way down to me so last night I gave it a whirl.  Now when I see "bayou" anything I want andouille sausage and shrimp.  Basically, I want jambalaya.  But we didn't exactly get the traditional jambalaya veggies in the Crop Share this week, so I cheated a bit.  So yes, before Emeril or any other Cajuns out there come after me with pitchforks, I do realize that "the trinity" is completely absent from my jambalaya and I may be committing a mortal sin by even calling this dish "jambalaya."  But, I try to work pretty close with in the parameters of what we get each week so that I or any of you don't have to go out and buy 50 other items of produce.  So please forgive me and I trust if one of you glorious Cajun's ever devise gluten free beignets you will not withhold the majesty from me.

Now a little bit about this Bayou-ish seasoning.  It's intended to withstand high heat, so if you're a fan of blackening fish or chicken, this is the way to go.  If I knew I wouldn't kill the Mister and myself with the smell I would have mixed this up with some gluten & dairy free breadcrumbs, breaded up some catfish and seared the heck out of it.  So instead, I went with my cheaters jambalaya and to roll in the Crop Share I did blacken up something, the one item I can only stand if it's cooked into submission...cauliflower.  I roasted that stuff in some Bayou-ish and olive oil at 430 degrees until it started to char, and that is the point in which I can consume cauliflower and not want to spit it out.  The roasted cauliflower really gives a nice hint of nutty sweetness to the jambalaya, and I had enough in my sample to use half of it on the cauliflower and the other half in the base sauce for the jambalaya.  So once they release this flavor, you'll be able to make this entire dish from one sample pack.  Problem is, then you're out, and I'm already dreaming up some Bayou-ish spiced shrimp po'boys with a vegan remoulade mixed with some more of the Bayou-ish.  Also, their seasonings are lower in sodium than most other seasoning mixes, but you don't feel like you're missing anything.  All I did was throw in a dash of salt at the very end and that was the only other additional seasoning I needed to add!

So what do you do in the meantime if you want to make this dish?  Grab yourself any all-purpose Creole seasoning from the store and give it a go.

Bayou-ish Jambalaya with Blackened Cauliflower


For the blackened cauliflower:
1 head of cauliflower, chopped
1 Tbsp olive oil
2 tsp Dizzy Pig Bayou-ish seasoning

For the jambalaya base:
1 Tbsp olive oil
2 cloves garlic, minced
1 sweet onion, chopped
12 oz andouille sausage, sliced on the bias
1 lb shrimp
6 oz tomato paste
2 tsp Dizzy Pig Bayou-ish seasoning
2 cups water
2 cups rice, just undercooked
2 Tbsp lemon juice
2 Tbsp parsley, chopped
Pinch of Kosher salt

Preheat oven to 430 degrees.  Toss cauliflower in olive oil and Bayou-ish, and spread evenly in a baking dish.  Bake for 30-45 minutes until it has started to char a bit.

While the cauliflower is roasting, prepare 2 cups of rice according to package directions and remove from heat just a few minutes early to leave it slightly undercooked as you're going to finish it in with the rest of the ingredients.

In a large saute pan, heat 1 Tbsp olive oil over medium high heat.  Add in garlic and onion and saute until the onion is translucent, about 2-3 minutes.  Toss in sausage and cook until slightly browned.  Add shrimp and cook for an additional minute.  Stir in tomato paste and Bayou-ish seasoning until well blended and cook for 2 minutes until you start to get a bit of a char on the bottom of the pan.  Deglaze with 1 cup of water, scraping all the bits off the bottom and then add the second cup of water.  Bring to a simmer and add the rice, folding in to fully incorporate.  Reduce heat to medium low and simmer for 10 minutes.

When cauliflower is done, add that along with any of the pan drippings to the jambalaya.  Stir to fully mix, and add lemon juice, parsley and a pinch of Kosher salt.  Now I like to get a bit of a crust on the bottom, so for this you'll want to kick the heat back up to medium high for about 3-5 minutes and just take care to not completely burn the bottom of the jambalaya, you want a nice golden brown crust.  Or just leave on medium low heat and let the flavors set up for that remaining 3-5 minutes.  Remove from heat and let stand for at least 3 minutes before serving.


Presto Pesto: Collard Greens In My Pesto!

Are you tired of me making pesto out of every green thing yet?  Hope not, because this past week, as I was wading through the sea of collards we got in the Crop Share, (Early Spring registration just opened so swing by Nalls on a weekend to snag a new registration form!) I decided to give a go at that Collard Greens Pesto recipe from Southern Living that I'd previously posted.  But I didn't want to have to run back to the store to get pecans and I really didn't even want to blanch those collards because I don't cook the basil before it goes in my pesto, and then it's just another pot to clean.  So I just did my usual base recipe for pesto but threw in a whole bundle of collards in place of the basil, and crossed my fingers for luck.  Oh...my...gosh!  Soooo good!  It may actually be my favorite pesto and the Mister even thought it was incredible.  So if you're still trying to use up all the collards from last week, MAKE THIS PESTO!  I also did not have pasta, so I mixed ours in with a 1 lb of mushrooms that were sauteed in white wine, butter & olive oil, some shredded thigh and leg meat from a rotisserie chicken, and 2 cups of cooked white rice, added another splash or two of white wine and a pad of butter and just let it all simmer down till nearly all the liquid was absorbed.  You can see the final product below, but I'm not including a recipe for the full dish as it was one of those throw in a bit of this bit of that and nothing got timed or measured.

Collard Greens Pesto


Ingredients:
1 cup roasted, unsalted almonds
2-3 cups collard greens, removed from stem and ripped into smaller pieces
1/2 cup basil leaves, removed from stems
1 cup olive oil
6 cloves garlic
3 Tbsp lemon juice
Kosher salt to taste


In a blender or food processor add all ingredients and blend until fully combined and smooth.  If serving over pasta, you'll want to have a little extra olive oil on hand to toss with the pasta.  Or serve this as I did mixed with sauteed mushrooms, shredded chicken and rice in a white wine sauce.  Would also be great over seafood, chicken, or as a sandwich or appetizer spread.


Wednesday, February 19, 2014

A Fusion Twist On Shrimp & Grits: Cilantro Lime Shrimp with Collards over Cheesy Arepas

I'm still musing over what to do for My Crop Share Challenge this week, and since the brussels sprouts did not want to come out into the blizzard, I'm going to have to re-think my two items.  I got A LOT of collards, so I'm thinking those will certainly be 1 of the 2 items and...wait a tick, hold the phone, some stewed collards with apples.  Yes, yes that's what it's going to be.  I've got a ton of Fuji apples and a ton of collards, why not see if they can play nice together!

But, before we get to those, let me show you what was served up for dinner last night.  I'd seen this recipe for Cilantro Lime Shrimp from Never Enough Thyme and figured I'd wait till we got some of the items needed in an upcoming Crop Share.  But there was that beast amount of collards to contend with, so I figured aww heck just make it and toss in a bundle of collards.  Hmm, shrimp and collards, feels very Low Country.  Hmm, shrimp & grits with collards.  Grits are a cornmeal porridge.  So is polenta, but no, doesn't feel right.  Ugali (see recipe at bottom of this page)?  No.  Oooo, cheesy arepas, it's like cheesy grits pancakes!  And thus Low Country met South-of-the-Border in my kitchen and the results were deeeeeee-licious!


Cilantro Lime Shrimp with Collards over Cheesy Arepas


Ingredients:

1 Tbsp olive oil
1 Tbsp butter
1 sweet onion, minced
1 jalapeno, seeded and diced
1 tsp garlic, minced
1 small bundle collard greens, removed from stem and rough chopped
1/4 tsp red pepper flakes (omit if jalapeno is enough heat for you, or just do 1/8 tsp)
1/2 tsp oregano
1 tomato, diced
2 limes, zest and juice
1/4 tsp Kosher salt
1/2 tsp ground black pepper
1 lb frozen pre-cooked shrimp, thawed in water and detailed
1/2 cup fresh cilantro,  chopped

For arepas -- see recipe for them in Vietnamese Style Tacos and just add a handful or two of your favorite shredded cheese (for dairy free I used Daiya cheddar shreds)


Make arepas first so they have time to set up and cool a bit while you're whipping up the shrimp portion.

Then in a large skillet, heat oil and butter over medium high heat.  Add in onion, jalapeno and garlic and cook for about 3-4 minutes or until onion is translucent.  Add in collards and cook until wilted.  Season with red pepper flakes and oregano and cook for an additional minute.  Add in tomato, lime zest, lime juice, salt and pepper and cook until tomatoes are nice and soft and soupy.  Toss in thawed shrimp and cook for only a few minutes until they are heated thru and have curled up.  Remove from heat and stir in cilantro.

Place 1 arepa on each plate and top with a scoop or two of the shrimp & veggies.


Thursday, February 13, 2014

Collard Greens Pesto via Southern Living

In case you hadn't heard, I'm currently obsessed with pesto (exhibit A, B & C).  So when I ran across this recipe on Pinterest, I knew it had to happen...Collard Greens Pesto!  The Mister and I will be spending the weekend at funeral events, so the Crop Share cooking, especially my new weekly challenge, will have to wait till next week.  But you can bet I'll be whipping up my own version of this Southern Living recipe for Collard Greens Pesto.  And right now for my Crop Share challenge, I'm thinking I'm going to pair the brussels sprouts with the minneola oranges, and possibly throw some celery in there just as an extra curve ball (I'm feeling sportsy after a morning of snowball baseball in our parking lot this morning).  Want to join me in your own Crop Share challenge?  Then either pair together the same seemingly random items I do each week and come up with your own creation, or come up with your own pairing.  Then e-mail your results and photos to me at tara@nallsproduce.com.  For more info on my personal challenge see this past week's post and recipe: My Crop Share Challenge: Swiss Chard Wrapped Salmon With Grapefruit

But for now...MOAR PESTO!

Collard Greens Pesto via Southern Living


Lemon Chicken Orzo Soup via Two Peas & Their Pod

If you've even remotely peeked outside you know this is some serious soup weather we have going on!  And since it looks like possibly a bit more snow tomorrow night at Saturday, we're all going to want to whip up something comforting with our Crop Shares.  So prepare to use up your celery and lemon this week, and check out this bright and delicious looking Lemon Chicken Orzo Soup from Two Peas & Their Pod.

Lemon Chicken Orzo Soup via Two Peas & Their Pod


Wednesday, February 12, 2014

Zucchini Boats Stuffed with Pesto Chicken

I'm currently OBSESSED with pesto.  Earlier in the week I had to make our new favorite, Cilantro Pistachio Pesto, and it just wasn't enough, I needed more.  Luckily, I've begun to cook in my dreams again, and the other morning I awoke after having whipped up some delectable roasted zucchini boats stuffed with basil & almond pesto, tomatoes and shredded chicken.  They say if you can dream it, you can do it, so I made a massive batch of basil & almond pesto (for the base pesto recipe, see our Broccoli Pesto recipe, and either omit the broccoli, or use up the last of this week's broccoli for a double dose of crop share veggies), turned two zucchini into battleships of deliciousness, snagged an extra tomato and rotisserie chicken, and prepared to make my dream come true.  I only used up two of the three zucchini this week, so it allowed for two halves for the Mister & I, and man do I wish I would have just attacked that 3rd zucchini.  But I'm lovingly saving that one to pair with the broccoli, and the rest of the rotisserie chicken in a creamy, dairy & gluten free mac & cheese.  That magic is happening tonight, so stay tuned!  Oh and if you make the full pesto recipe linked above, it makes A LOT.  You only need a cup for this recipe, so save the rest to toss with pasta, pour over some baked chicken or fish, use as a chip or veggie dip, or hollow out a couple tomatoes and cook up a cup of quinoa, and get ready to roast up some stuffed tomatoes with pesto quinoa.  Which if you want a vegetarian or vegan version of these zucchini boats, just leave out the chicken and sub in quinoa, chickpeas, or another protein-packed animal-friendly foodstuff.


Zucchini Boats Stuffed with Pesto Chicken


Ingredients:
2 large zucchini, stem end trimmed, halved and seed section scooped out to make enough room to stuff
1/2 tomato, seeded and diced
1 breast and 1 thigh from a rotisserie chicken
1 cup pesto (for homemade, see our Broccoli Pesto recipe.  I left out the broccoli, but added in 1/2 cup of the zucchini innards, for extra veggie power)
Pinch of kosher salt
Olive oil for drizzling

Preheat oven to 375 degrees.

Lightly rub olive oil onto zucchini boats and place on a baking sheet or in a large enough baking dish.

In a medium sized bowl, shred the cooked chicken breast & thigh meat, and then stir in 1 cup of prepared pesto and the diced tomato.  Add a pinch of kosher salt, and stir to fully combine.  Evenly distribute filling among zucchini boats, and then lightly drizzle tops with a bit of olive oil.

Bake in the oven at 375 for 30 minutes or until zucchini is just soft, but not mushy, and top of stuffing is golden.


Wednesday, January 29, 2014

Guac This Way!

Great news, we're getting domestically grown avocados in this week's Crop Share!!!  AHHHHHHHH!!!!!! That can only mean one thing...GUACAMOLE!  Never has something that looks like rancid baby food ever tasted so very good.  You'll find a ton of recipes out there for guacamole, some of which contain about 15 different ingredients and even hardboiled egg.  Let me stop you right there, right bloody there, egg has no place in guacamole and if you need to add a bevy of seasonings, you are dishonoring the flavor glory of the incredible produce that goes into this dish.  Let the ingredients sing for themselves, as the only help they need is a bit of salt and lime juice to balance things out and bring out the brightness of the flavors.  So what does the guacamole sing when it's done properly?

"So I took a big chance, and gave a second glance, with an avocado that was ready to play.  It wasn't me it was foolin', cos it knew what it was doing, when it told me how to gauc this way!  Gauc this way!  Talk this way!  Gauc this way!  Talk this way!  Just give me chip!"

Yes, that was the guacamole version of Aerosmith's "Walk This Way."  Clearly I can talk the talk, and guac the guac. ;)


Fresh Guacamole


Ingredients:

3 medium avocados, flesh scooped, pitted & mashed
1 lime, juiced
1 tsp Kosher salt
1/2 red onion, diced
1 clove garlic, minced
1 tomato, seeded and diced
1-2 Tbsp cilantro, minced
1 jalapeno or serrano chile, seeded and diced *optional


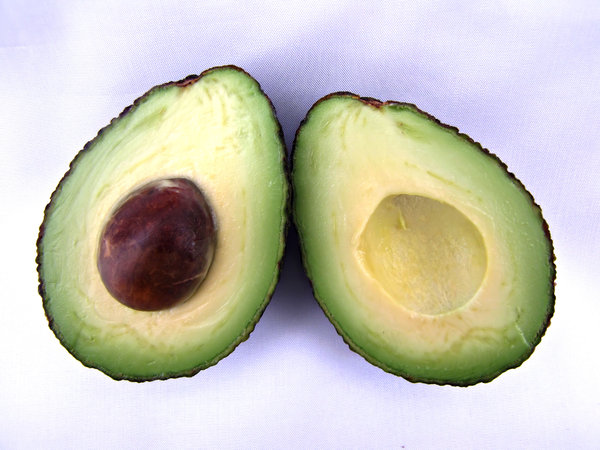
Want to know the best way to get the flesh out of an avocado?  Start by taking your knife straight through it as if you're going to cut it in half, and then just turn the avocado so that you're slicing the whole way around.  Twist each half apart and you'll be left with what you see in the photo above.  Then whack your knife into the pit and pull it out.  Next with your knife, slice three rows down and three rows across through the flesh on each half, and then grab the skin and essentially flip the avocado halves inside out.  The chunks you cut should easily come right out, and it'll save a lot of messing scooping.

In a medium bowl, combine your mashed avocado with all of the ingredients and stir to fully blend.  Adjust salt or lime juice, if necessary.  Serve immediately or really allow the flavors of meld and refrigerate for about 1 hour.  Serve it up the classic way with corn tortilla chips, use it as a topping for burgers and sandwiches, or see our favorite Potato Skins recipe and omit the traditional stuffings and throw in some guacamole or use it along with the bacon and cheese, for a fresh take on a game day classic!

Game on and gauc on!


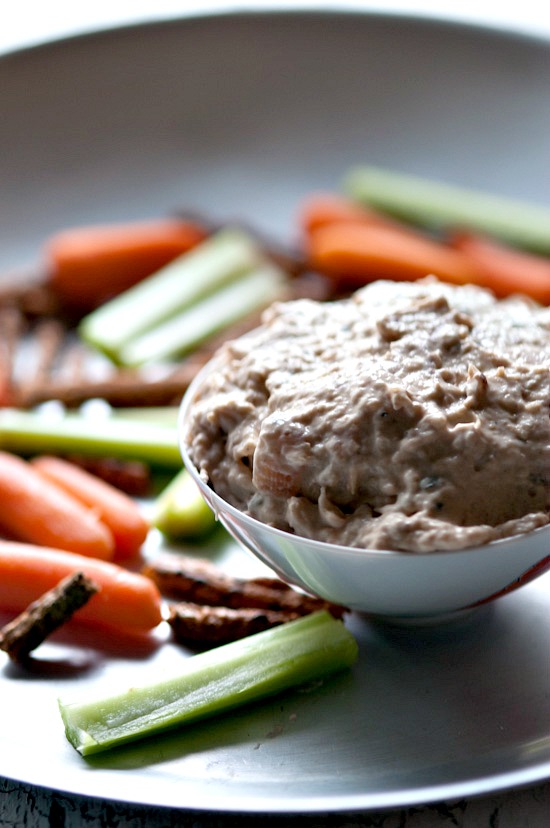
Healthy Caramelized Red Onion Dip via Healthy Green Kitchen

I tend to have a fear of red onions -- long story, but let's blame it on a freshman-year college roommate with horrendous acid reflux and a penchant for subs loaded with raw, red onion.  But when I came across this Caramelized Red Onion Dip from Healthy Green Kitchen, I knew it could make be a believer in "demon onions."  So with Super Bowl Sunday on the horizon, make sure to honor your chips and give them something good and fresh to be dipped in!  If it looks like it's in the same style can as cat food, it's probably wise to leave that on the shelf, and whip up your own easy and healthy onion dip!  Plus, you'll get to put this week's garlic to good use in this dip, too.  Follow the link below to view the recipe...

Caramelized Red Onion Dip


Vietnamese Style Tacos

So when we were going back and forth to Union Market during Christmas tree season, I had to watch in envious pain as everyone, including my own husband, devoured these incredible looking "takos" from TaKorean.  They have found a way to marry traditional Korean flavors and ingredients with one of our favorite Latin comfort and convenience foods...the taco.  But alas, just like most Korean BBQ, none of the offerings at TaKorean are gluten-free thanks to gluten's ability to hide itself in just about every blessed brown marinade.  Curse you gluten!!!  I love tacos and I worship Korean, Vietnamese and Thai cuisine, even if most of I can no longer have.  So after a few odd days of binge watching Korean TV (it should be noted, I don't speak a lick of Korean), I vowed to stop drooling and pouting, because I was going to do some research, follow my culinary gut, and head to the store to procure what I would need for some back to back weeknight delights.  I'm gearing up to make homemade Korean bulgogi with kimchi tonight, but last night, oh last night, I grabbed the cabbage and some of the leftover carrots from the share two weeks ago and set out to create a fusion style taco with all the bright Vietnamese flavors I've been craving (come back to me bahn mi!).  I'd made arepas for the first time earlier in the week, so the Mister begged to have those as the base rather than just a corn tortilla, so these are more open face tacos, or something.  I'm not quite sure what to truly call them other than utterly delicious!  Let's just say I had some again for breakfast this morning!


Vietnamese Style Tacos


For the pickled slaw:

1 cup water
½ cup apple cider vinegar
½ cup sugar
½ cabbage, cored & thin sliced
½ cup cilantro, minced
3 carrots, peeled and shredded
Kosher salt


For the spicy chili beef: 

½ cup sweet chili sauce (I use a brand called Mae Ploy, and can find it at the Giant in Kingstowne)
¼ cup wheat free soy sauce
1 Tbsp Sriracha
1 tsp garlic, minced
1.5 lbs thin sliced ribeye (if you really want the perfect cut for this or for making bulgogi hit up a local H Mart, it's worth the extra trip -- alas, I did not have the time to make the extra trip)
2 Tbsp sesame oil


For the arepas (or if you prefer, just use corn tortillas):

2 cups white corn masa (can be found in the Hispanic food section of most grocery stores)
1 tsp kosher salt
3 cups warm water
Butter for frying (I use Earth Balance margarine for dairy free, but beware it's melting point and it's burning point are much lower than regular butter)


Make your slaw a day in advance if possible, if not, just allow yourself at least 30 minutes to an hour for the flavors to meld and begin to pickle the veggies.  In a small saucepan, heat the water, vinegar and sugar until the sugar is fully dissolved.  Remove from heat and allow to cool.  Prep your cabbage, cilantro and carrots and then toss into a bowl.  Pour the liquid over, and sprinkle with a pinch of two of Kosher salt and toss to fully combine.  Cover bowl and place in fridge for at least 30 minutes up to 24 hrs (the longer it sits the better).

In a medium sized bowl, whisk together your sweet chili sauce, soy sauce, Sriracha and garlic, till fully combined.  Then add in your sliced ribeye and toss to coat.  Set aside and allow to marinate while you prep the arepas.

Next, prep your dough for the arepas.  If you're not familiar with these, they are fried white corn cakes, so think of a crispy, savory pancake.  In a bowl stir together your masa, salt and warm water until there are no more masa lumps.  Allow to rest for 5 minutes.  Melt a tablespoon or two of butter in a skillet over medium high heat.  Take a handfull of arepa dough and pat it out into palm sized rounds about 1/4 inch thick and place into sizzling butter.  Brown each side for about 4 minutes until both sides are golden, then transfer to a separate place to cool.  Once you're about half way through the dough, time things so that you can begin to cook up your beef while a batch of arepas cook.  Then do the fun juggling act of tending to both!

In a large skillet, heat your sesame oil over high heat, but take care to not allow it to burn.  Once you start to see little bubbles in the oil, that means it's ready so pour in your beef, marinade and all, and toss with tongs to cook.  Cook beef on high heat until you can no longer see pink on the meat, and no longer otherwise you're going to have chewy bits of beef.  Remove from heat and set aside to cool.

Finish cooking up all your arepas and then begin the assembly process.  For each serving, place 1 arepa on a plate and top with beef. Use a spoon to drizzle some of the pan sauce over the beef and arepa for extra favor.  Then top the beef with a generous dollop of the slaw, and if you're a heat freak like me, grab that bottle of Sriracha and drizzle some extra over top the slaw.  Devour immediately!

We ended up with more arepas and slaw than beef, so problem solved, they made a delicious meat free pairing sans the beef.  It was my lunch today.  Yes, I've had three meals out of this dish, and I'm debating whether to be a really good wife and let the Mister take leftovers for his lunch on the night shift, or just go for round 4 for my dinner.  I'm not feeling like so good of a wife right now when I know what's hiding in my fridge.  And yes, this reheats superb, just heat an arepa topped with beef for about 30 seconds to a minute and you're set to top with slaw, devour, and repeat!