Showing posts with label parsley. Show all posts

Monday, June 8, 2015

Keeping the Green Stuff Pretty


On occasion, we get a bunch of herbs in our box.  This week was Italian parsley.  This is good for more than garnish, believe me!

But herbs wither and get ugly pretty quickly, don't they?  They do, if not optimally stored.  I've kept lots of different herbs pretty and usable for weekS.  Yes, that's plural, as in two or more.  How?  Easy.  It's a plant, it needs water.  Wash them like salad, and spin dry.  Cut off like the bottom 1/8 inch from the stems and stand them in a tall, slender glass of water.  Put an Ziplock bag over the top of the glass, leaving the bag open around the bottom, and stand it in the fridge.  See this for details.
Photo via Serious Eats
Check back in a few days, and as long as you keep water in the glass, the herbs will stay fresh. See? No throwing away withered ones!

What to do with your now long-lived parsley?  Here's three options:
Photo via Taste of Home
My favorite is buttered parsley potatoes.  Wash and halve baby potatoes (I find reds work best for this) and boil them until soft.  Drain the water and add butter to the still-hot pot with the potatoes.  Salt & pepper generously and liberally add fine-minced parsley.  Toss until the butter melts and the herbs are evenly distributed.  Leftovers are great for breakfast, seared in a hot pan.

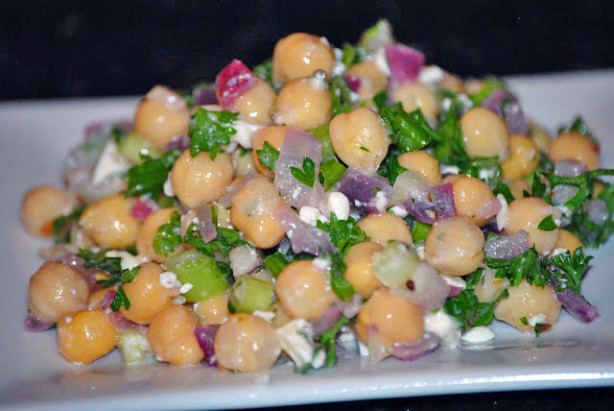
Valerie suggests this chickpea salad.  Like lots of these sorts of salads, it's better after a day or two in the fridge.
Photo via Food.com
Remember our discussion about pesto?  Parsley walnut pesto is a great topping for grilled beef or pork.

Friday, April 17, 2015

If I Can Do It, So Can You

All winter, going to the grocery store was an exercise in frustration.  I get so used to cooking with fresh herbs, I want them to cook with over the winter, too, but the prices are exorbitant.  Plus, the packages contain more than I need at the time, so I wind up tossing some in the trash when it goes bad.  Ugh!

On top of this, I'm the biggest brown thumb on the planet.  Seriously, I try every year.  I try hard.  But my little 35 square foot garden usually yields about 3 carrots, 2 tomatoes and a handful of jalepeños in a year.  Yes, I'm that bad.

But herbs are different.  Maybe they're more foolproof than veggies.  In any case, about this time I plant a bunch in pots, and I don't have to buy any for months.  One plant, that will yield all season long, costs about the same as 1 or 2 small packages at the grocery store.


Come fall, we'll talk about how to preserve herbs over the winter.

One more note.  Have you tried Trickling Springs's ice cream?  Waaaay good.  Their Strawberry is about the best I've ever had -- and when it comes to ice cream, I'm really addicted.  The seasonal flavor right now is Lemon Chiffon, and it's pretty darned incredible too.  Hurry up and get some, before I eat it all!


Monday, January 12, 2015

Past posts

As it now stands, this is the 448th article for Nall's Kitchen.  There are lots and lots and lots of goodies in our archive.  Let's take a look back at what the top 3 posts are for each of the items in this week's box.  Maybe we'll find some goodies!

Broccoli

3. Pattypan Pasta has quite a bit of broccoli, too.


1. Broccoli Blitz was a listing of top broccoli recipes.  The Spicy Chicken With Broccoli looks very promising!

Oranges

3. This year's New Years post has that wonderful Brandy Orange Cake!

2. Strawberry Rhubarb Crisp uses this week's strawberries too!

1. Pomegranate and Citrus Salad (mmm... pomegranates!)

Baking Potatoes

3. Potato Skins -- because, after all, the Superbowl will be here shortly!


Strawberries

3. Strawberry Baby Cakes would be really good about now, wouldn't they?

2. Strawberry Cheesecake Trifle sounds quite amazing too.

1.  Fresh Strawberry Cake is one of the most popular posts of all time!

Parsley

3. Baked Spaghetti Squash With Garlic & Butter in case you haven't used your spaghetti squash yet.

2. Bacheofe is a classic Alsatian dish.  Alsatian cuisine is a perfect blend of French and southern German influences.  If you've never tried Alsatian cooking, Lyon Hall in Arlington is a wonderful place to start!

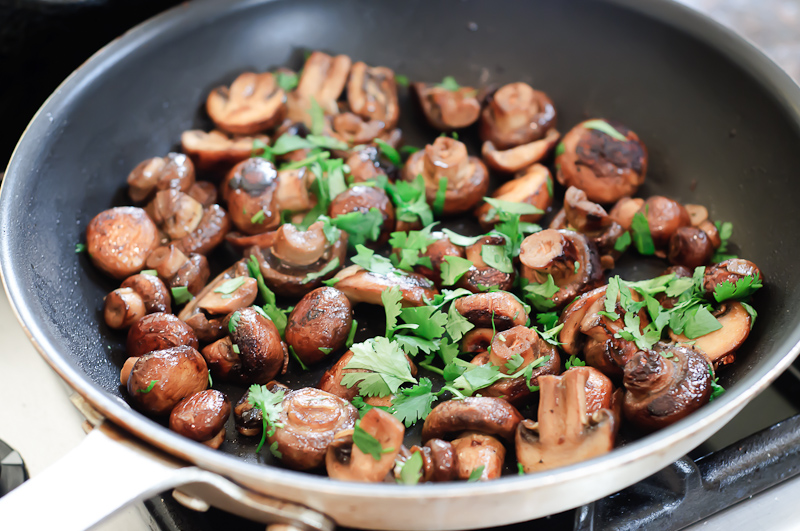
1. Mushrooms Sautéed With Sherry Vinegar  The Store has some wonderful mushrooms right now!

Monday, August 18, 2014

Guest Post: Crustless Corn Quiche

This is a guest post from KRvW.  Thank you!  We welcome crop share members to pen guest posts.  If you have something to share, please email me at burt@nallsproduce.com.  Without further adieu:

                    Crustless Corn Quiche


Here's a fun one for pulling together several summer favorites into one savory dish that is sure to please.

A long time ago, my mom shared with me an old recipe for a "crustless corn quiche". It was pretty good, but it lacked something for me. So, I decided to bump it up a notch.

For starters, it needed a bit of salty goodness from the addition of a bit of meat. Next, I felt it could use a bit of spicing to make it a bit more interesting.

After quite some experimenting, I arrived at one of my favorite summer dishes. It marries fresh summer corn with poblano peppers, onions, and one of my favorite Tex-Mex flavorings - chipotle peppers in adobo sauce. I really think the chipotles are one of the unsung heroes of the kitchen. A can of them goes for about a buck at most supermarkets, and they can last in the fridge nearly forever. Chipotles are smoked jalapeño peppers, and the adobo sauce is a great spicy sauce that packages them perfectly.

Recently, it occurred to me that most of the ingredients of this recipe are available right up the road from us at Nalls Produce. I love the addition of the cream and cheese from Trickling Springs along with the fresh organic eggs from Pennsylvania -- all available at Nalls.

Talk about a dish with all local, fresh, and natural ingredients!

Now, combine that with the fact that this entire meal can be cooked in a single pan. I like to use my trusty 12" cast iron skillet for making the dish, but you can also make it in just about any similarly sized dish. The only other dish used is a mixing bowl. 

It is easy to make and tastes fabulous. If you want to notch up your game a level or two, grill the ears of corn on your grill and use heavy cream in lieu of the half-and-half I generally use. The smokiness of the corn will be a fabulous complement to the dish, and the heavy cream is a wonderful treat for those special occasion dishes.

Enjoy! Oh, and if you make improvements to my recipe, I'd love to hear from you. I'm always open to cool new ideas.

Cheers,

Ken


Crustless Corn Quiche
Ingredients
4 ears fresh corn, cooked, husked and kernels cut off (about 3 cups) N
1 medium onion, finely chopped N
1/2 to 1 lb. bacon, chopped
1 poblano pepper, finely chopped N
2 chipotle chile pepper in adobo sauce, finely chopped
1 tablespoon Madam Pele's Heat or Emeril's Essence
1 tablespoon butter N
3 eggs N
2 cups light cream (half and half is great, or even heavy cream if you want to step it up a bit) N
1 cup flour
1 tablespoon chile powder
1 teaspoon pepper
2 tablespoons parsley, dried, or 1/4 cup fresh N
1/4 cup parmesan cheese
2 cups sharp Cheddar cheese N

Directions
1. Cook the corn. Steamed, boiled, or grilled is great. This can be done in advance. It's also a great use for leftover ears of corn after a big meal.

2. Preheat oven 375F degrees.

3. Sauté the bacon (Virginia country ham also works great here), browning it well, and then mix in the onions, poblano, and chopped chipotle. Continue to sauté on medium to medium-high, until the onions are well caramelized, about 15-20 minutes.  If the meat is lean, you may want to add a bit of butter or olive oil when adding the onions.  Otherwise, use the pan drippings from the meat. When the mix is well caramelized, set the cast iron skillet aside to cool. Add in the Madam Pele's Heat or Emeril's Essence to the mixture, if desired.

4. Meanwhile, in large mixing bowl beat eggs until fluffy, then add cream, chile powder, and flour and mix together.

5. Add the corn, salt, pepper, parsley, and 1-1/2 cups of cheddar cheese.  Mix (or even blend) well.

6. Pour the mix into the cast iron skillet with the meat/onion mix. Sprinkle the top with the rest of the cheddar cheese. Optionally put a bit of paprika in the cheese on top as well.

7. Bake at 375F degrees for about 35 - 40 minutes. Remove from oven and let rest for about 10 minutes. Cut and serve.

Wednesday, July 23, 2014

Emerald of the Herb Garden

Wow, two big bunches of parsley.  So, what to do... what to do... what to do...

First off, parsley isn't the green stuff on the side of the plate at old school restaurants.  That's curly parsley anyway.  The bunches we have are, well, a horse of a completely different color.  Italian flat leaf parsley, and it's an oft-overlooked emerald in the herb world.

Parsley is what's called a biennial plant.  That means it has a two-year lifecycle.  Over its first growing season, it stores nutrients in a taproot.  After the second growing season, the roots can be used in soups and stocks, or roasted with other root vegetables.  Mmm...  The varieties of parsley we typically get here in the US have smaller, thinner roots than Eastern European varieties, but they still taste really good.
Photo via Wikipedia

So, what to do with all this parsley?  We did talk about pesto before, and parsley makes a really good one.  Take a basic pesto recipe, and make the following substitutions:  parsley for the basil, toasted walnuts for the pine nuts, and a little grated fresh ginger for half the garlic (but go easy on the ginger).  That'll make a pesto that's great on pasta, fish and chicken.

It's called Italian flat-leaf parsley, and it's in a wide variety of Italian dishes.  Spaghetti puttanesca, for example.  There are numerous risotto dishes featuring parsley, as well.
Photo via SimplyRecipes

Parsley is a classic ingredient in American cooking, particularly in stuffing.  Yes, yes, I know, Thanksgiving stuffing has to have sage.  But this isn't Thanksgiving.  Sunday dinner is fast becoming a thing of bygone days, but hey, fight the trend.  Roast a chicken, and make some stuffing (you can get bagged roasted chestnuts at any big grocery store).  This one is a great stuffing recipe, too.  Bring back tradition!

As previously mentioned, you can stuff some of the zucchini that you have, and there's parsley in the stuffing.
Photo via Fareham Wine Cellar Blog

Finally, I'd like to tell you about a recent culinary interest of mine.  I discovered a Bolivian restaurant, and a prominent feature of their cuisine is chimichurri sauce for their steaks and chicken.  Parsley is the main ingredient, and the bright vinegary sauce shows just how not boring the parsley is.  I've been trying to replicate their chimichurri, and can never quite get it.  There are some recipes out there that get pretty close, though, and they're delicious.  Try this one, this one, or this one.

In looking at my recipe database, of the 1100+ recipes I have, more than 20% list parsley as an ingredient.  Many of those use it just as some color sprinkled on top, but a lot of them use it as an integral flavor in its own right.  Yep, parsley is more than just color.

Friday, July 11, 2014

Yet Another Ethnic Tongue-Twister Dish

I guess I have a penchant for cooking things that are difficult to pronounce.  Green beans are becoming quite abundant, and tomatoes are starting to come in.  What’s that mean?

Fasolakia!!

Go ahead, spend a minute trying to figure out how to pronounce it.  I’ll wait.  Meanwhile, I'm going to dig deep into the nightmares of pledge semester and see if I can write that with the Greek alphabet.  Hmm... Φασολακια  Is that right?

It’s Greek stewed green beans.  No crispy onion straws involved.  Yay.  Unfortunately no bacon either.  Boo.  This is the sort of dish that it’s easy to get going, then leave on the stove for forever to cook.  Without further delay…

Ingredients
1 1/2 to 2 lbs. green beans, ends snapped off, washed
1 medium onion, quartered and thinly sliced
1/2 cup olive oil
2 cups diced fresh tomatoes
1 cup water
1/2 cup finely chopped fresh parsley, oregano, or a combination thereof
2 tbsp fresh lemon juice, more to taste
Salt & pepper

Directions

Gently heat olive oil over medium flame (not to smoking).  Add onion and cook 3 to 4 minutes until translucent.


Add green beans, tomatoes, water, and herbs.  Let simmer over low heat at least 30 minutes, but it’s okay to leave it a lot longer than that.  (I’ve had no problem with it cooking for 2 hours.)  Stir occasionally.


Remove the lid and bring flame to medium, let reduce 10 minutes.  You still want the beans in liquid, but it shouldn’t look like soup.  Season with lemon juice, salt and pepper to taste.


That’s a pretty easy one, but the flavors are amazing.  I like making this when I’ve got a number of other things to cook, and I can just let it go while I’m busy elsewhere.

Any other ethnic dishes out there you can share with me?

Wednesday, April 23, 2014

Radishes In Herb Butter

Other than raw in a salad or in this delicious Radish Dip, I've never actually cooked with radishes.  So for Easter Sunday, I figured why not turn it into a quick and simple side dish.  I'd bought a bundle of parsley earlier in the week, and frankly I couldn't remember what I planned to use it for, so it became destined to join the radishes, and thus this recipe was born.  The bitterness of the radish and parsley is the perfect accompaniment to anything with very rich flavors (like that Gratin of Leeks).


Radishes In Herb Butter


Ingredients:
1 Tbsp butter
1 bundle radishes, both ends trimmed and sliced thin
1 bundle parsley, chopped
Salt & pepper to taste

In a skillet, melt butter over medium high heat.  Add in radishes and saute for about 3-5 minutes or until the middles are translucent.  Toss in chopped parsley and season with salt & pepper and cook for an additional minute.  Remove from heat and serve.


Thursday, March 13, 2014

Salmon With Vegetables In Herb Butter Sauce

In Dublin's fair city, Molly Malone may have wheeled about her cart of cockles and mussels (alive, alive, oh!), but she might as well have been wheeling about fillets of salmon for as much as the Irish consume of this meaty, delightful fish.  That's one of the benefits of being an island, all the seafood, all the time!  And while most of us think of fish & chips when it comes to Irish seafood, that's like portraying all American cuisine as just McDonald's.  Those folks know their fishies, and how to best prepare them, and one of my all time favorite recipes comes from Margaret M. Johnson's cookbook The New Irish Table.  In a bit of a twist on a surf & turf, she tops some wine and butter poached salmon with veggies from the land and the sea. I'll spare you having to hunt down dried sea vegetables, and just stick with lovely land based ones.  But this is one dish that is sure to be a winner, winner, St. Patrick's Day dinner!


Salmon With Vegetables In Herb Butter Sauce


Ingredients
2 Tbsp dry white wine
1/2 cup fish stock or bottled clam juice
Juice of 1/2 lemon
1 bay leaf
2 carrots, chopped
1/2 red onion, chopped
1 small zucchini, chopped
4 cherry tomatoes, halved
1 cup spinach, coarse chopped
4 salmon fillets, about 5-6 ounces a piece
1/2 cup (1 stick) unsalted butter
1 Tbsp parsley, minced
1 Tbsp chives, minced
1/2 tsp fennel seeds
Kosher salt and ground black pepper, to taste


In a large saute pan, heat the white wine over medium heat until reduced by half.  Add in the fish stock/clam juice, lemon juice, bay leaf, and all the vegetables from the carrots thru the spinach.  Place the salmon on top of the vegetables, cover the pan and cook for 4 to 5 minutes or until the vegetables are tender and the salmon is cooked thru.  Transfer the salmon to a plate to keep warm, and into the pan add your butter and stir till well blended.  Then stir in your herbs, salt & pepper, and cook for an additional 30 seconds.

Serve each piece of salmon with a generous spoonful of the vegetables and butter sauce.


Thursday, January 16, 2014

Bacheofe - Alsatian Meat & Vegetable Stew via Saveur

You hear a lot about my Irishness and love for all things potato, but that's only half of my DNA.  Another quarter is French...French Huguenot, to be exact.  So, since my Huguenot ancestors spent a good portion of their lives in the Rhine region of Germany as a means to escape persecution in France, it must be coded somewhere in my genetic tastebuds to love dishes from the Alsace region of France, because their cuisine is an incredible blend of French & German flavors.  So no dainty, delicate sauces over something poached.  No, this is good stick to your ribs food, and like all good traditional cuisines, it's comprised of what's local, seasonal and on the cheap.

Hands down one of my favorite Alsatian dishes is Bacheofe/Baeckoffe, and all you need to know is it's a giant casserole of warmth.  While I was musing over what fun thing to suggest for the Crop Share carrots this week, Saveur did the work for me and posted their recipe for Bacheofe.  Which reminded me I also had tucked away Alsatian chef, Hubert Keller's recipe for his family's version.  So I leave you with links to both versions, but do read the notes at the bottom of Keller's as there's really nothing quite like the phrase, "pig trotters add a gelatinous consistency."  Not sure if that's a good or bad thing, but I'm pretty sure Penny would have something to say about that.  Thankfully, pig trotters are entirely optional for this dish!  So use up those carrots from this week, and if you still have any leeks and potatoes leftover from last week, this will use those right up too.  The recipes are hyperlinked in each title, so click through to view them on their original pages.  But if a massive hearty stew of heavy meat & veg isn't the way you want to use your carrots this week, then enjoy another taste of my DNA (well not literally, as we do frown on cannibalism here at Nalls) with my Grammy Freer's Chicken In A Wine Sauce.  Remember two cups of white wine for the dish, and 3 cups for the chef.  ;)

Bacheofe - Alsatian Meat & Vegetable Stew via Saveur


Beef Lamb & Pork Baeckeoffe via Hubert Keller

There's no image of his version of Baeckeoffe, so I give you this photo of the silver fox himself, shaving with a kitchen knife.  I only have a slight food crush on this man.


Wednesday, November 13, 2013

Quinoa Tabbouleh

When your best friend is Lebanese and her mom owns her own restaurant, that can only mean one thing...you wind up with hummus running through your veins.  I cannot tell you the number of times I made the mistake of eating something before going to their house.  Big, big mistake!  Because you're almost always greeted with a giant plate of delights, and whether you came on an empty stomach or not, you will leave nearly unable to stand up straight from being so full.  So I've been trained to consume NFL linebacker portions of hummus, pita, tabbouleh, kibbe, fattoush, mujadara and shawarma.  Not to mention obscene quantities of garlic sauce that I will continue to sweat out for about 48 hrs (oh yes, I keep it classy!).  So when I had to give up gluten, there went pita, kibbe, fattoush, and tabbouleh, 4 of my favorite things on earth, right out the window.  Waaaaaaa!!!!  But, like the angle she is, Mrs. Rajeh started making gluten-free kibbe and tabbouleh at her restaurant, using quinoa as the base for both.  Happy days were here again!  So the last time my friend Nawal stayed with us, she arrived with a big container of me-safe tabbouleh from her mom's restaurant, which I promptly ate in one sitting.  Whether you enjoy this recipe gluten free with quinoa, or go the traditional route with bulgur/cracked wheat, it will undoubtedly have you singing....The Tabbouleh Song.  DC based comedian, Remy, put this together a few years ago and ever since I've been shake, shaking my booty every time I eat tabbouleh.  Because, as Remy says, you've got to push, push, push the tush, when you eat an Arab salad that's not fattoush!  Enjoy this taste of Samia's Phoenician Grill (well as close as it gets since, as a true cook, Mrs. Rajeh never measures or writes anything down).

Quinoa Tabbouleh


Ingredients:
1/2 cup quinoa (or bulgur for traditional, non-gluten free version), cooked to package directions
1 bundle fresh parsley, finely chopped
2 Tbsp (heaping) fresh mint, finely chopped
3 green onions, ends trimmed and finely diced
2 tomatoes, seeded and diced
1 tsp garlic, minced
Juice of 2 lemons
1/4 olive oil
Kosher or sea salt

Cook quinoa according to package directions, then set aside to cool completely.

In a bowl, mix together parsley, mint, onions, tomatoes and garlic.  Fold in cooled quinoa and stir to fully combine.

In a separate bowl whisk together lemon juice and olive oil.  Pour dressing over the tabbouleh and season with a pinch of two of coarse ground salt.

Cover and refrigerate for at least 30 minutes to allow flavors to meld together, and then taste and adjust any seasoning as needed.


Serve with Homemade Chicken Shawarma or Kale, Sweet Potato & Lamb Polenta Pizza, basically anything with super bold flavor that needs a good refreshing palate cleanser to go with it.


Tuesday, November 5, 2013

Oh Honey, Let's Be Rad...ish!

If you haven't figured this out yet, I'm incapable of talking about radishes without making a pun.  It will keep happening, so just smile and nod.

Anywho, last evening I finally got around to using up my radishes from two weeks ago (thank you cooler season produce for lasting so much longer and suiting my procrastination tendencies), and was able to finally make this Radish Dip that Crop Share member Missie Welch had shared with us.  She was oh so right with how delicious it is.  We baked up some Beet Chips to go with it, but this would make a fantastic veggie dip.  So for holiday parties, if you're tasked with bringing the veggie tray, whip up a quick batch of this dip and tell the french onion dip to take the night off and keep off your hips!  It has an almost hummus like consistency so it's a great, healthy alternative for a chip dip, too.

We used the juice of 1 lemon and a full 8 oz of cream cheese (we use Tofutti Better Than Cream Cheese to keep it dairy, free but you can use any reduced fat variety to keep the calories down).  Plus at one point I went to add a dash of pepper and opened the pour and not the sprinkle side, so I spent a good 5 minutes scooping what was about 1/4 cup of ground black pepper out of my blender.  *sigh*


Radish Dip via Missie Welch


Acorn & Butternut Squash Soup by Crop Share Member Brandi Collins

Several weeks ago, Crop Share member Brandi Collins posted on our Facebook page about this Acorn & Butternut Squash soup she had made.  I knew right away, we had to have that recipe and I had to share it with you all.  So here it is, from Brandi's kitchen to yours, a Fall squashtacular soup that is just what the Daylight Savings Time sleepies need.  Plus, if you've been perplexed by the Buttercup squash from this past week, you can easily substitute that in for either the acorn or butternut in this recipe, and use up some of your Amish candy onions in place of a regular sweet onion!


Acorn & Butternut Squash Soup

INGREDIENTS:
1 butternut squash, halved and seeded
1 acorn squash, halved and seeded
3 tablespoons butter
1/2 chopped sweet onion
1 quart chicken broth
1 tablespoon minced garlic
1 (8 ounce) package cream cheese, softened
1/2 teaspoon ground black pepper
Salt to taste
fresh parsley, for garnish


DIRECTIONS:

1.
Preheat oven to 350 degrees F (175 degrees C). Place the squash halves cut side down in a baking dish. Bake 45 minutes, or until tender. Remove from heat, and cool slightly. Scoop the pulp from the skins. Discard skins.
2.
Melt the butter in a skillet over medium heat, and saute the onion and garlic until tender.
3.
In a blender or food processor, blend the squash pulp, onion, broth, cream cheese, pepper, and salt until smooth. This may be done in several batches.  This may also be done in the pan with an immersion blender.
4.
Transfer the soup to a pot over medium heat, and cook, stirring occasionally, until heated through. Garnish with parsley, and serve warm.

Thursday, October 17, 2013

Sausage & Pumpkin Pasta

Don't get too excited, there won't be any pie pumpkins in this week's Crop Share, but I suspect some of you still have your pie pumpkin sitting around just begging to be turned into something yummy.  Either that any of the hard squash you've received, like the butternut, acorn or this week's carnival squash can be used in place of pumpkin.  Just follow the same basic steps for making your own pumpkin puree whether you're using any type of pumpkin or hard squash (just not spaghetti squash, too sinewy).  But this dish is our absolute Fall go-to meal!  Not only is it quick and easy, but holy mother of pearl it is goooooooooood!  Kind of makes me want to hoard pumpkin puree so that I can make this dish in August, because every time I make it I wonder why I haven't been making this every single week.  So if you enjoy all things pumpkin, prepare to fall in love with this pasta!

Sausage & Pumpkin Pasta


Ingredients:

1 box pasta (farfalle or rotini work best, and I use Bio Naturae gluten free rotini)
6 links hot Italian-style turkey sausage (casing removed and crumbled)
1 Tbsp olive oil
1 medium sweet onion, chopped
1 Tbsp garlic, minced
1 cup low-sodium chicken broth
1 cup dry white wine
1 cup pumpkin puree, or puree of other like hard squash (make your own!)
1 1/4 tsp dried, rubbed sage
1/2 tsp garlic powder
1/2 tsp Kosher salt
1/2 tsp fresh ground black pepper
1 Tbsp fresh parsley, chopped

Cook pasta to package directions.

In a skillet, heat olive oil over medium high heat.  Add in crumbled sausage and onion.  Once sausage begins to brown add in garlic.  Once sausage is cooked through and browned on the outsides, deglaze pan with chicken broth and wine.  Bring liquid to a light simmer and stir in pumpkin, sage, garlic powder, salt and pepper.  Cook for an additional minute or two, just enough to thoroughly heat the pumpkin.  Remove from  heat and stir in parsley.  Toss with pasta to serve.


Thursday, October 10, 2013

Baked Spaghetti Squash with Garlic & Butter

Let's just say spaghetti squash and I have an unfortunate history.  You see, my senior year in college I was taking this ghastly Flight class taught by a former NASA physicist (I was a political science kid, and as we can all plainly see from current events, those who focus on politics decidedly do NOT excel in maths and sciences), and on my lab days my roommate knew to have a cocktail ready for me when I walked into the apartment.  Yes, the class was really that bad, especially when you never actually took a physics class in your life.  So on this one occasion she greeted me with a rather interesting "cocktail" of Crystal Lite and vodka, and not just any vodka, but that Vladimir vodka that comes in the giant plastic jugs and is probably just straight kerosene or distilled windshield washer fluid. *shudder*  Then to top it all off, she'd made dinner, and it was spaghetti squash with marinara.  Oooo, I'd never had spaghetti squash before but as a vegetarian at the time I was excited for this new veggie to enter my life.  Well, I'm not rightly sure what she did to the squash, because I saw a baking sheet and yet I also saw a pot of water on the stove that looked like it had recently boiled up something.  But what was hiding under the marinara was a gelatinous glob of goo, so methinks it got boiled like pasta.  Eek!  Two sips of the cocktail and maybe 3 bites of the squash travesty and it was coming back up to greet me.  So needless to say, dinner was over and I avoided spaghetti squash for years.

But fear not, when done right, it is amazing!  One of the most common and tastiest preparations is to slice the squash in half lengthwise, and then pour olive oil or melted butter on each half and season with a generous amount of brown sugar and cinnamon, before baking till golden brown.  But if you're looking for something a little less sweet and a little more savory, or even something that can serve as the base for an entree, then doing a simple garlic and butter preparation is the way to go.  This would be great tossed with some sauteed chicken to turn it into a full meal, or simply use it as an alternative to a pasta side dish.

Baked Spaghetti Squash with Garlic & Butter


Ingredients:

1 spaghetti squash
2 Tbsp butter (or Earth Balance margarine for dairy-free)
2 cloves garlic, minced
1/4 cup parsley or basil, minced
Kosher salt and ground black pepper, to taste
Dash of red pepper flakes
1/4 cup Parmesan cheese, shredded (or Go Veggie! vegan parm for dairy-free)

Preheat oven to 375 degrees.

Pierce the squash a few times to allow for ventilation, and then place whole on a baking sheet and bake for 1 hour, or until a paring knife can easily be inserted.  Set aside and allow to cool for at least 10 minutes.

Once squash is cooled, cut in half lengthwise and scoop out the seed portion.  Then using a fork, scrape out the flesh so you have stringy "noodles".  If it's hard to scrape, place back into the oven and bake for an additional 10 minutes or more until the squash will easily shred with a fork.  Set shredded squash aside and discard skin.

In a skillet, heat butter over medium high heat.  Add in garlic and saute for 1-2 minutes.  Toss in shredded squash, parsley and seasonings, and toss to evenly coat.  After about a minute, add in your parm and toss to fully incorporate.  Cook for an additional minute and then remove from heat to serve.


Friday, September 27, 2013

Can't Wait To Try!

With tomorrow's opening of our Pumpkin Tunnel we had a late, after-hours staff meeting, which means I fell asleep while writing the previous post.  So if things cease to make sense, that's why.  To keep things short and sweet and get sleepy self to bed, here are two recipes I'm dying to give a try this coming week!  Yum and zzzzzzzzzzzzzzzzzzzzzzzzzzzzz...

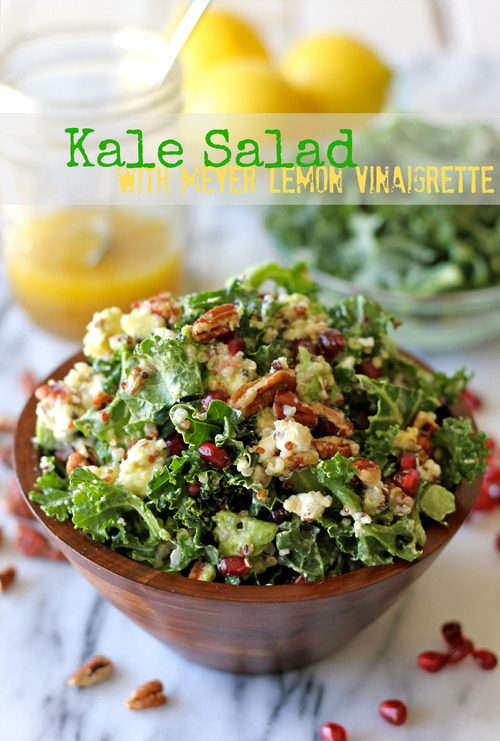
Kale Salad with Meyer Lemon Vinaigrette via Damn Delicious


Kale, avocado, goat cheese, quinoa and pecans?!  It's like all my loves in one bowl!


Mushroom Stroganoff via Skinnytaste


Love stroganoff.  Love mushrooms.  This recipe cannot disappoint!  Prepare to be made dairy & gluten free you crazy Skinny Mushroom Stroganoff you!


Tuesday, September 24, 2013

Stuffed Cubanelle Peppers

With the Autumn chill in the air over the weekend, there was just one thing, but one thing to do with those Cubanelle peppers from last week's share...stuff them.  My Mama's stuffed peppers are one of my all-time favorite comfort foods, which is odd because until  I was in high school I hated the taste of the cooked pepper, so she always made some sans pepper so I could have a meatball and sauce.  Which means today I'm completely incapable of making a small batch of stuffed peppers without having also enough meatballs to feed about 3-4 other people.  Come to my apartment, I'll be like the old lady from the Wedding Singer just doling out meatballs into your hands!  And since Cubanelle's are much smaller than bell peppers, that means less filling and thus...more meatballs.  So if you follow this recipe to the letter, you will have PLENTY of meatballs and sauce left over for spaghetti and meatballs or for some great game day meatball subs.  And with the way the Skins have been playing...all you fans are going to need some hearty comfort food.  Oh snap!  ;)


Stuffed Cubanelle Peppers


Ingredients:
7 Cubanelle peppers, washed, tops and seeds removed
1 Tbsp olive oil
1/2 cup red wine (I used a Malbec & Cabernet red blend)

For stuffing/meatballs:
1 lb hot turkey sausage
1 lb ground turkey
1 cup dry bread crumbs (for gluten-free I used Glutino breadcrumbs which are also dairy-free!)
2 tsp garlic powder
2 tsp parsley (if you still have fresh or frozen herbs, I recommend using those for the herbs in this recipe)
1 Tbsp oregano
1 Tbsp basil
1/2 tsp Kosher salt
1 tsp minced garlic
1/2 tsp black pepper
1/4 cup applesauce (I used the last of my Homemade Applesauce)

For sauce:
60 oz tomato sauce (I use Nature's Promise Organic from Giant)
12 oz tomato paste (also Nature's Promise Organic)
2 tsp garlic powder
2 tsp parsley
1 Tbsp oregano
1 Tbsp basil
1/8 tsp red pepper flakes
1 tsp sugar

Preheat oven to 400 degrees.

In a sauce pot, mix all ingredients for sauce until fully blended, and bring to a simmer.  Depending on the tomato sauce and paste base that you use, you may wish to use more or less sugar depending on how acidic and bitter it tastes.  Cover pot to prevent sauce spurting everywhere, and simmer on low heat.

In a large bowl, mix together all ingredients for the meatball mixture until all ingredients are completely combined.  The applesauce in this recipe is used in place of an egg for binding, so if you don't have applesauce on hand you can always use 1 egg.

Stuff each Cubanelle with meat mixture until coming out the end and a bit mounded.  Place into a baking dish and repeat with all peppers, making sure to form a single layer of stuffed peppers.  Pour some of the sauce over top until all the peppers are covered, and then place dish into the oven to bake at 400 degrees for about 50 minutes.

Meanwhile, turn the rest of the meat mixture into meatballs that are no bigger than the palm of your hand.  I was able to get 8 additional meatballs out of my reserve mixture.

In a skillet, heat olive oil over high heat.  One oil is hot, begin to add meatballs to skillet, making sure not to overcrowd  your pan.  Brown all meatballs on all sides to form a bit of a crust, and then transfer them to the sauce pot to finish cooking in the remaining sauce.  Stir in red wine to sauce and simmer meatballs in sauce for at least 30 minutes on medium-low heat, until meatballs are fully cooked.

To reserve for future use, I like to freeze the meatballs right in the sauce in a freezer-safe container, that way they are ready to thaw and heat to spoon over spaghetti or to use for meatball subs.  Even just the meatballs and sauce make a great dinner.  Serve with a big salad to help offset the heaviness.


Thursday, August 15, 2013

Celebrating 101 Years of Julia Child with Tomates a la Provencale

August 15th may be one of my most favorite days on the calendar, because 101 years ago, on this very day, a little girl was born who was destined to change the face of food as we knew it.  Not just food in America, but perceptions of food across the globe.  That little girl who was never actually all that little, was none other than Julia Child.


Whether you're a Julia nerd like me, we all share in a piece of what she was all about by participating in the Crop Share program, and as Julia herself said, "You learn to cook so that you don't have to be a slave to recipes.  You get what's in season and you know what to do with it."  And that's why we're all here, eating, cooking and learning about all this wonderful seasonal produce so that we're not slaves to recipes or supermarket shelves, we can create our own magic with the bounty that the earth gives up each season.  So as we all raise our rolling pins and save the chicken liver in honor of what would have been Miss Julia's 101st birthday, here is her classic recipe for Tomates a la Provencale and then my quick gluten and dairy-free riff on it.  Bon Appetit!


Julia Child's Tomates a la Provencale


Ingredients:
6 firm, ripe, red tomatoes about 3 inches in diameter
Salt and pepper
1 to 2 cloves mashed garlic
3 Tbsp minced shallots or green onions
4 Tbsp minced fresh basil and parsley, or parsley only
1/8 tsp thyme
1/4 tsp salt
Big pinch of pepper
1/4 cup olive oil
1/2 cup fine, white, dry bread crumbs
A shallow, oiled roasting pan just large enough to hold the tomatoes easily in one layer

Preheat oven to 400 degrees.

Remove the stems, and cut the tomatoes in half crosswise.  Gently press out the juice and seeds.  Sprinkle the halves lightly with salt and pepper.

Blend all remaining ingredients in a mixing bowl.  Correct seasoning.  Fill each tomato half with a spoon full or two of the mixture.  Sprinkle a few drops of olive oil.  Arrange the tomatoes in the roasting pan; do not crowd them.

Place in upper third of oven and bake for 10 to 15 minutes, or until the tomatoes are tender but hold their shape, and the bread crumb filling has browned lightly.


Quinoa Stuffed Tomatoes


Ingredients:
2-4 large, red tomatoes, tops sliced off and diced, insides scooped out and seeded
8 oz Tofutti Better Than Cream Cheese (or real dairy cream cheese)
2 tsp garlic, minced
1 Tbsp fresh tarragon, minced
1 Tbsp fresh basil, minced
1 cup quinoa, cooked to package directions
Salt & pepper
Olive oil


Preheat oven to 400 degrees.

In a mixing bowl, combine cream cheese through quinoa.  Mix well to incorporate.  Stir in diced tops of tomatoes, and then season mixture to taste with salt and pepper and hit it with a quick splash of olive oil.  Stuff each tomato till full with the quinoa mixture and place into a baking dish.  Drizzle tops with a smidge of olive oil and then bake in oven at 400 degrees for 10 to 15 minutes or until tops are slightly browned and skin on the tomatoes has blistered a bit.

Thursday, August 1, 2013

Cucumber Cool & Minty Fresh

With the combo of mint and cucumber in this week's Crop Share, it'll be a passport to cool and refreshing.  If you need a bit of a detox, slice up some cucumber, lemon and toss it in a pitcher of ice water with a bundle of mint leaves.  Allow it to set up for a bit in the fridge and then enjoy your 8 glasses of water a day with an added detox boost.

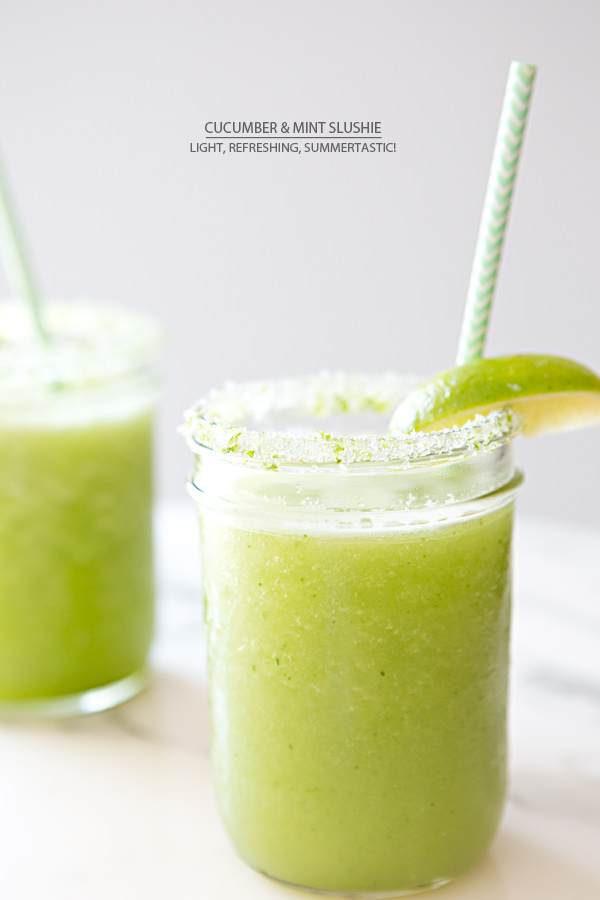
But if you're looking for something a tad more substantial, try these two delicious looking recipes from Eating In Instead and A House In The Hills.  Both call for honey, so grab some local honey in store to help battle allergies while you nosh away!


Cool Cucumber Mint Salad via Eating In Instead


 Cucumber & Mint Slushie via A House In The Hills


Wednesday, June 12, 2013

Guest Post from Across the Pond: Pattesons Glass' Pork Rillettes

Apparently my foodie vibes must have been reaching across the miles, because as I spent my weekend musing over this blog becoming a collection of voices, I returned to work on Monday to find an e-mail from Pattesons Glass Ltd, a glass bottle and jar company in Grimsby, England.  They've enjoyed reading our blog, and wanted to offer up one of their recipes to share with our members.  While their Pork Rillettes recipe isn't exactly Spring produce heavy, it's the perfect way to put your garden herbs to good use in a bouquet garni as the base for this dish.  Still have lots of parsley leftover from last week or have you been drying your Crop Share herbs?  Then now is their time to shine.  Just whatever you do, don't tell Penny Pig we've got a pork recipe up on the blog, she might start to wonder why I feed her so many strawberries!

So from some fellow foodies across the pond, I give you their recipe for traditional French rillettes (if you need help with the metric conversions, hop on over to http://www.metric-conversions.org/ to compute it quickly and easily)...

Pork Rillettes


Like all charcuterie, rillettes (pronounced ree-yettes) were originally a way of preserving the cornucopia of fatty goodness yielded by the slaughter of a pig. Stored in earthenware crocks or in glass jars and sealed with a lid of pork fat, they would keep for months. This recipe is much lower in fat and consequently has a little less staying power, but the rillettes will keep well in the fridge for at least a week, and will benefit from a few days’ maturation before you break open the jar.

1.25kg pork belly or shoulder, skin removed but bones left in, cut into chunks
4 cloves garlic, peeled and lightly crushed
1 bouquet garni
3 bay leaves
6 cloves
50ml vermouth
500ml water
1tsp ground mace
Salt and pepper

Place the pork, garlic, bouquet garni, bay leaves, vermouth and water in an ovenproof, lidded dish. Cook at about 100°C for four hours, turning the meat a few times so it doesn’t become too brown, until it falls away from the bones. Remove from the pan and allow to cool slightly. Discard the bay leaves, cloves, bouquet garni, bones and any obvious pieces of cartilage. Drain the pork and place the liquid in a small bowl over ice or in the fridge to chill.

Using two forks, gently shred the meat, allowing it to retain its natural grain. Remove the reserved liquid from the fridge and carefully lift off the solidified fat. Mix the jellied stock that remains with the pork, season to taste with mace, salt and pepper and place in a sterilised 580ml clip-top jar.

Melt the reserved pork fat and pour over the rillettes before sealing the jar and refrigerating until needed.

Rillettes are delicious served cold or at room temperature as a starter, the centrepiece of a light lunch or for a picnic. All that’s needed to accompany the rillettes are some slices of warm baguette, a few cherry tomatoes and some cornichons or pickled onions.


View the original recipe on Pattesons Glass' recipe blog at http://www.jarsandbottles-store.co.uk/blog/recipes/pork-rillettes/ and be sure to check out some of their other great recipes, like their divine looking Salsa Verde!

Thanks very much to Pattesons Glass to reaching out to us with their recipe, it's great to have you at our communal table!


Thursday, June 6, 2013

Radish Dip: Guest Post From Crop Share Member Misse Welch

This week's Crop Share is going to be RAD!  Why?  Because you're getting a bundle of RADishes!  If you're a radish skeptic, fear not, because do I have a recipe for you.  Or more like Crop Share member Misse Welch has a recipe for you.  During the Early Spring round, Misse sent us this recipe as an entry into our Nalls Next Top Food Blogger Contest, and we've been drooling over it ever since and waiting for another go-round of radishes so we could share this great recipe with you all.  So from Misse's kitchen to yours, we give you delicious way to prepare radishes.  Because we all know, cream cheese makes every thing amazing!


Radish Dip

Ingredients:
5 oz cream cheese
1 cup radishes, quartered
1-1 1/2 Tbsp fresh lemon juice
1 bunch chives, chopped
1/2 cup fresh parsley, chopped
2 cloves garlic
Sea salt
Black pepper
Paprika

I threw the radishes, chives, garlic and parsley in my food processor until finely chopped, and then added the lemon juice and cream cheese (cubed to make it easier).  Once it was combines to the consistency of a dip, I added sea salt and pepper to taste and put it in a serving dish.  I sprinkled it with paprika and it was ready to eat, more like devour!  It can be eaten with veggies, potato chips, or I even used it as a sandwich spread!

Adapted from Farmgirl Fare (http://www.farmgirlfare.com/2009/08/advice-for-new-vegetable-gardeners-what.html)